OpenPOS Compatibility
Woocommerce Multi Locations Inventory Management is compatible with Openpos – WooCommerce Point Of Sale(POS).
-
To use WCMLIM with OpenPOS, activate the relevant settings.
To activate OpenPOS compatibility, navigate to Multilocation > Settings > General and mark the checkbox labeled “OpenPOS Compatibility“, as shown in the image below.
 Enable above setting
Once an outlet has been established, you may assign it to a location by going to Locations. If a POS order is placed from an outlet that has been assigned to the location, the inventory stock will decrease accordingly.
(Please refer to the POS-1, POS-2, POS-3, and POS-4 images with the procedure)
Step 1:-After installing the POS plugin, activate the relevant setting in our plugin.
Step 2:-Access the POS plugin and generate an outlet. Consult the POS-1 Image for further guidance.
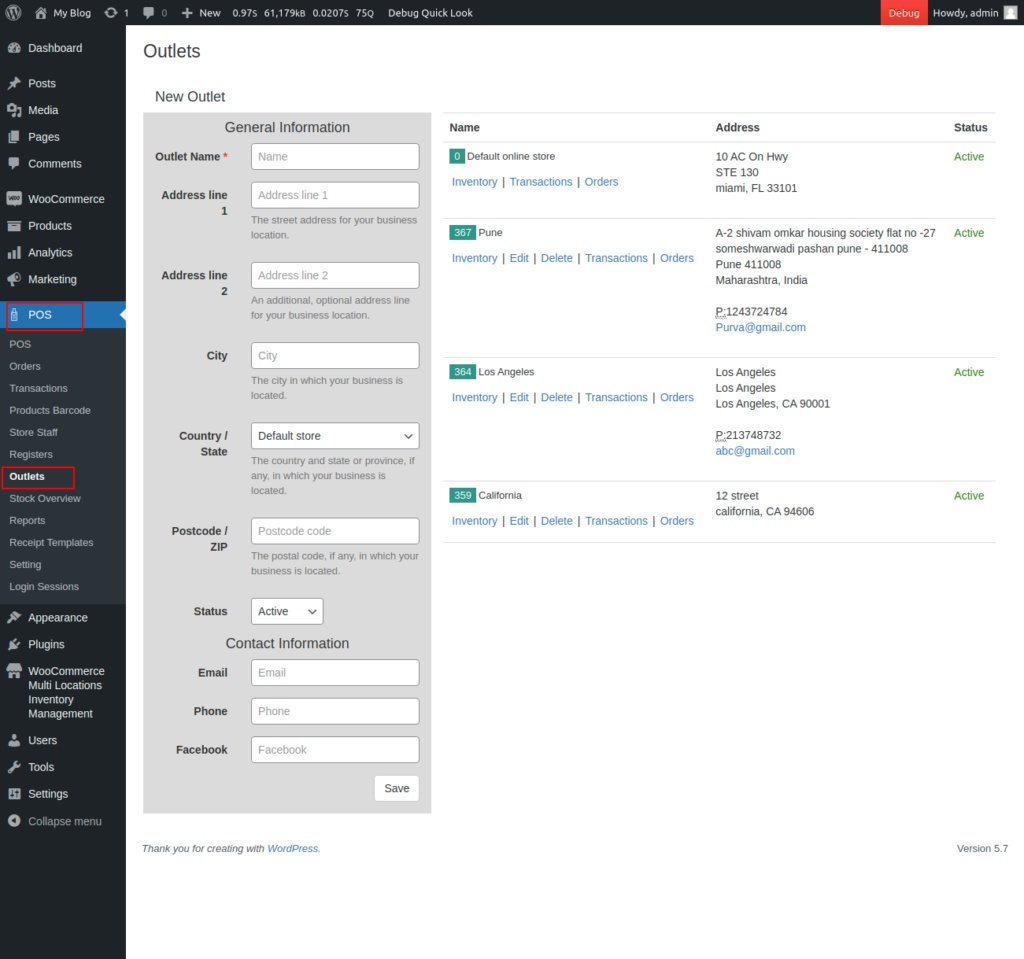
Image POS-1
Step 3:-Proceed to the register option and register the outlet accordingly.
Please Refer to the POS-2 image.

Image POS-2
Step 4:- Navigate to the multi-inventory plugin and access the warehouse section. Establish a warehouse and allocate a POS outlet.
Please refer to POS-3 Image

Image POS-3
Step 5:- Next, proceed to the product edit section where you will see the POS location and multi-warehouse location. You are required to input the stock in both sections. The stock inventory will automatically be decreased when any order-related activity is performed by the admin