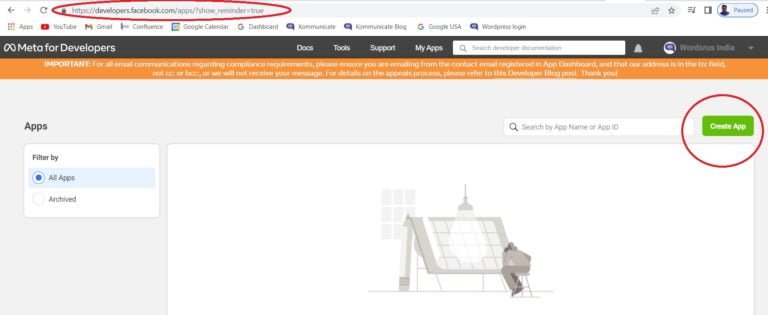
Step1: Log in to the Facebook developer account.
The first step to setting up the WhatsApp cloud API. For login use Facebook credentials. visit following link:
https://developers.facebook.com/
After login you will then get an option to “create App”.
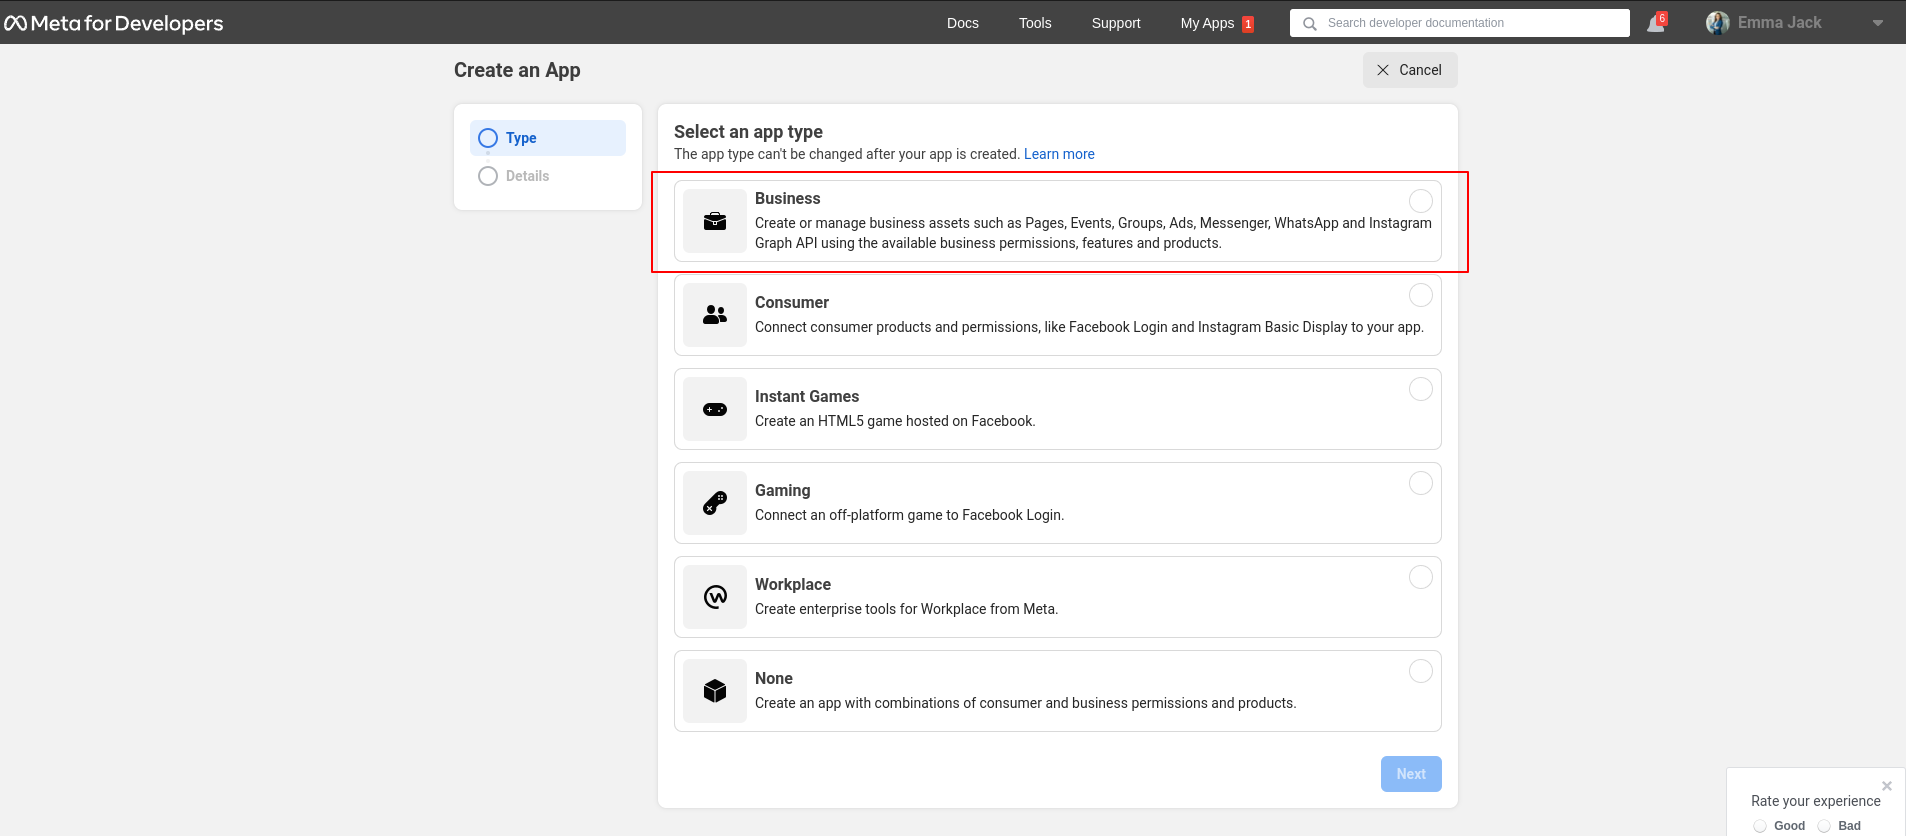
Step2: Select the app type
In the next step, select “Business” as your app type.
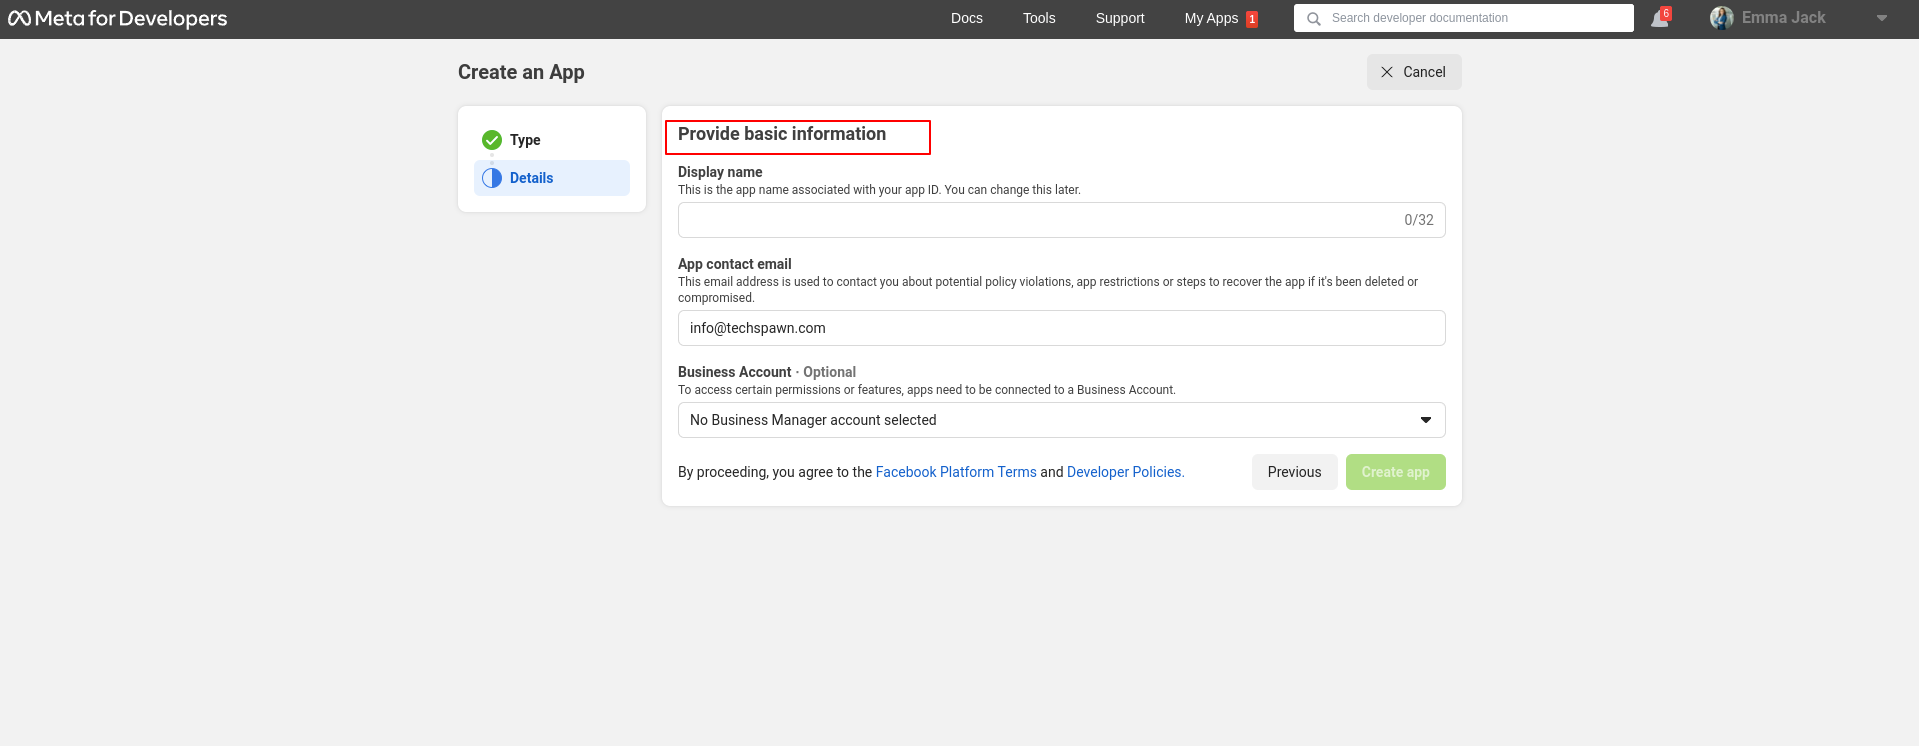
Step3: Provide Basic Information
In this next step, you will have to provide basic information about your business.
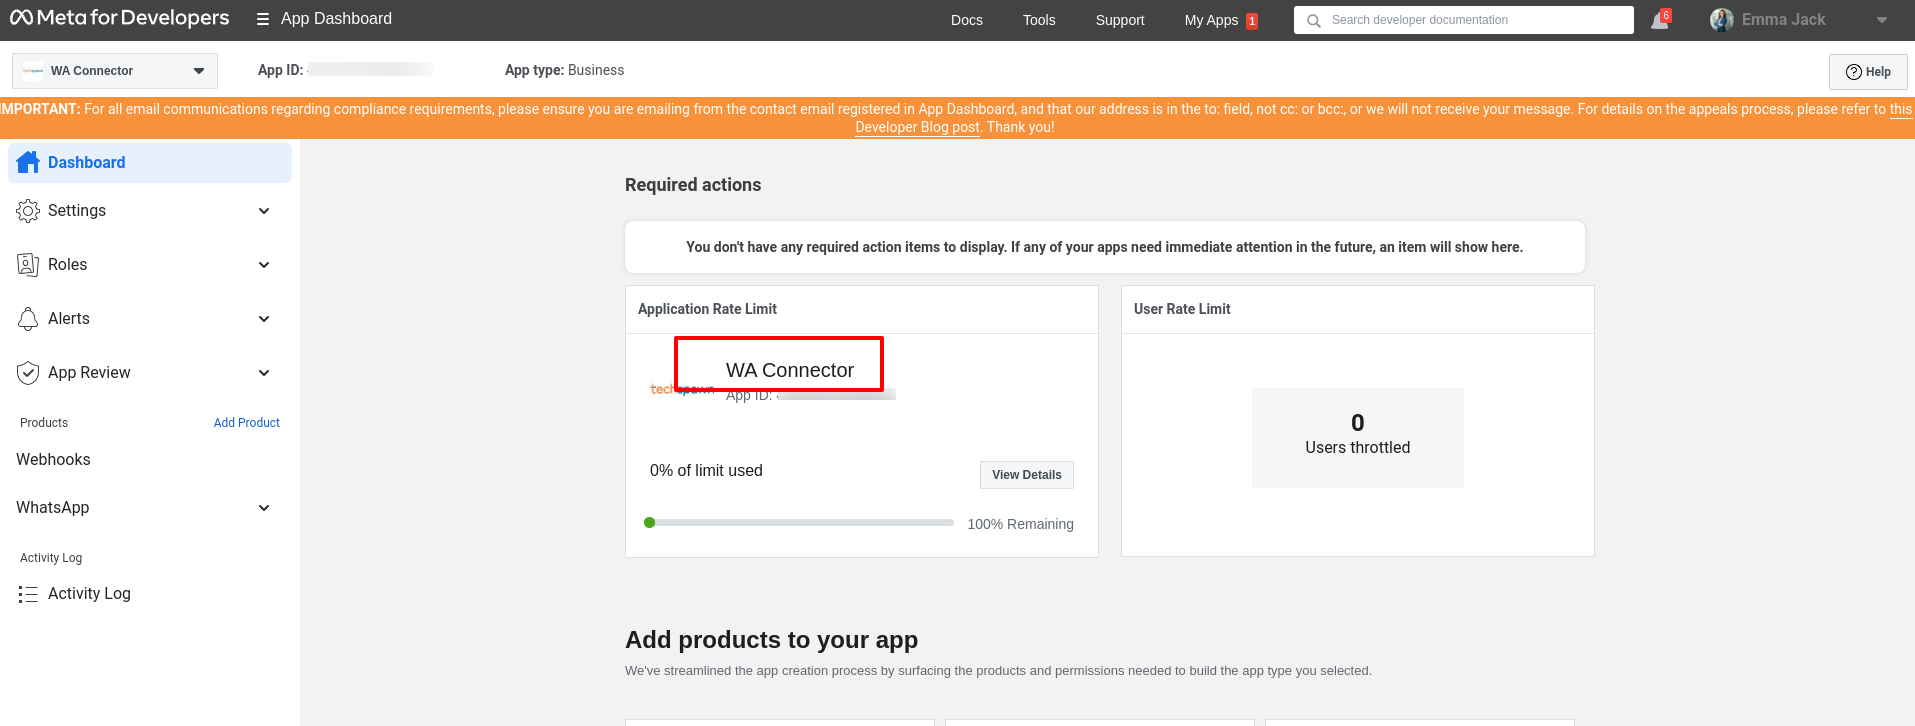
Step 4: Set up WhatsApp from the Dashboard
You would now have successfully logged into your Meta dashboard. From here, scroll down to the WhatsApp section and click “Set up.”
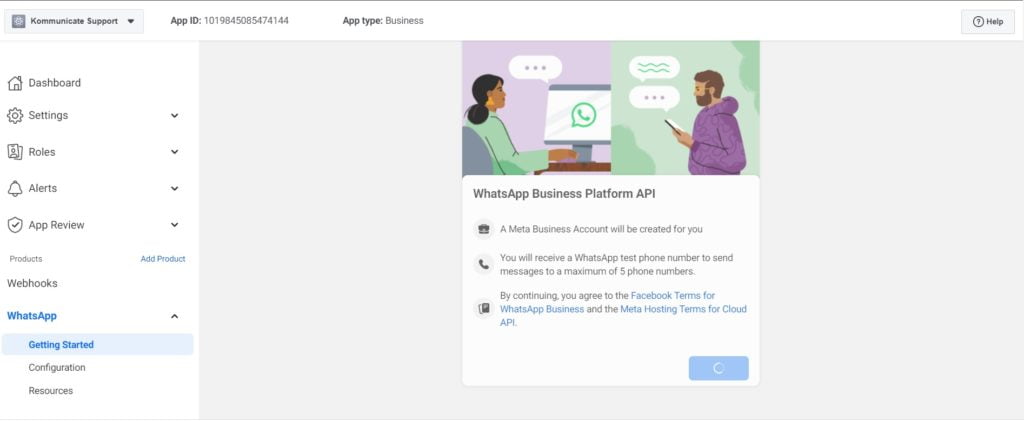
Step5: Accept WhatsApp Business Platform API conditions
The next screen shows you a list of the Terms and Conditions you must accept before using the WhatsApp Cloud API. Hit the “Continue” button, and you are good to go.
For more information, please visit below link:
https://developers.facebook.com/docs/development/create-an-app
please read below Steps to follow for Sandbox Testing connection:
Step 1: Send a test message to a WhatsApp-enabled number:
We now come to our final screen. Here you are given a unique Phone number ID and a unique WhatsApp Business Account ID. The “From” number is a Test number that is assigned to you. The “To” number is the number you wish to send your first WhatsApp text to.
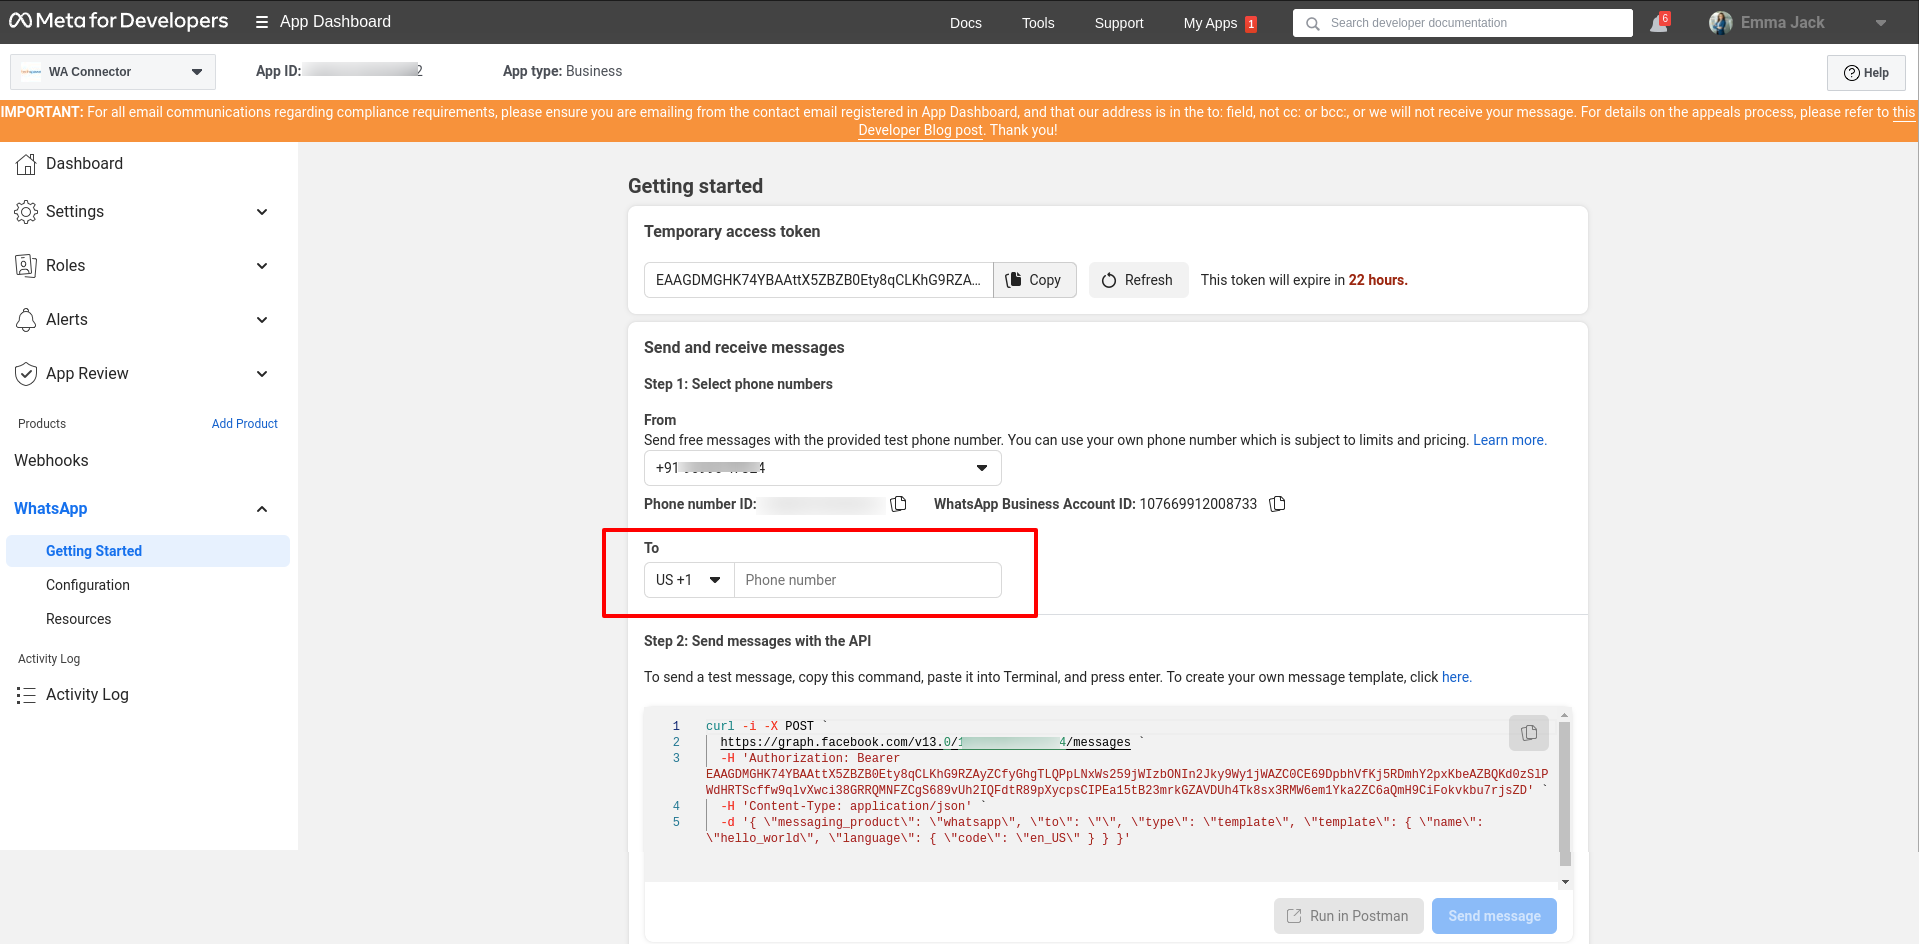
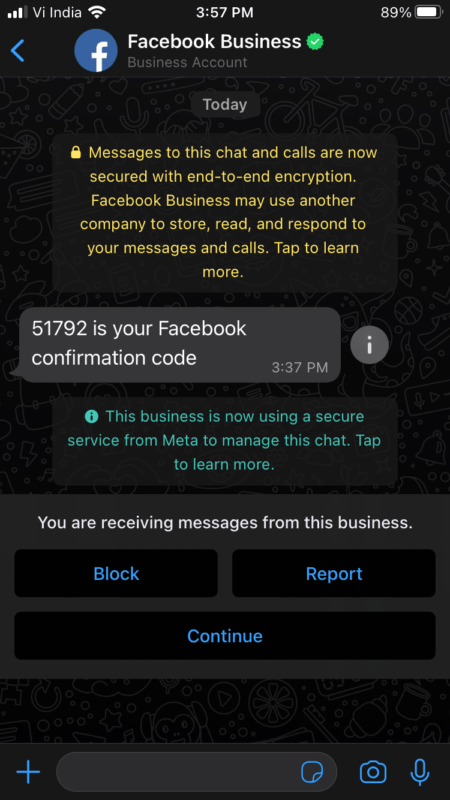
Step 2: Enter the verification code you received:
You will receive a verification code on your mobile phone from Facebook Business. Enter this number into the boxes provided to finish the verification.
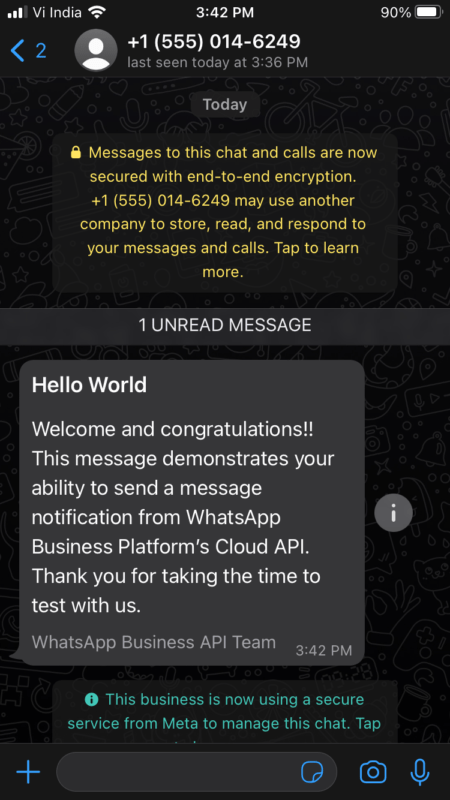
Step 3: Send your first message over WhatsApp Cloud API:
It is now time for you to test if your integration of the customer number is a success. Select the message that you have just verified from the drop-down box and hit “Send Message.”
The message will look something like this.
Now that you have access to the WhatsApp cloud API.
Steps to follow for Production connection:
Setting For Module in Odoo
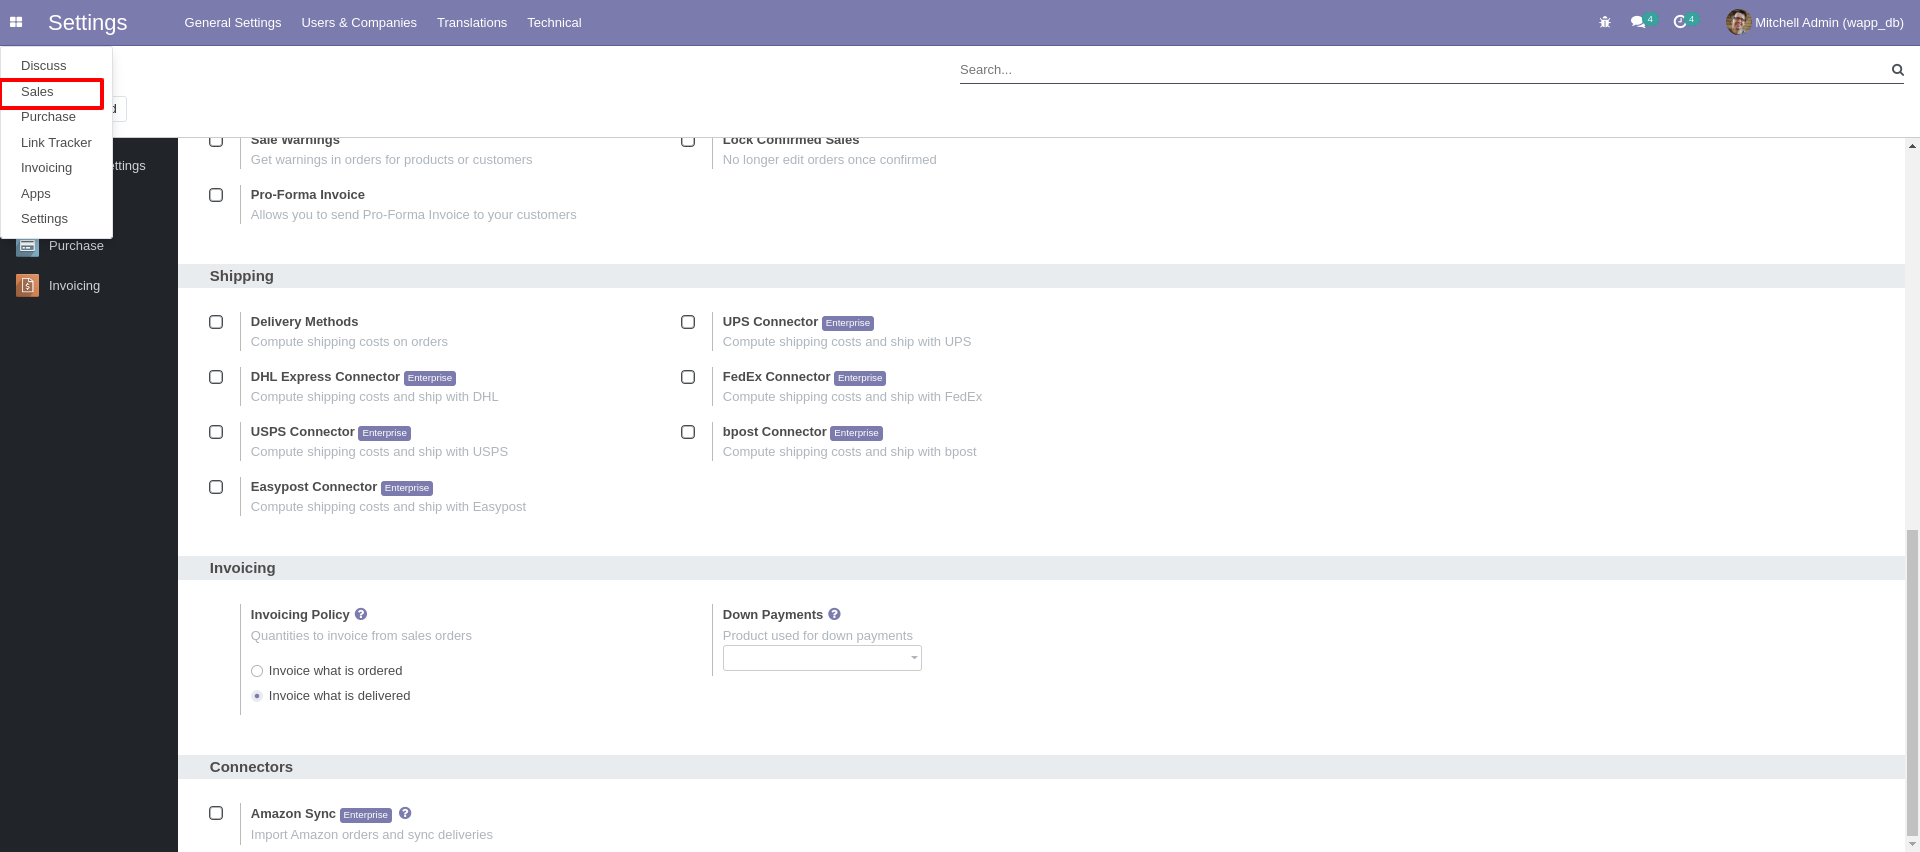
Note: [Make sure that Sales, Purchase, Invoice are installed in database.]
Step1: Go to WhatsApp Integration Setting
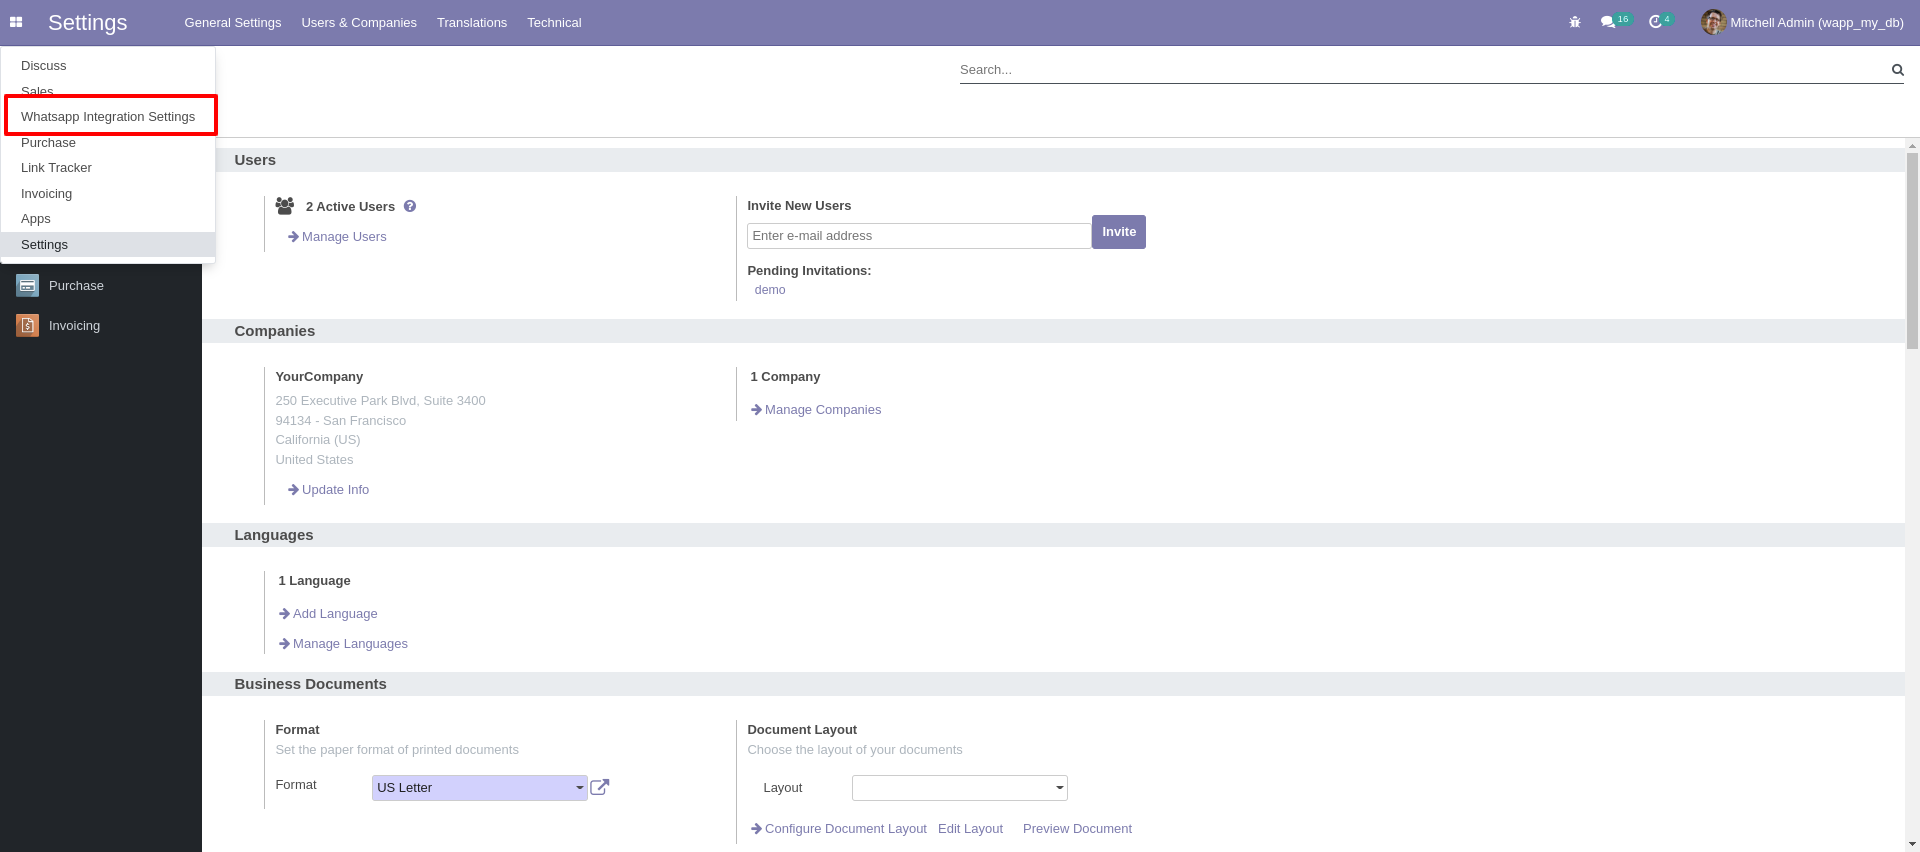
Step2: After clicking on WhatsApp Integration Settings, User need to set all the fields in WhatsApp Integration Setting.
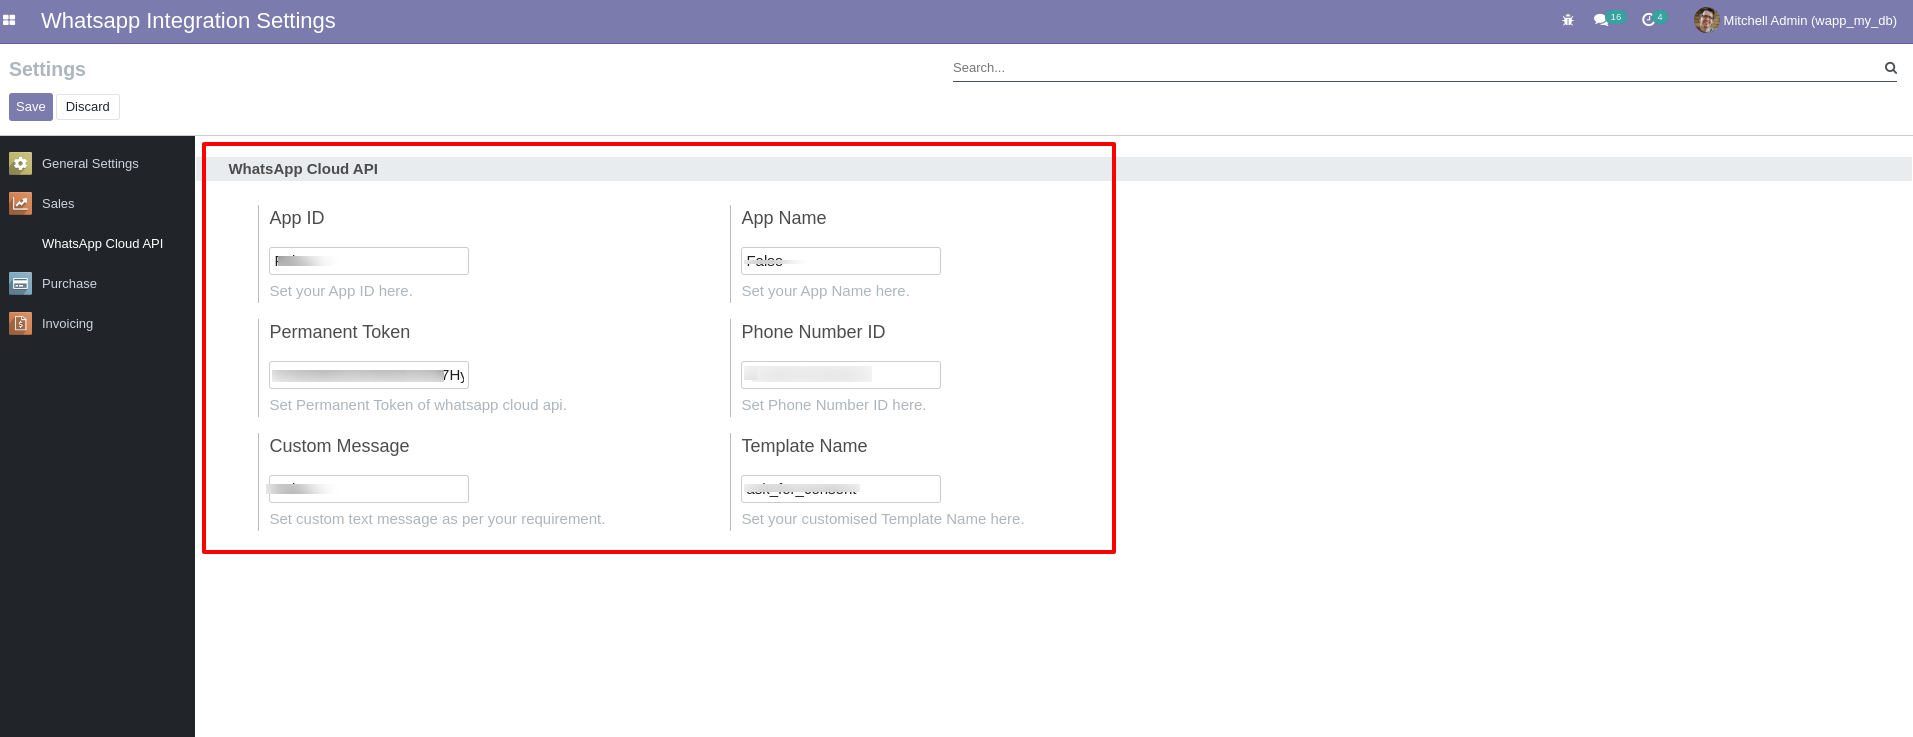
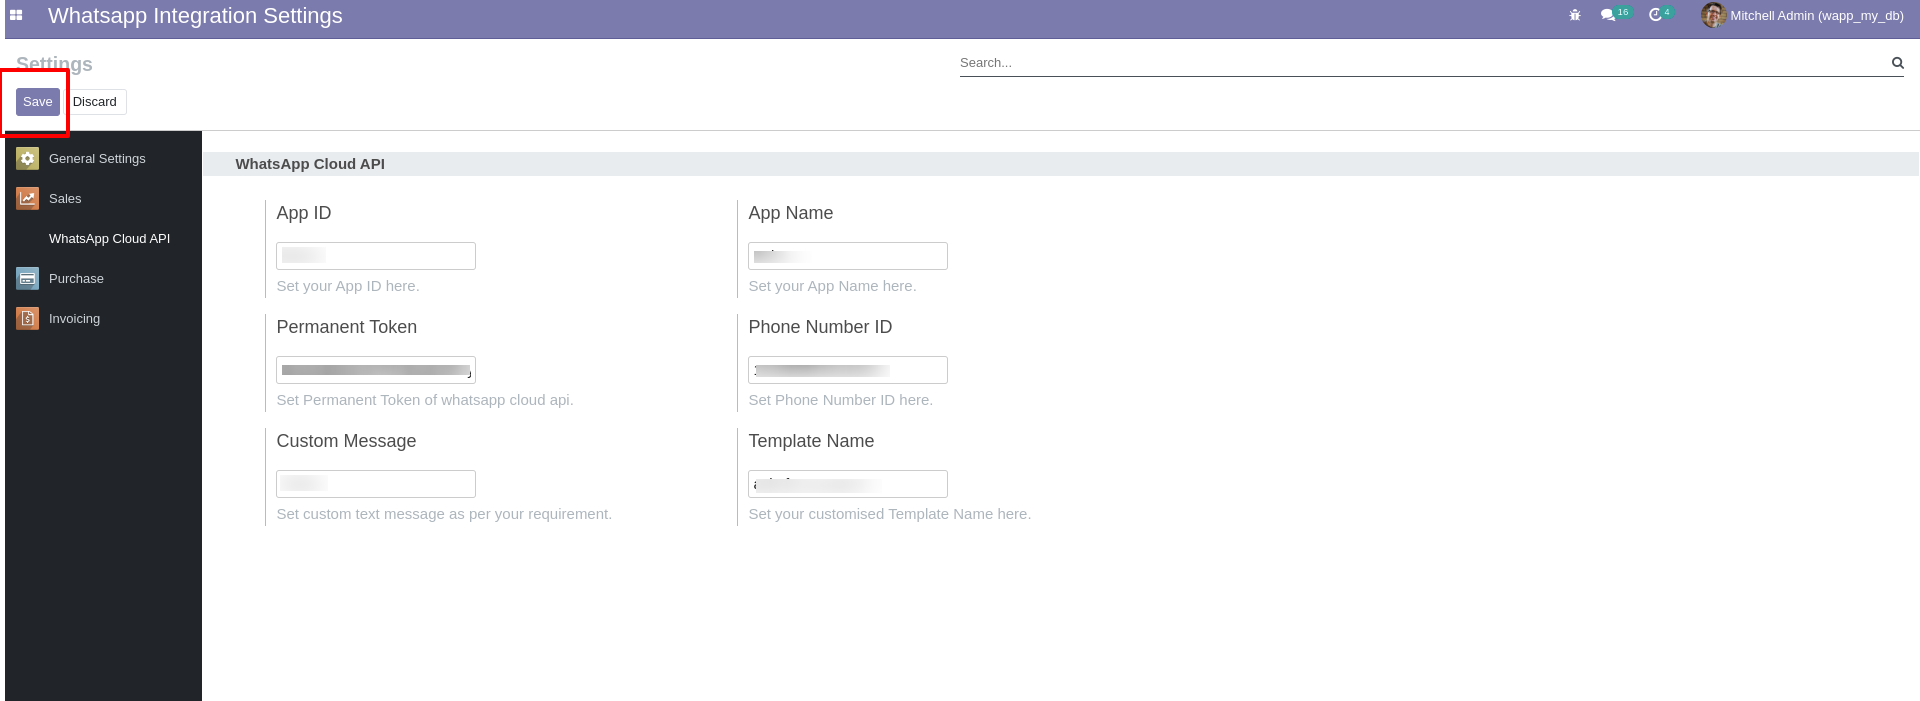
Step3: After setting all the fields, save this setting.
Fields Setting:
1. For Add App ID Setting:
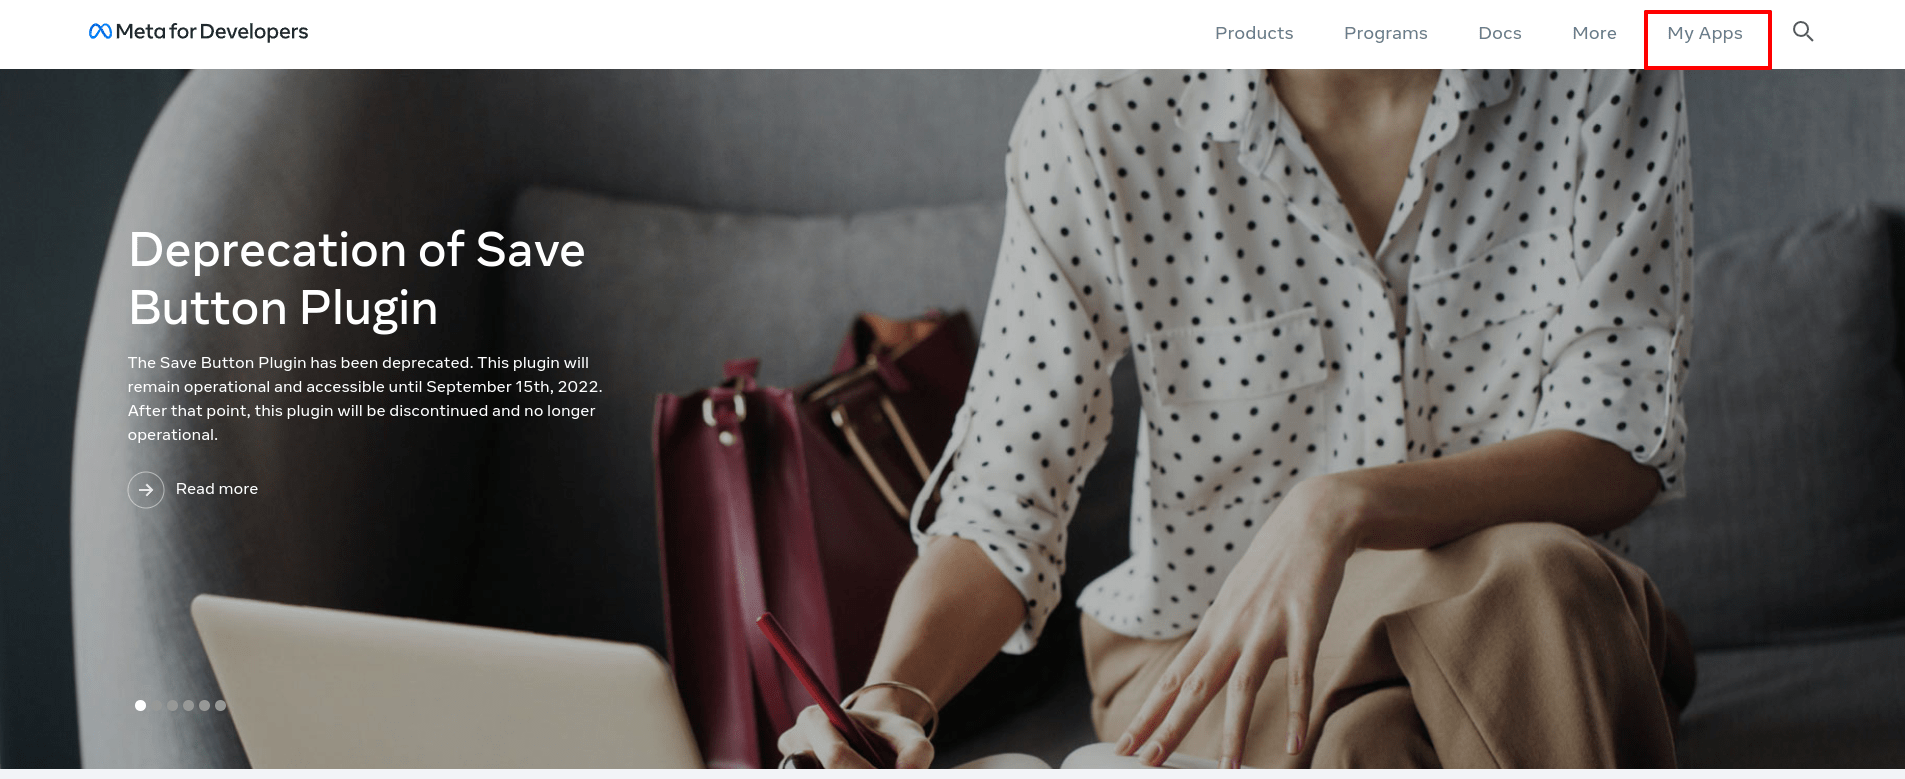
- Go to https://developers.facebook.com/ site. Click on My Apps.
- After clicking on MyApps, App Dashboard screen will open, user can see created App with its name and App ID. Copy this App ID and paste in Add App ID field.
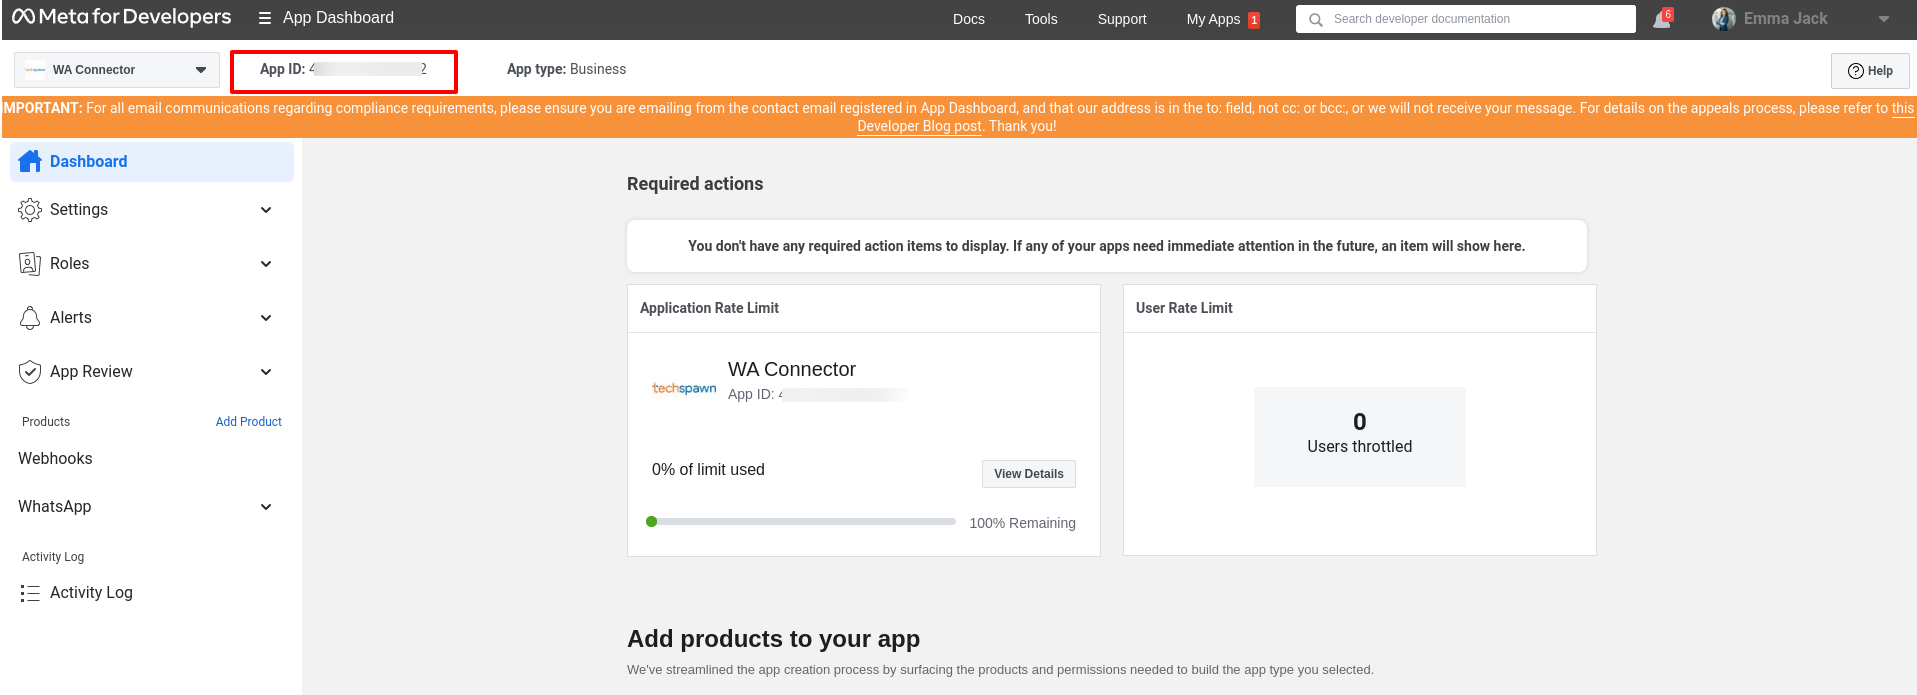
2. For Add App Name Setting: User need to add App Name in Add App Name field. User can see App Name on App Dashboard.
3. For Permanent Token Setting: user need to generate Permanent Token for this field. After generating permanent token, copy that token and set in Permanent Token field.
[Note: Permanent Token is required field for this module.]
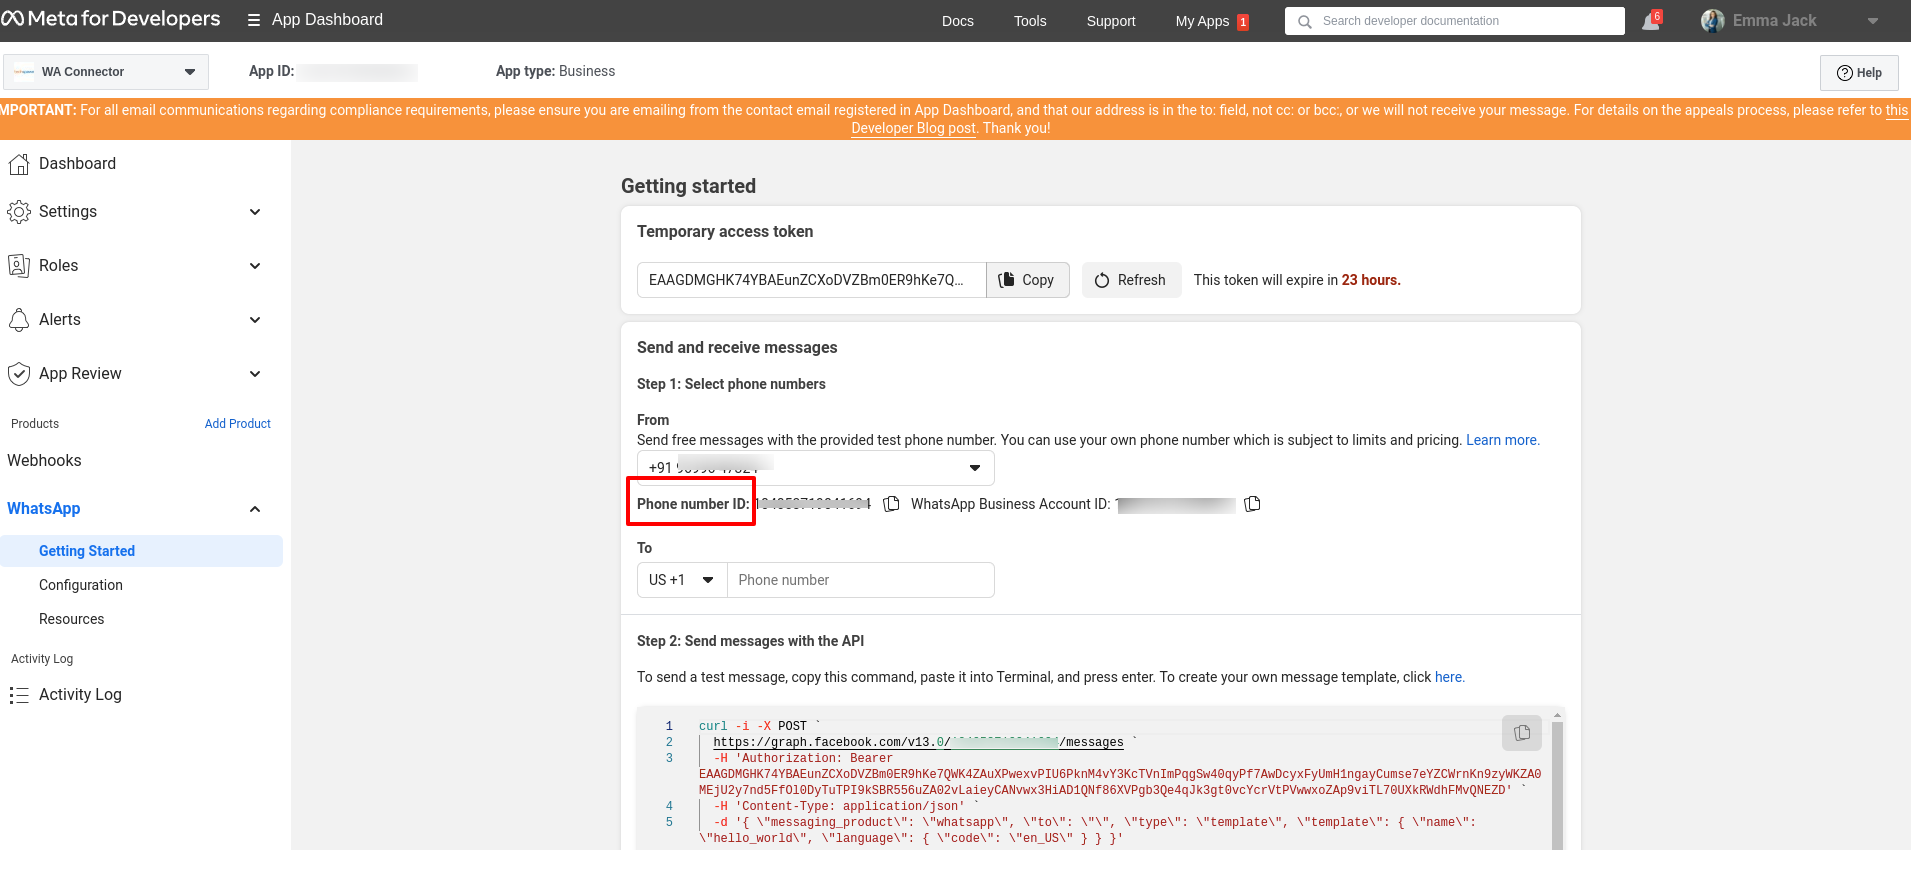
4. For Phone Number ID Setting:
- Go to App Dashboard and click on ‘getting started’.
- After clicking on ‘getting started’ user can copy Phone Number ID. Copy Phone Number ID and set in Phone Number ID field.
[Note: Phone Number ID is required field in this module.]
5. For Custom Message Setting: User can send Custome text message along with Sale Order, Invoice Order, Purchase Order. User need to set custom text message as per their requirement in Custom Message field.
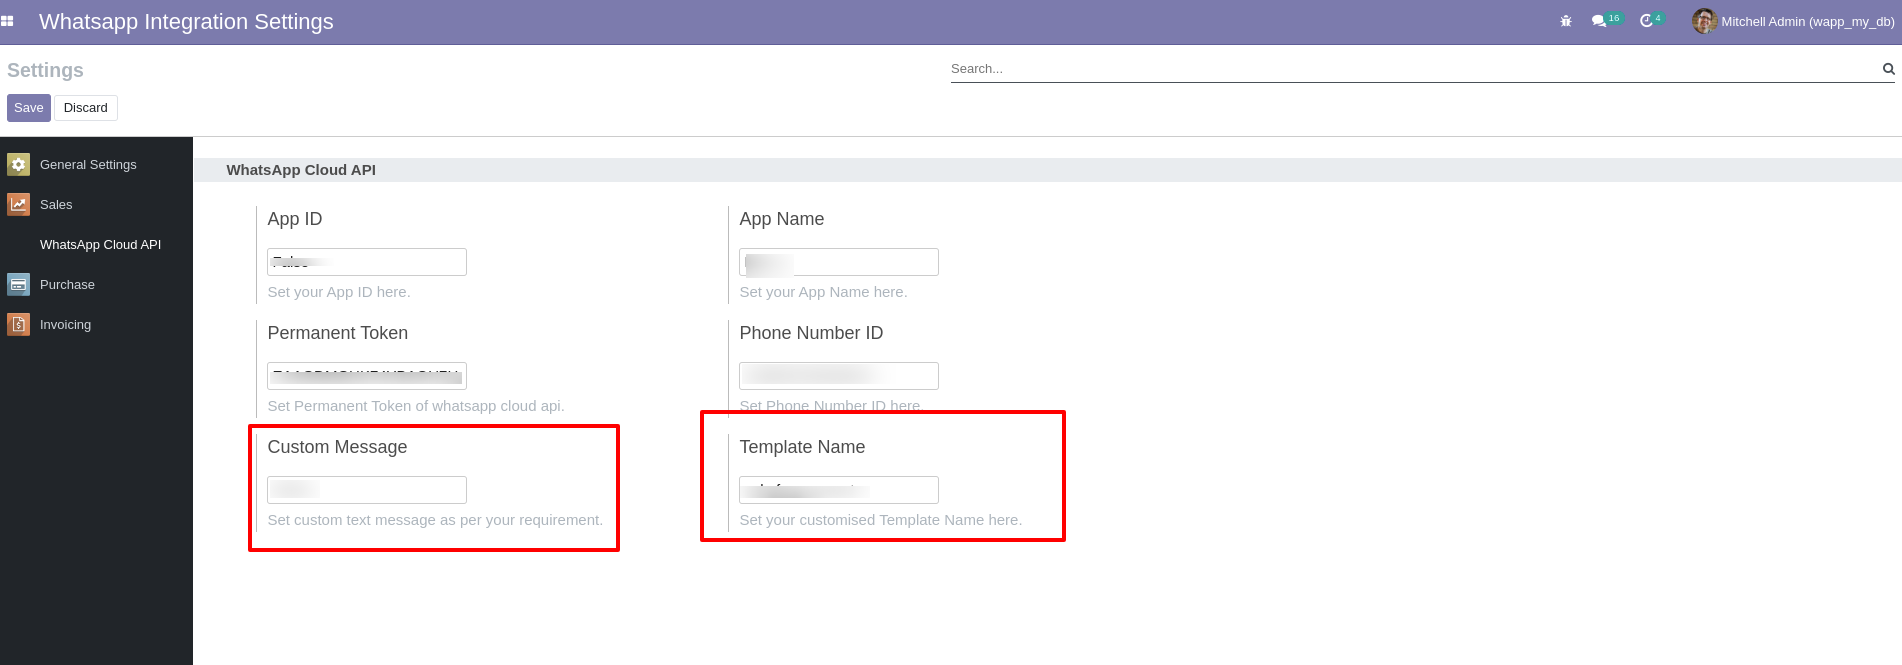
6. For Template Name Setting: User need to set template name in Template Name field.

To create template, follow below steps-
How To Create Template for consent from contacts.
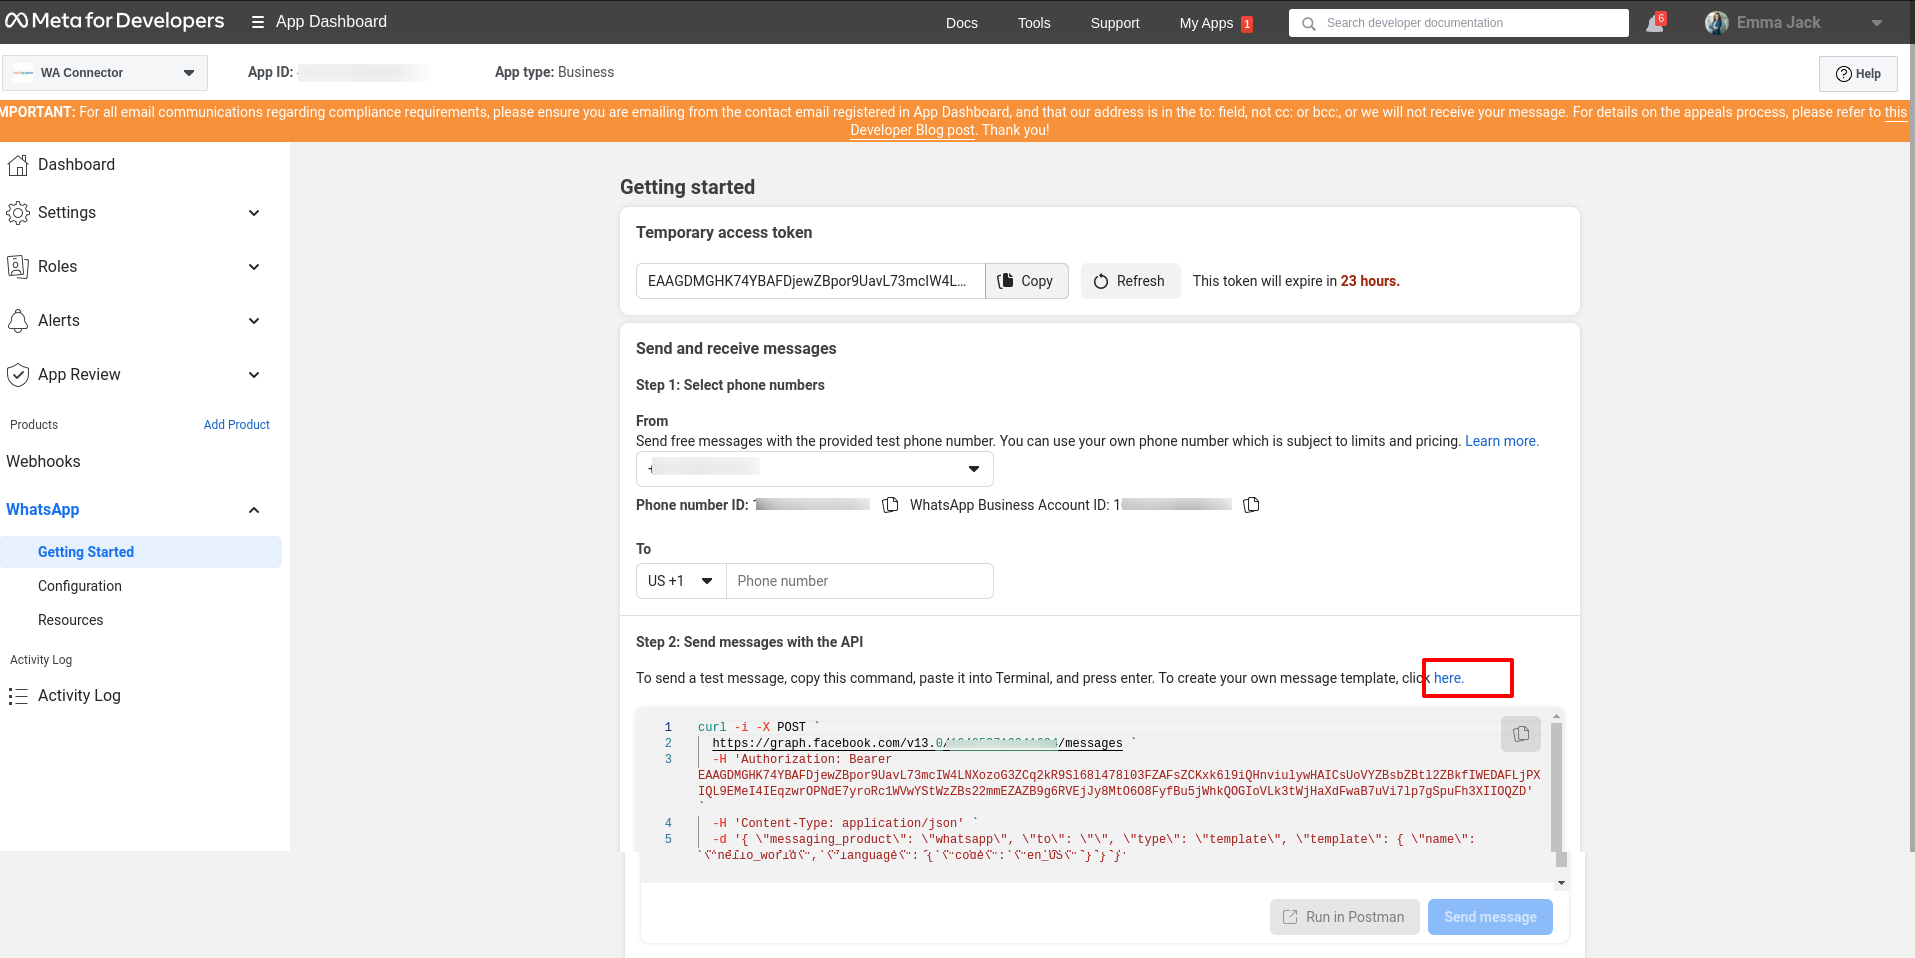
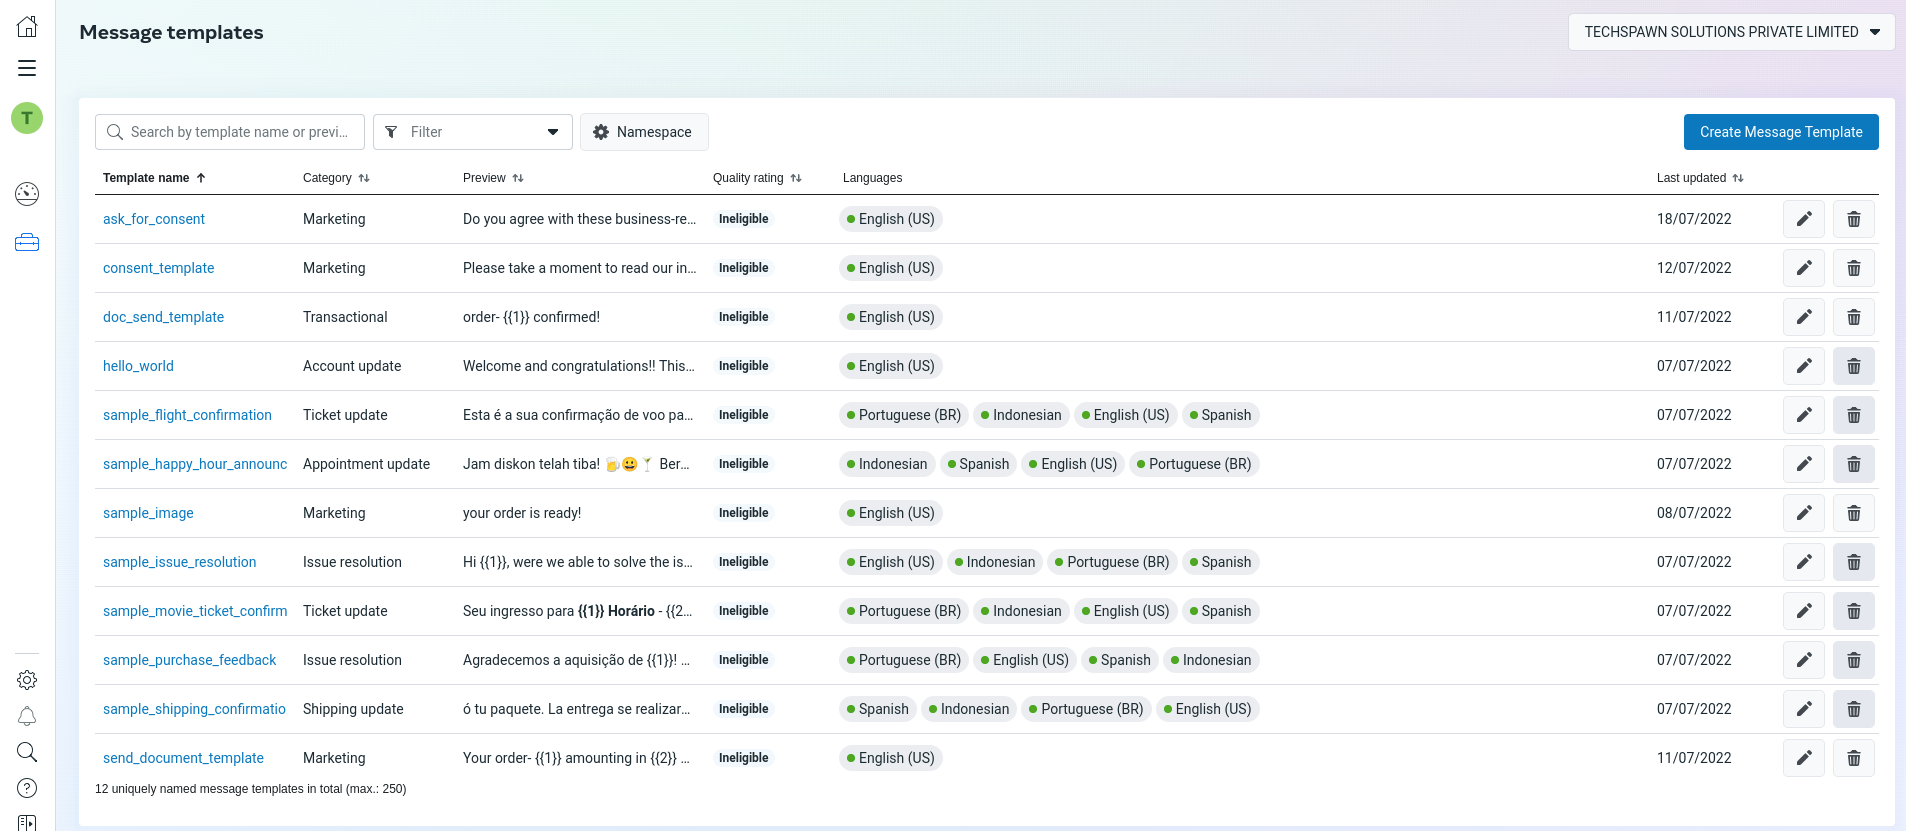
Step1: To create your own message template, go to App Dashboard and click on highlighted link.
Step2: After clicking on that link user will go on Message templates screen.
Step3: After reaching on Message templates screen, click on create message template. Choose category for message template, set name for template, and select language as per your requirement. And click on continue.
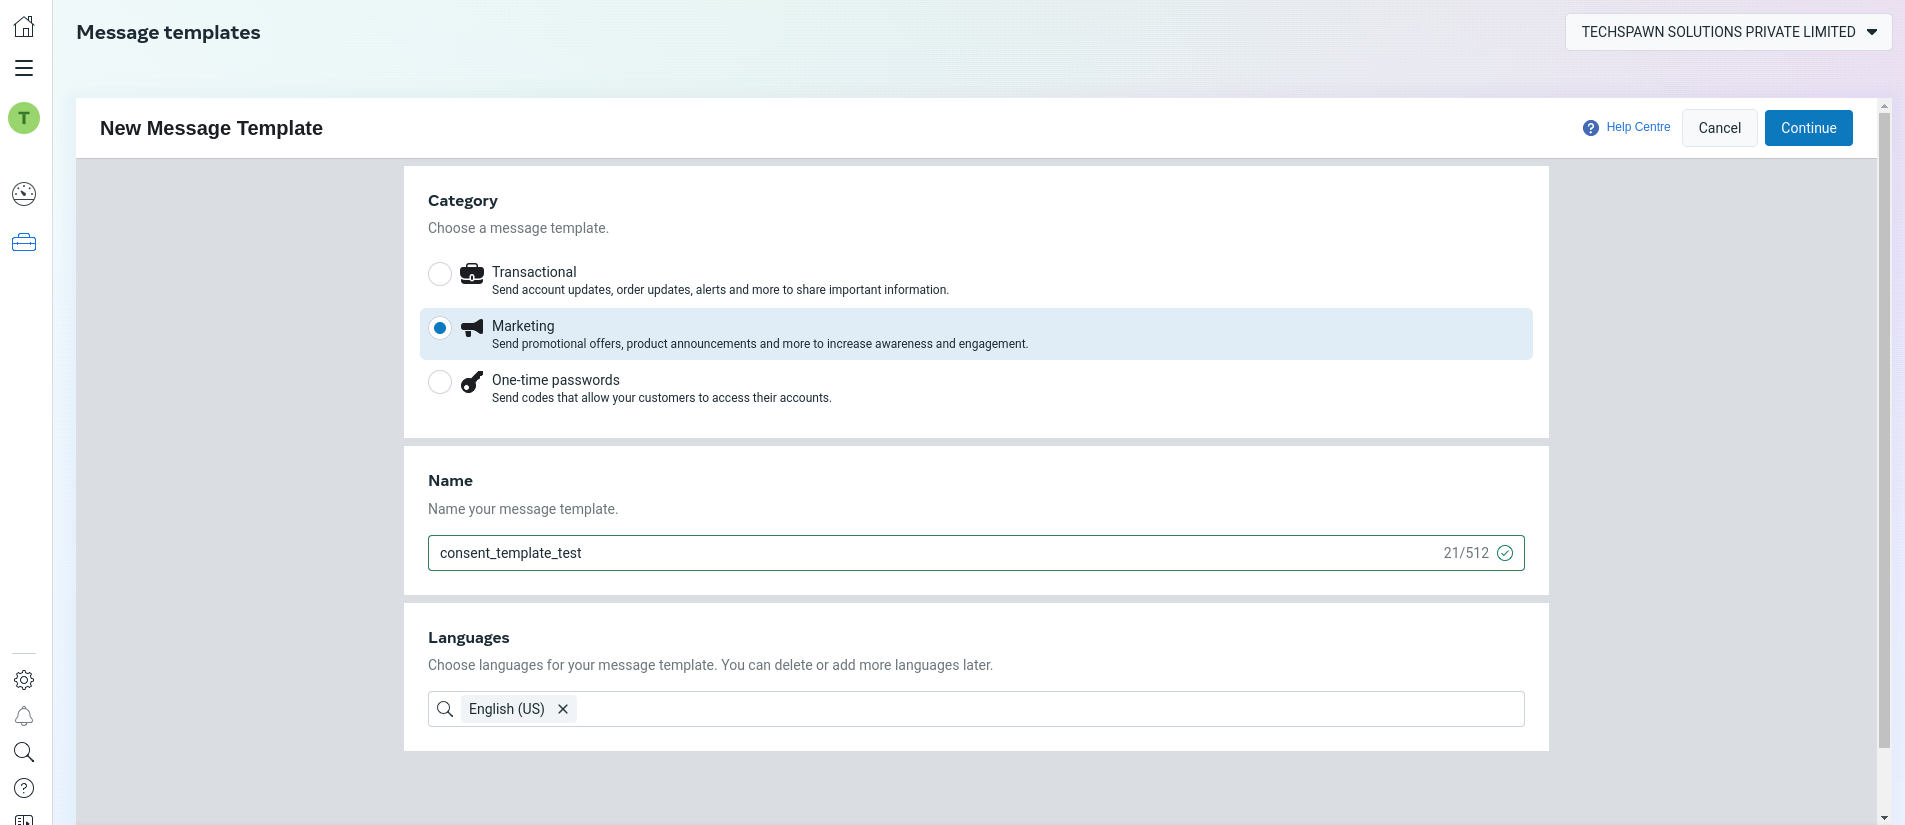
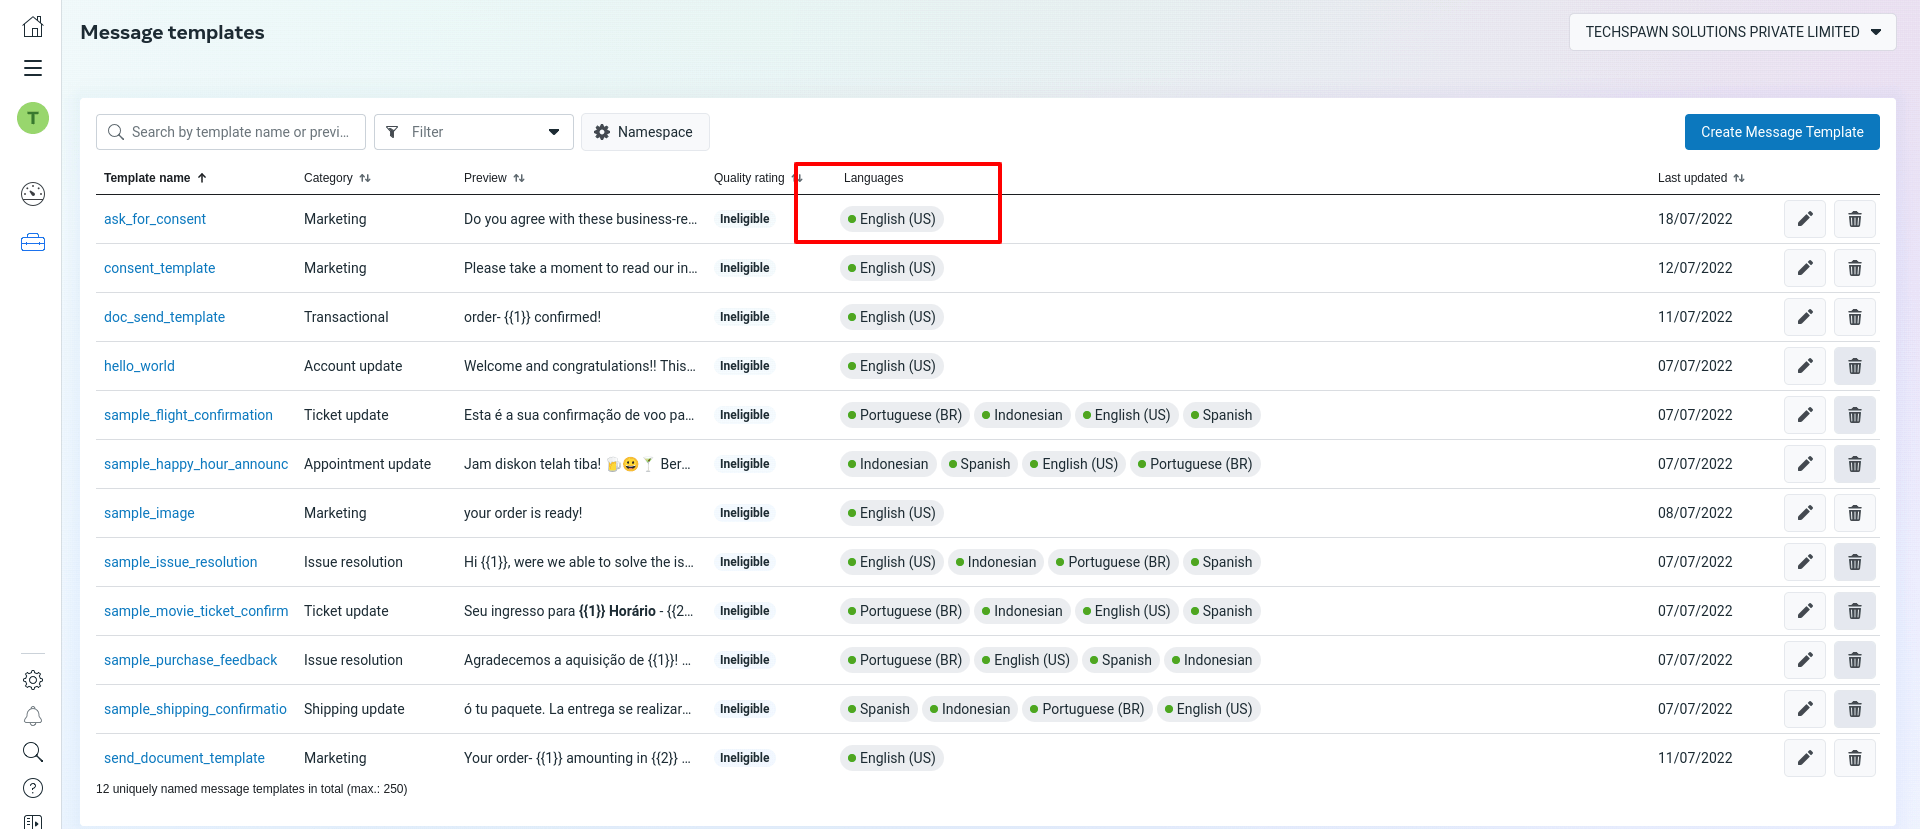
Step4: After clicking on Continue, user need to set Header as Text, add text message for consent from customer as per your requirement. Also, you can add footer for your template. User can see preview of template for their confirmation. Click Submit after making your changes to send your message template for review. It will be reviewed in under 24 hours. If your template format is correct, it will be reviewed and approved in 3 minutes minimum. To use template for consent, user need to approve template first. After approving template, you will see green dot next to template name.
Tips:
1. In addition to the above, please consider the following to accelerate the approval process.
- Make your message template name clear. Instead of using a name like “template_014,” use “bus_ticket_details”.
- Remember that this template will be for consent from customer. you need to write a message something like below example:
Example: If you’d like to continue this discussion, OR do you agree with these business-related messages, please reply with ‘yes’, otherwise do not reply!
After successfully creating template for consent, you can add that name in Template Name field.
Use of Custome template:
• Send custom consent text message to customers valid WhatsApp number.
2. Please make sure format of Phone number before sending message:
The phone numbers in Cloud API requests can be provided in any dialable format, as long as they include their country code.
Here are some examples of supported phone number formats:
- “1-000-000-0000”
- “1 (000) 000-0000”
- “1 000 000 0000”
- “1 (000) 000 0000”
[Note: If phone number is in wrong format, customer cannot receive messages. Make sure you are adding right format and valid phone number.]
How to generate permanent token.
Please follow below steps:
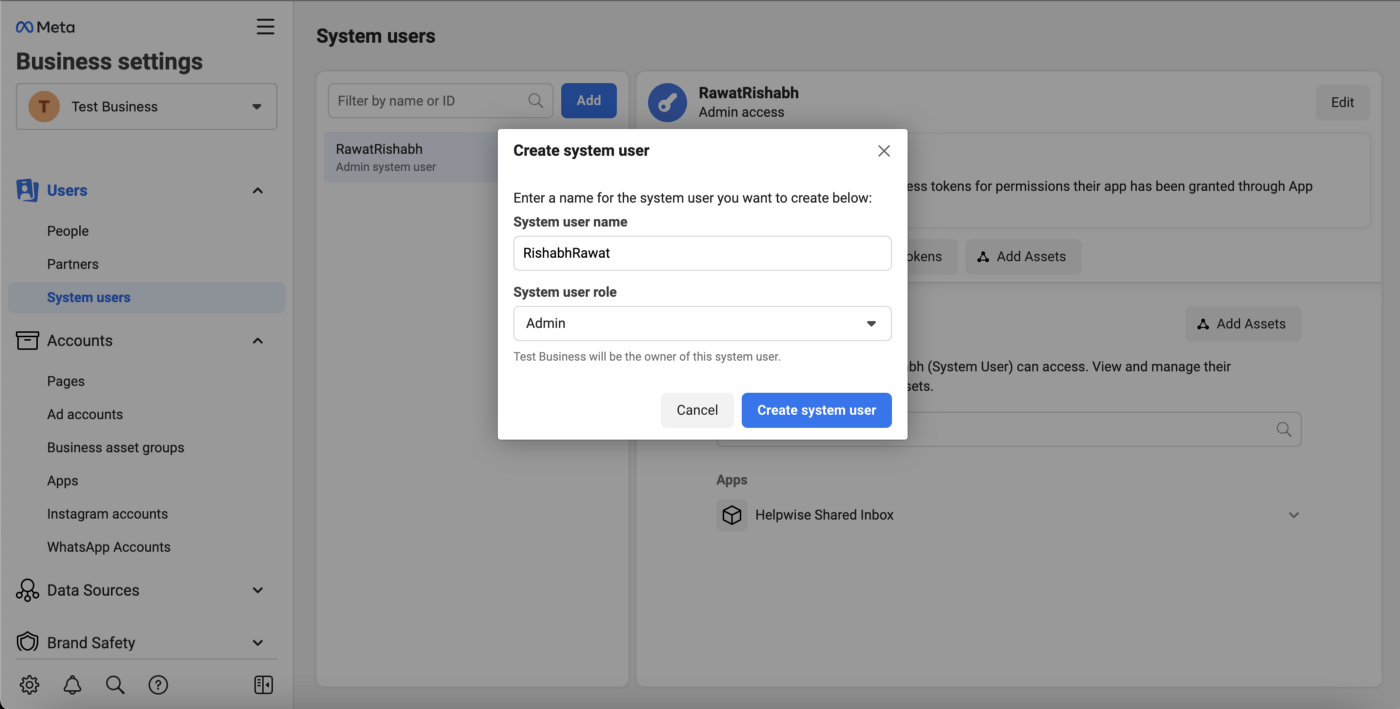
Step1: Login to your Facebook developer account and choose the WhatsApp app and then go to the Business settings page.
Step2: You will see the System users under the section of Users on the left sidebar. Click the Add button and you will get the pop-up window. Enter the user name and choose the admin as the system user role.
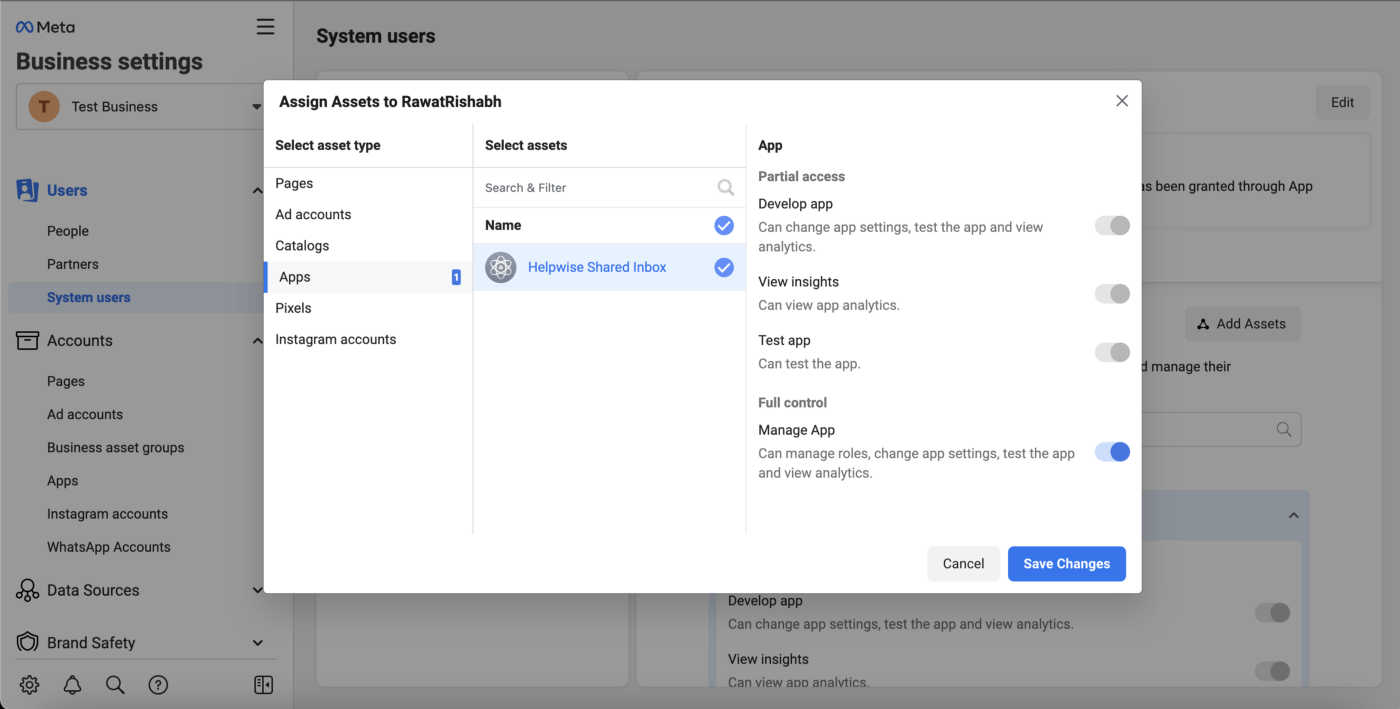
step3: Now, your new system user should be created. Click on the Add Asserts on the current page (System user page) the pop-up will appear. Choose App>Select App Name>Full control option & click save changes button.
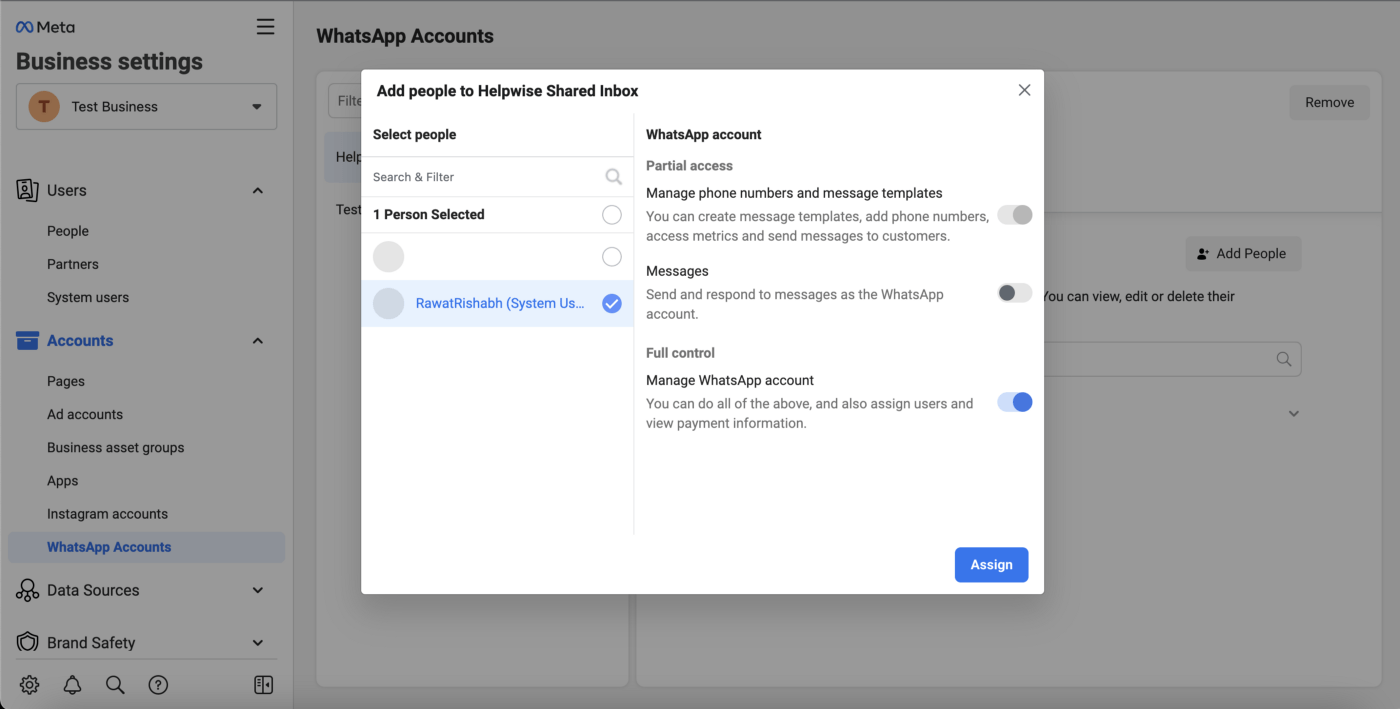
Step4: Now, click on the “WhatsApp Account” on the left sidebar and then select the WhatsApp business app and click the “Add people” button. Popup will appear, choose the recently created system user and check the full control and then click the Assign button.
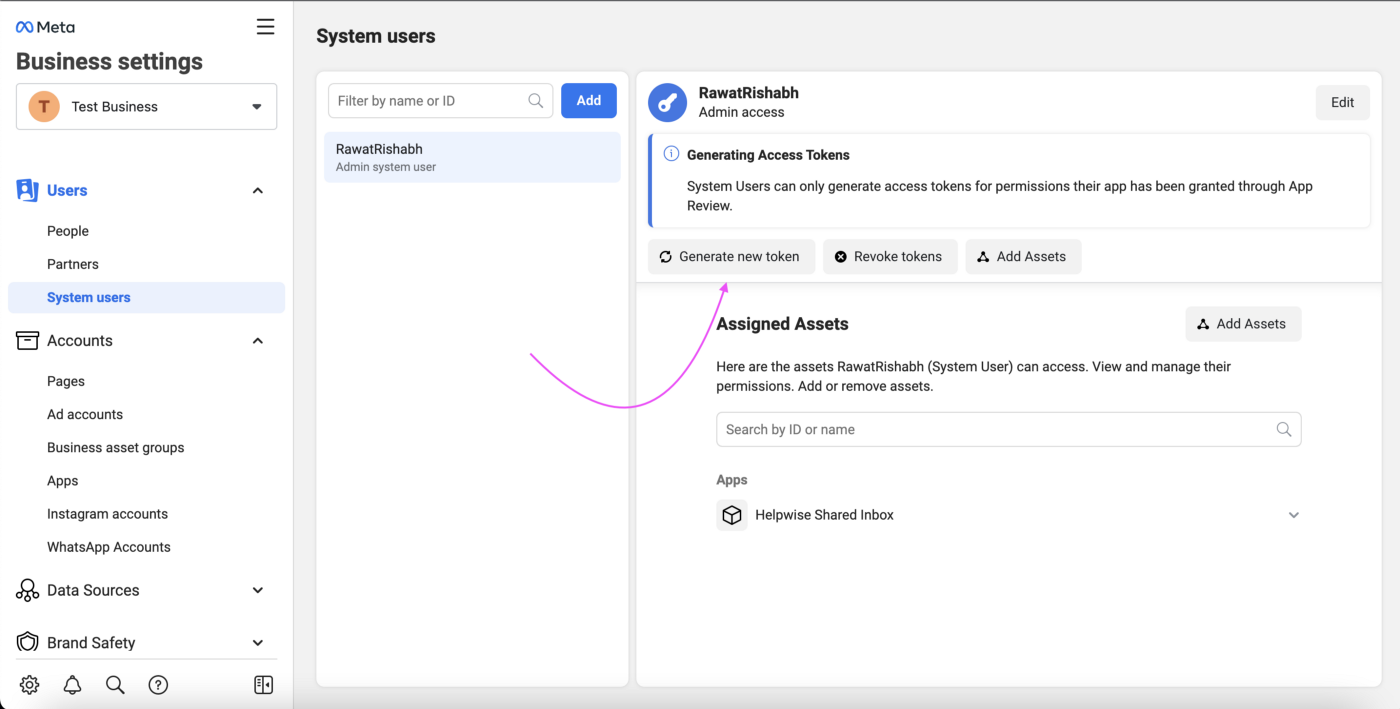
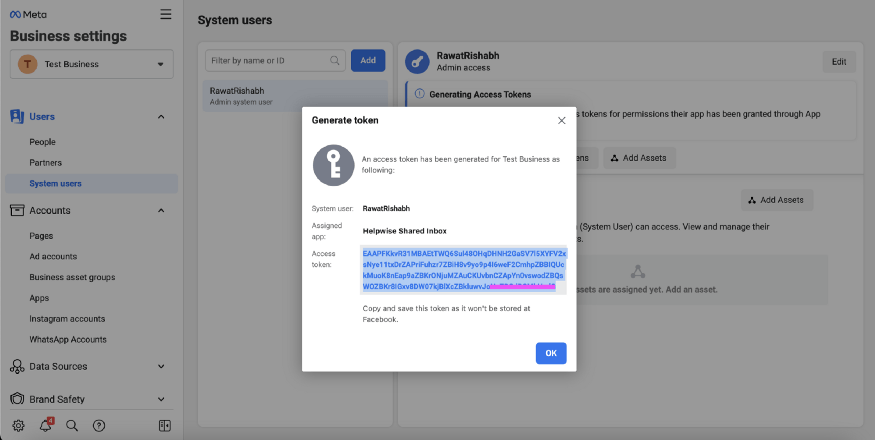
Step5: Now, go back again to the system users page and select the recently created system user from the list and then click the “Generate new token” button.
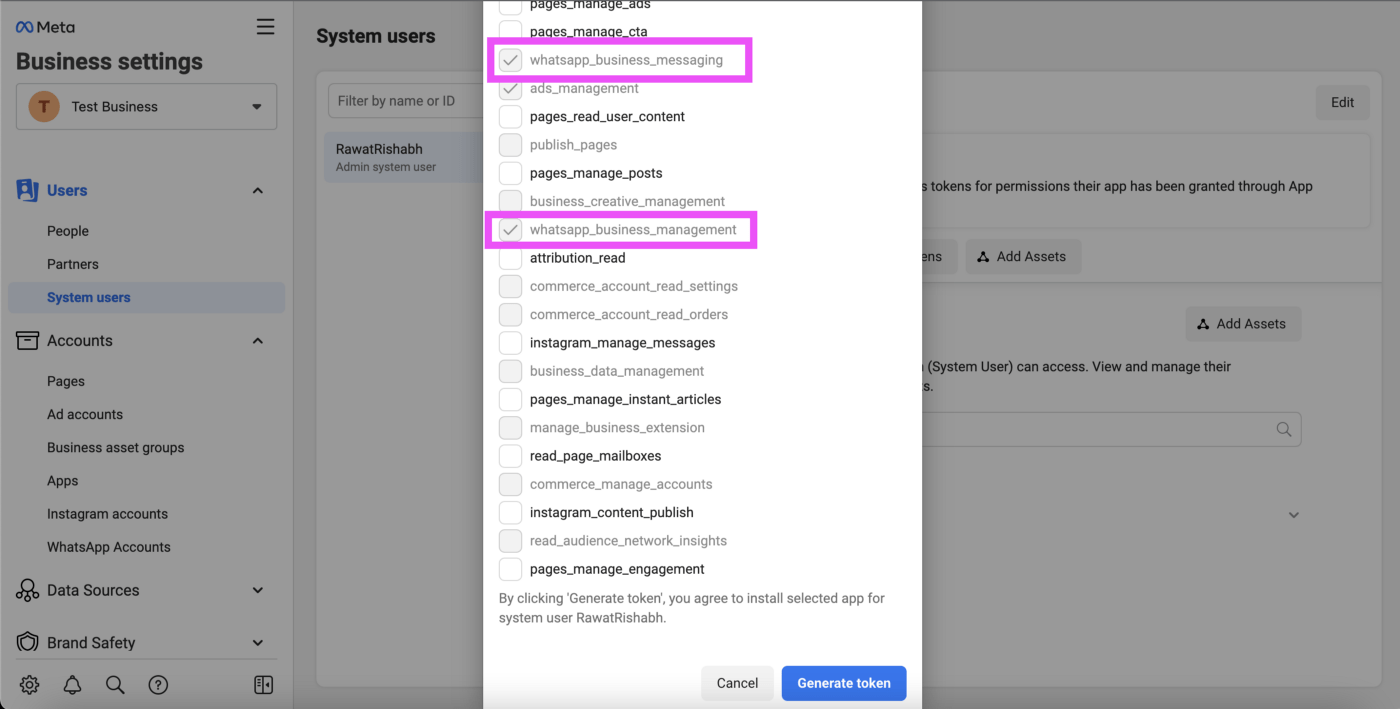
Step6: Pop up will appear, choose the business app from the dropdown and make sure the whatsapp_business_management and whatsapp_business_messaging must be checked, if not then click on the checkbox and click the “Generate token” button.
Step7: The token should be generated at this time. Now, this token will not expire and live forever until and unless you do not click the revoke token button. You can use this token in the API instead of a temporary access token.
You can also verify the token scope from the Facebook token debugger tool and check the scope of the token added successfully or not.
How to send Sale order with custom text message to customers valid WhatsApp number.
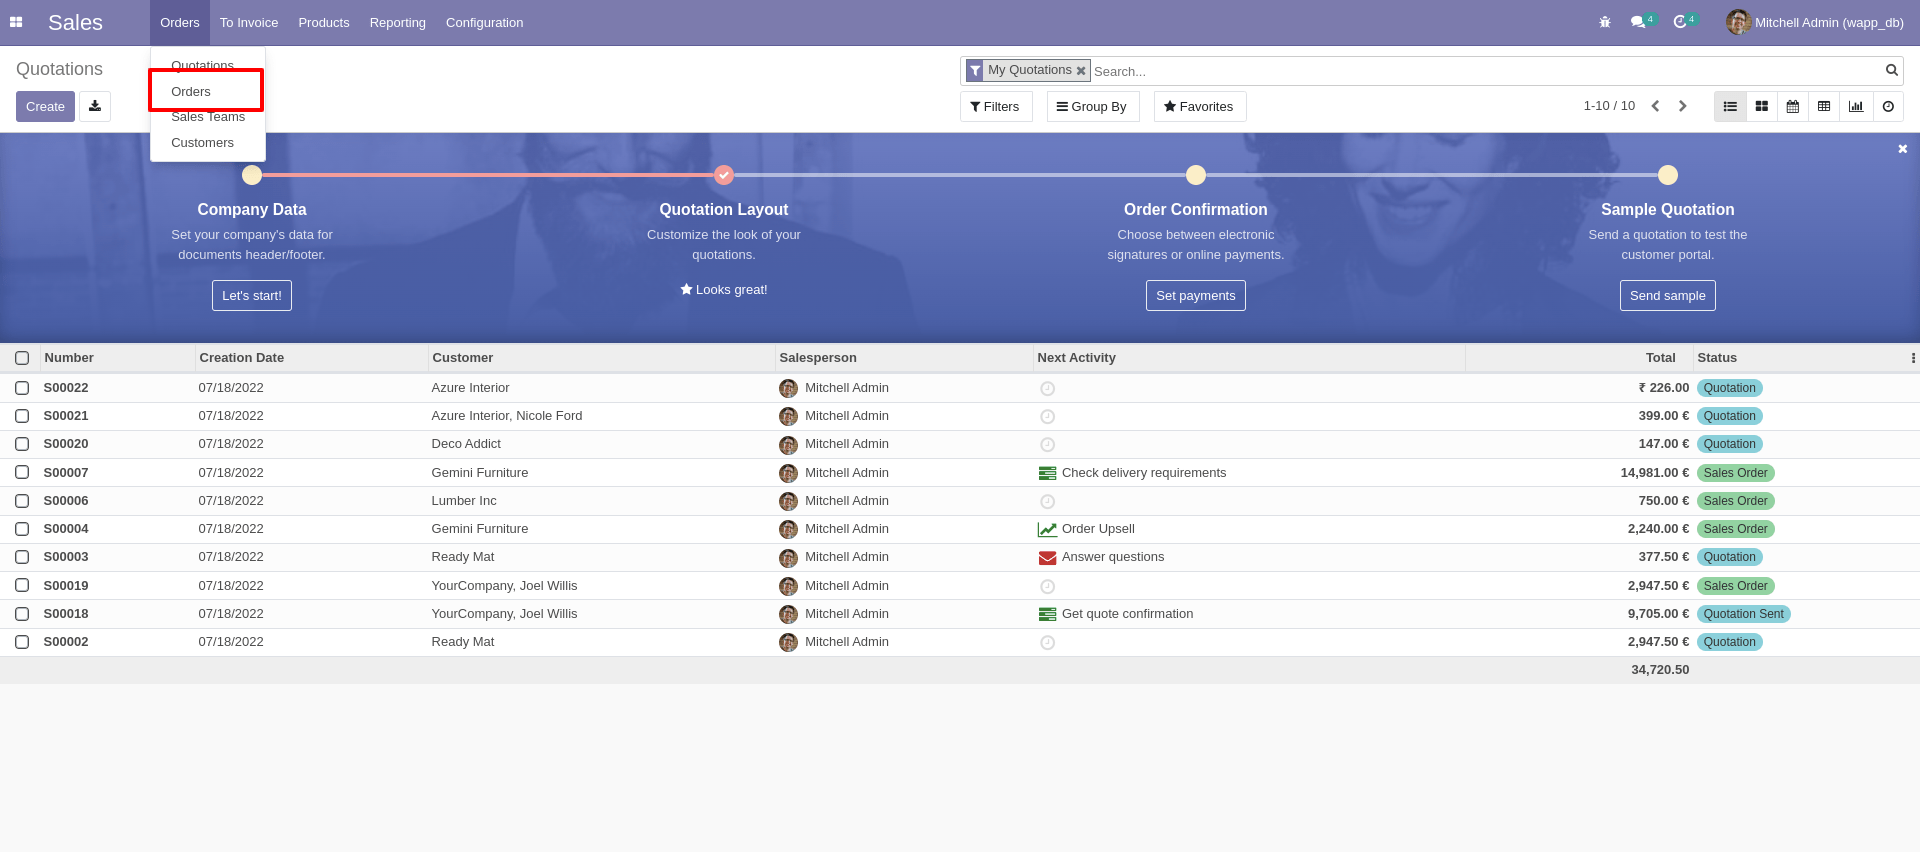
Step1: Go to Sales and click on that,
Step2: After clicking on sales click on ’Orders’ and select order you want to send.
Step3: After selecting order you want to send; User can see two buttons ‘Ask For Consent’ and ‘Send By Whatsapp’.
• Remember that We follow Ideal process of WhatsApp Cloud API for sending messages to customers valid WhatsApp number. Follow below process for sending sale order.
Process:
1. Click on ‘Ask For Consent’ button to get Customers consent reply, if they reply to that message, we can send sale order with custom text message to their valid WhatsApp number.
2. for sending sale order click on ‘Send By Whatsapp’ button and customer will receive sale order PDF with custom text message.
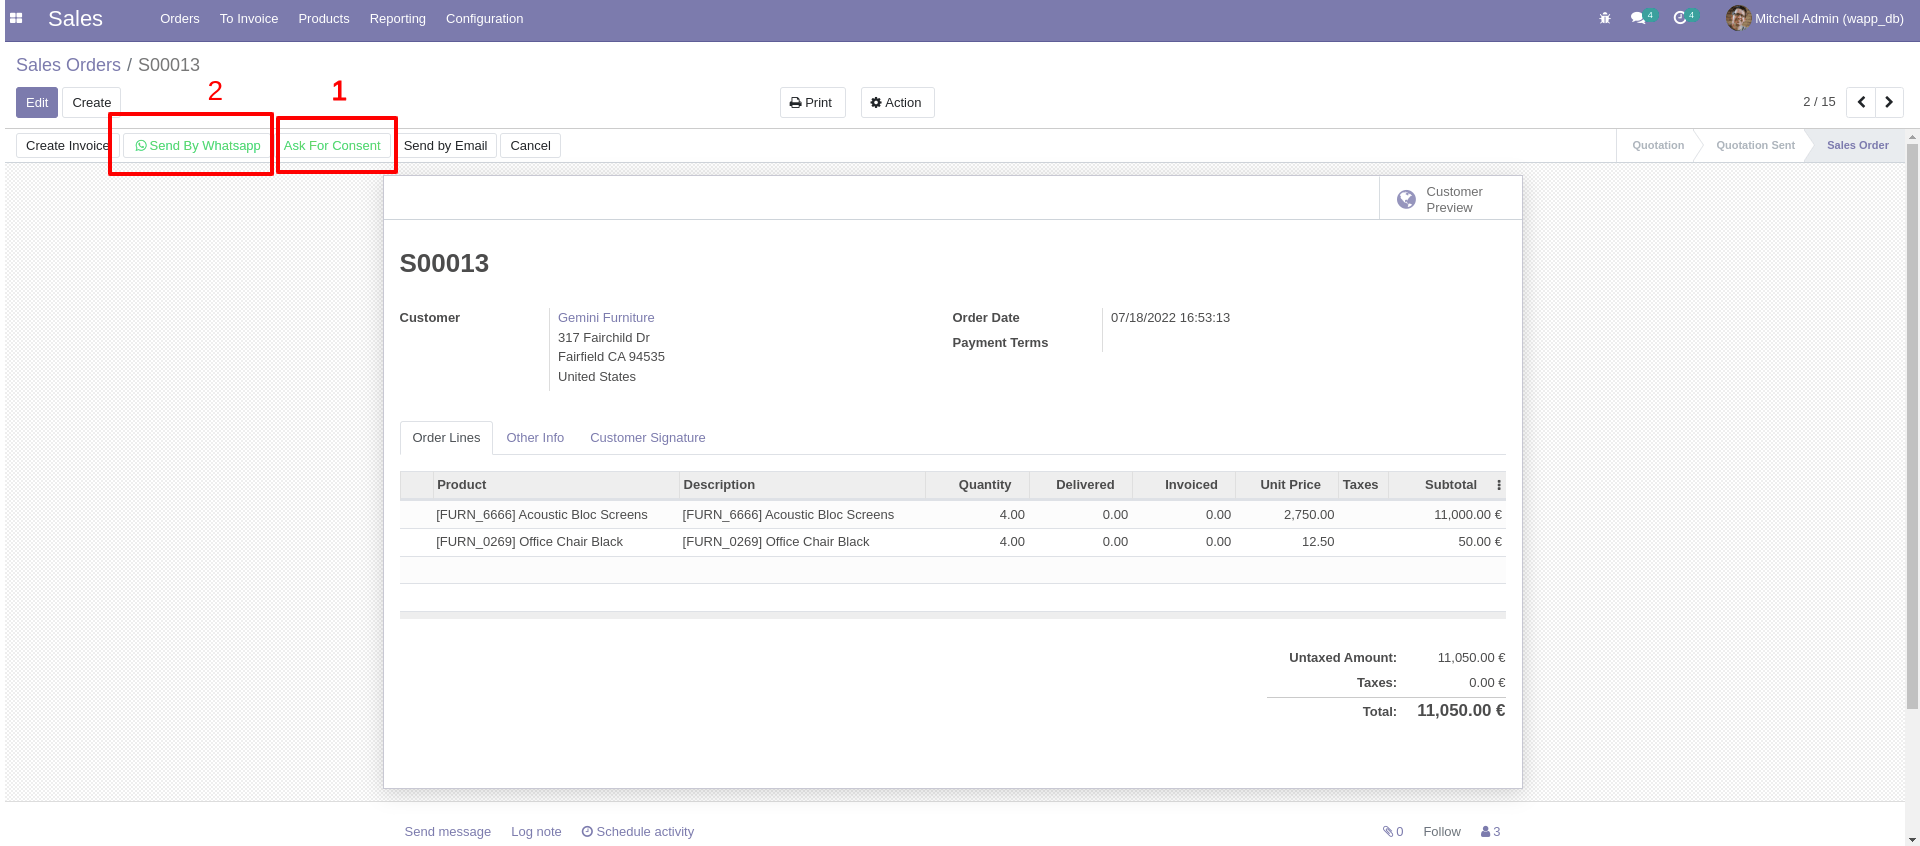
This is ideal process of WhatsApp cloud API.
How to send Invoice Order with Custom text message to customers valid WhatsApp number.
Step1: Go to Invoicing and click on that,
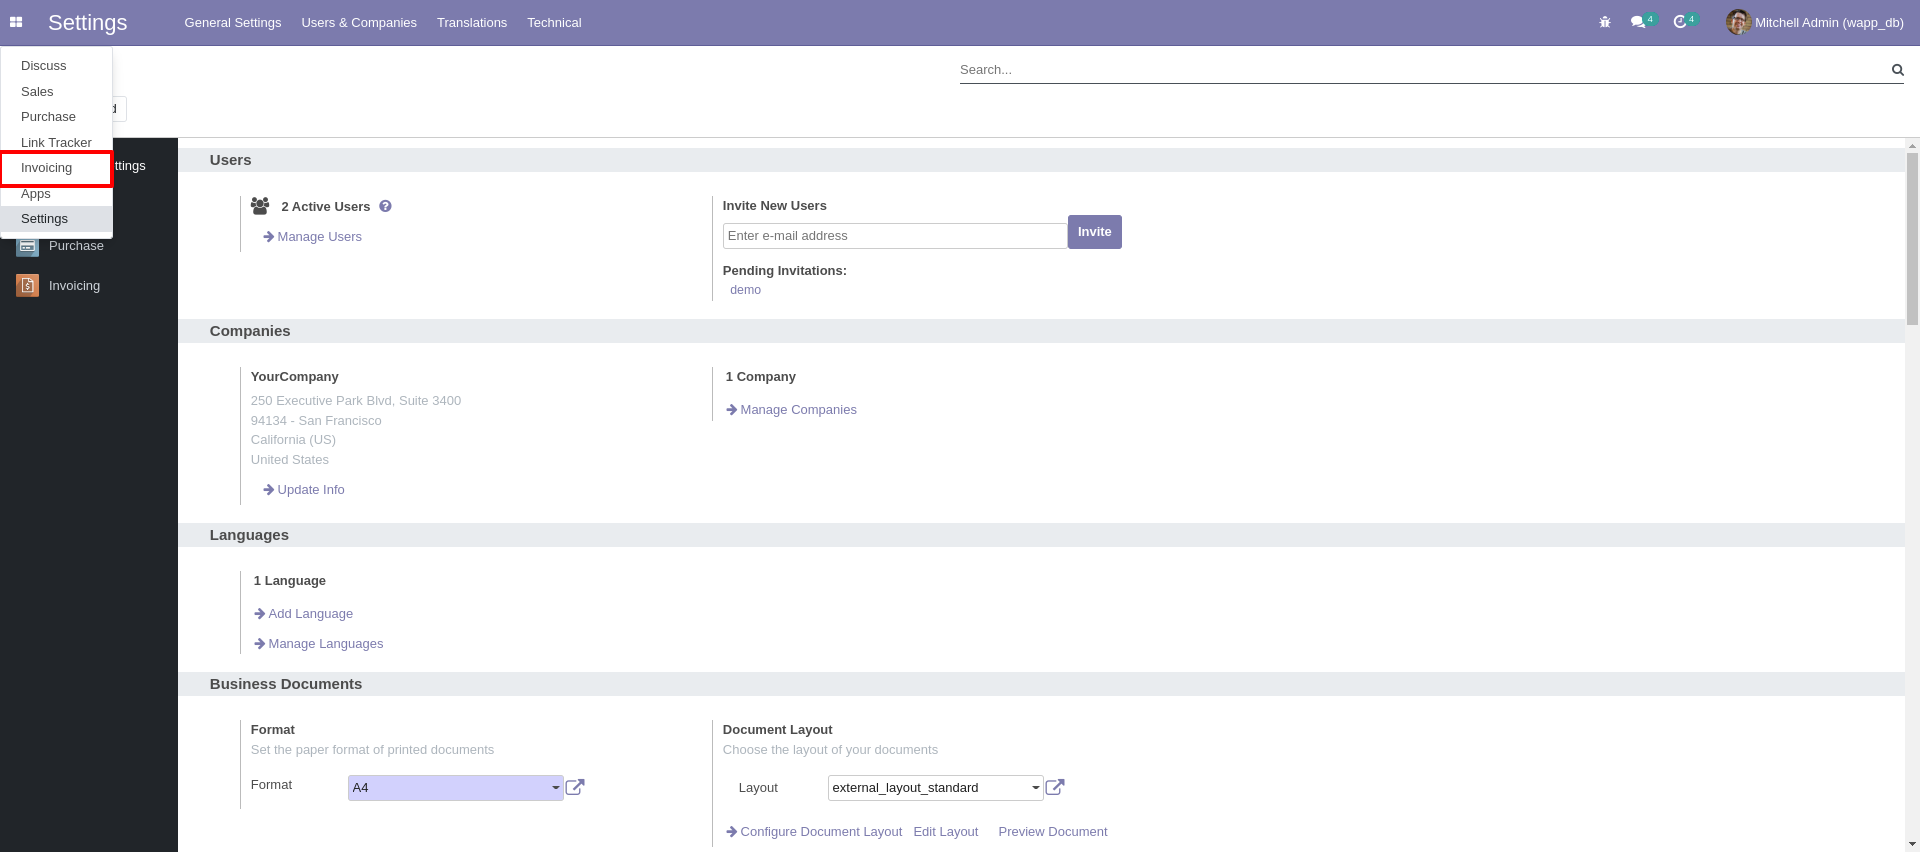
Step2: After clicking on sales click on ’Invoices’ and select Invoice order you want to send.
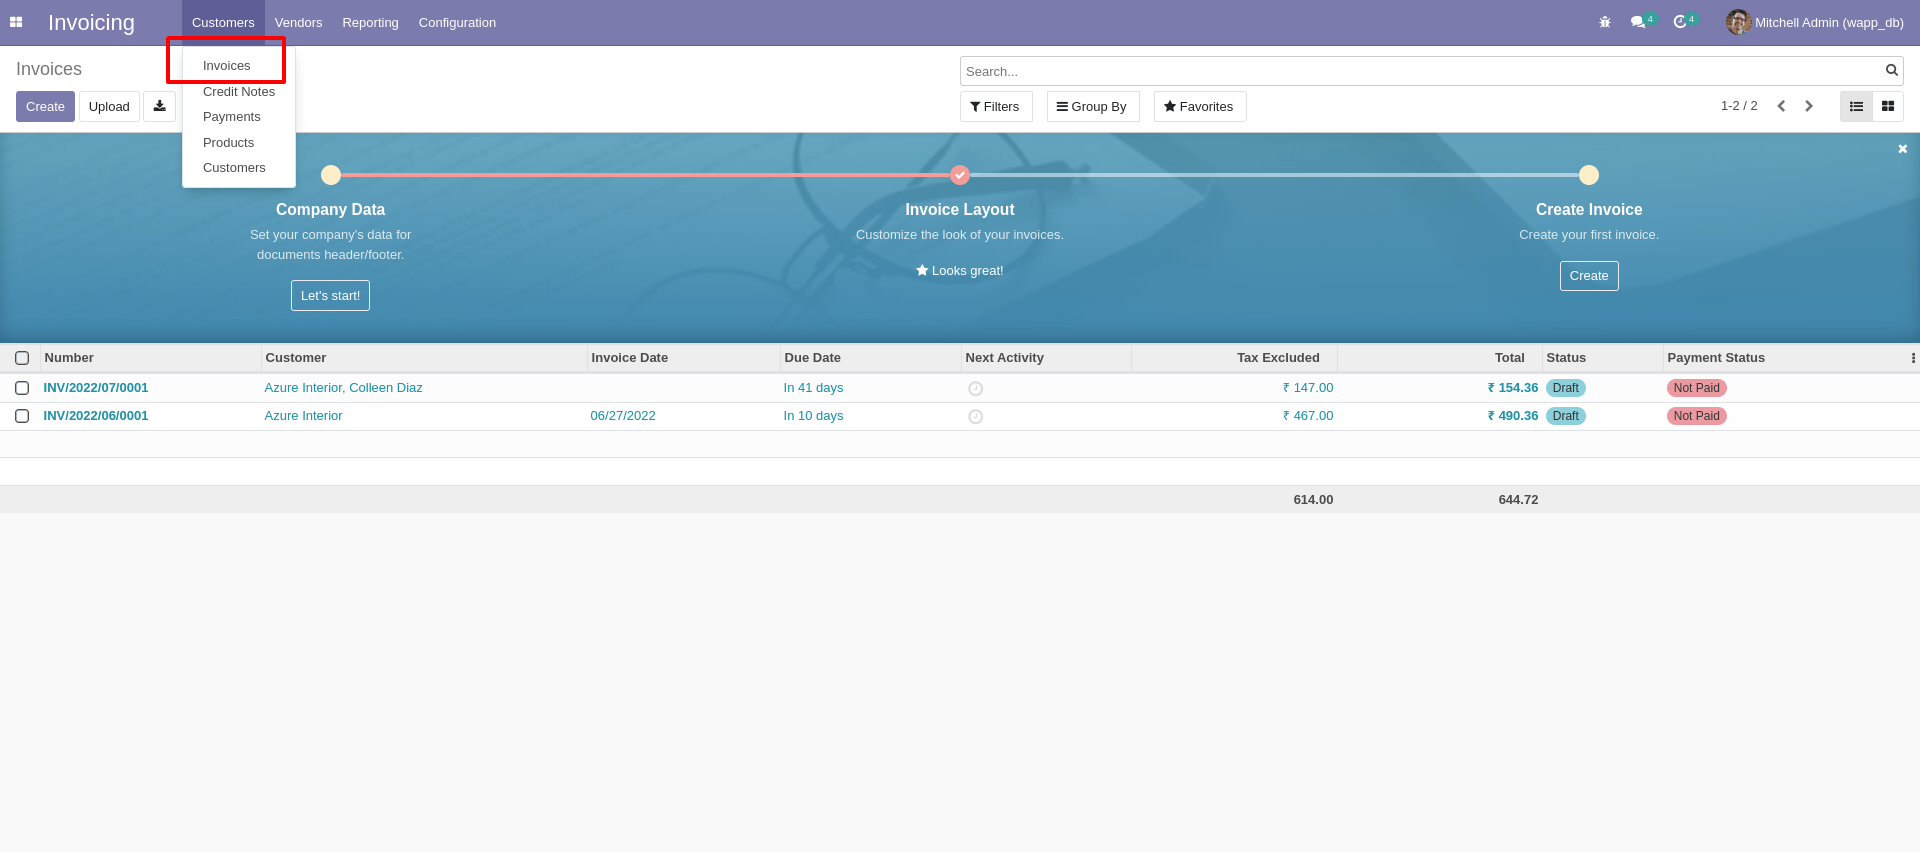
Step3: After selecting Invoice order, to send invoice order to customers valid WhatsApp number, please follow same process of Step3 from How to send sale order.
How to send Purchase Order with custom text message to customers valid WhatsApp number.
Step1: Go to Purchase and click on that,
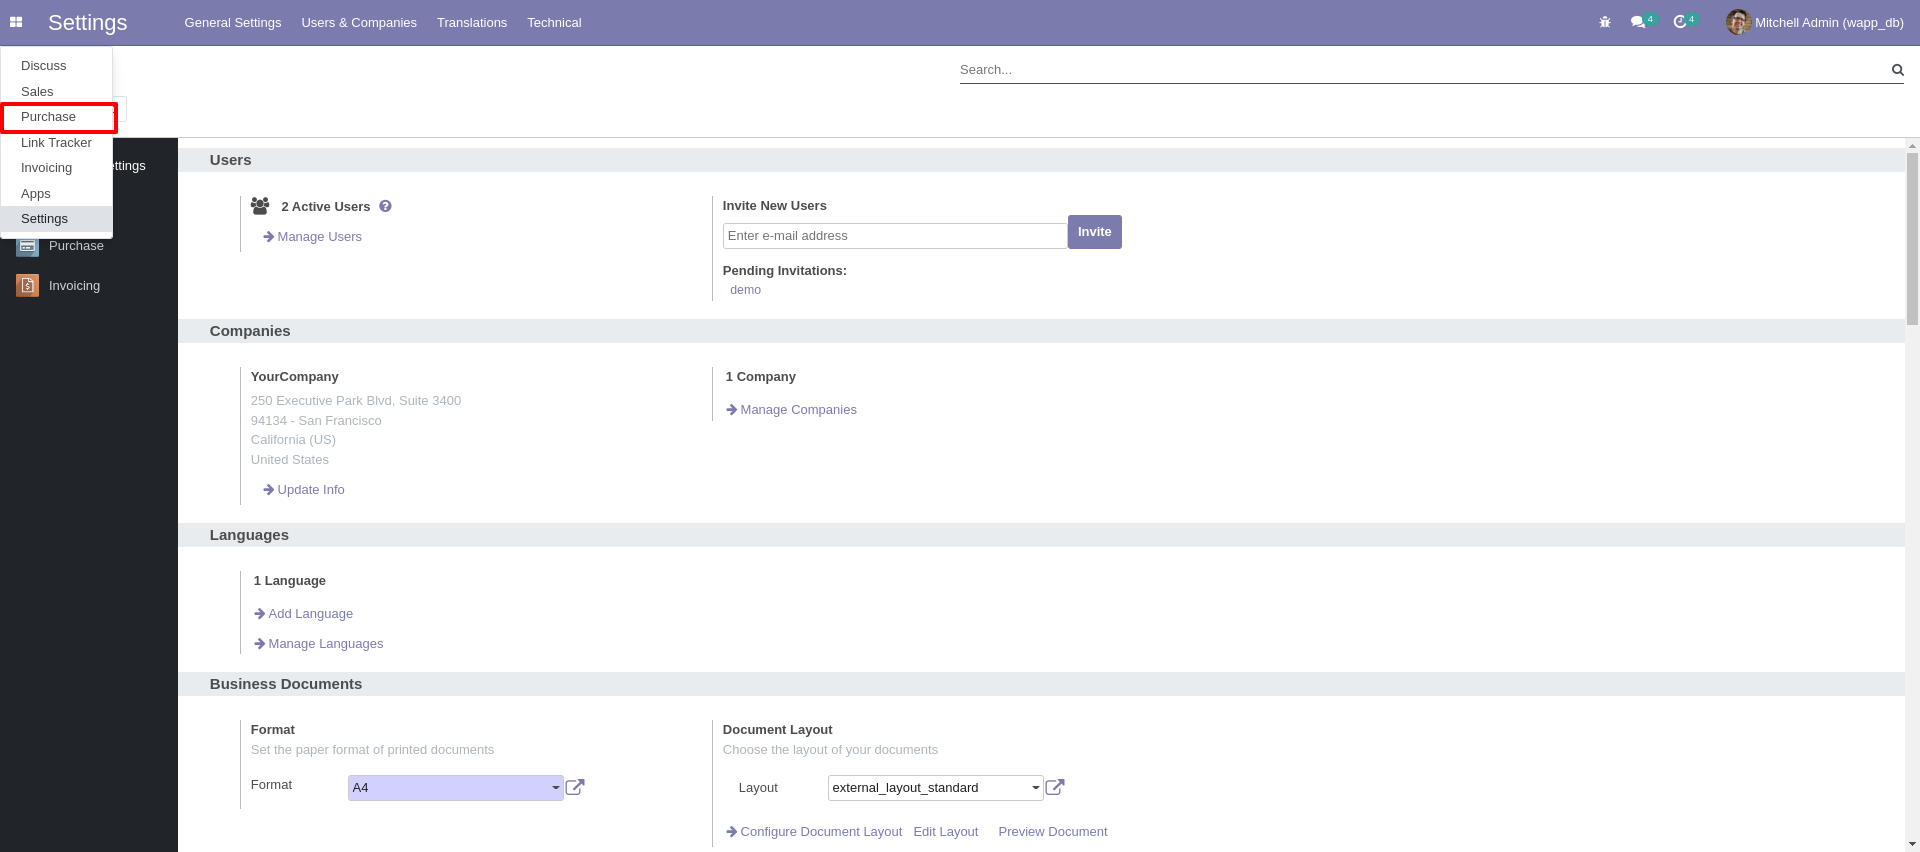
Step2: After clicking on sales click on ’Invoices’ and select Purchase order you want to send.
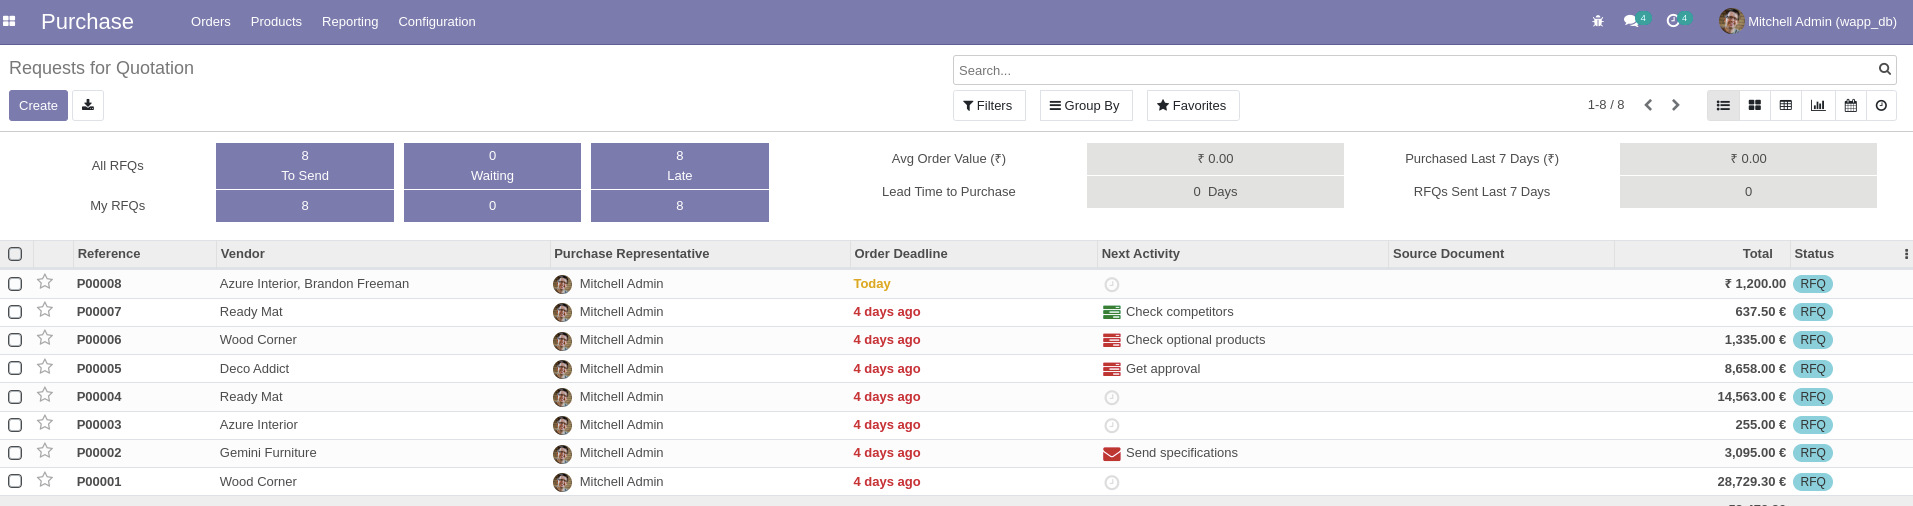
Step3: After selecting Invoice order, to send invoice order to customers valid WhatsApp number, please follow same process of Step3 from How to send sale order.
• For more information visit below link.
https://developers.facebook.com/docs/whatsapp/cloud-api/