How To Get FedEx Web Services Production Credentials
Ans: Follow the instructions listed below.
1] Go to https://developer.fedex.com/api/en-ph/home.html to access the FedEx Developer. Use your regular Fedex.com online login and password to get in.
Note: If you don’t have an online username and password, click on “Open an Account” .
2] Browse APIs to determine what you need for your application.
- Go to the API Catalog to determine the right APIs for your application.
- Select an API to discover its overview, change log and key features.
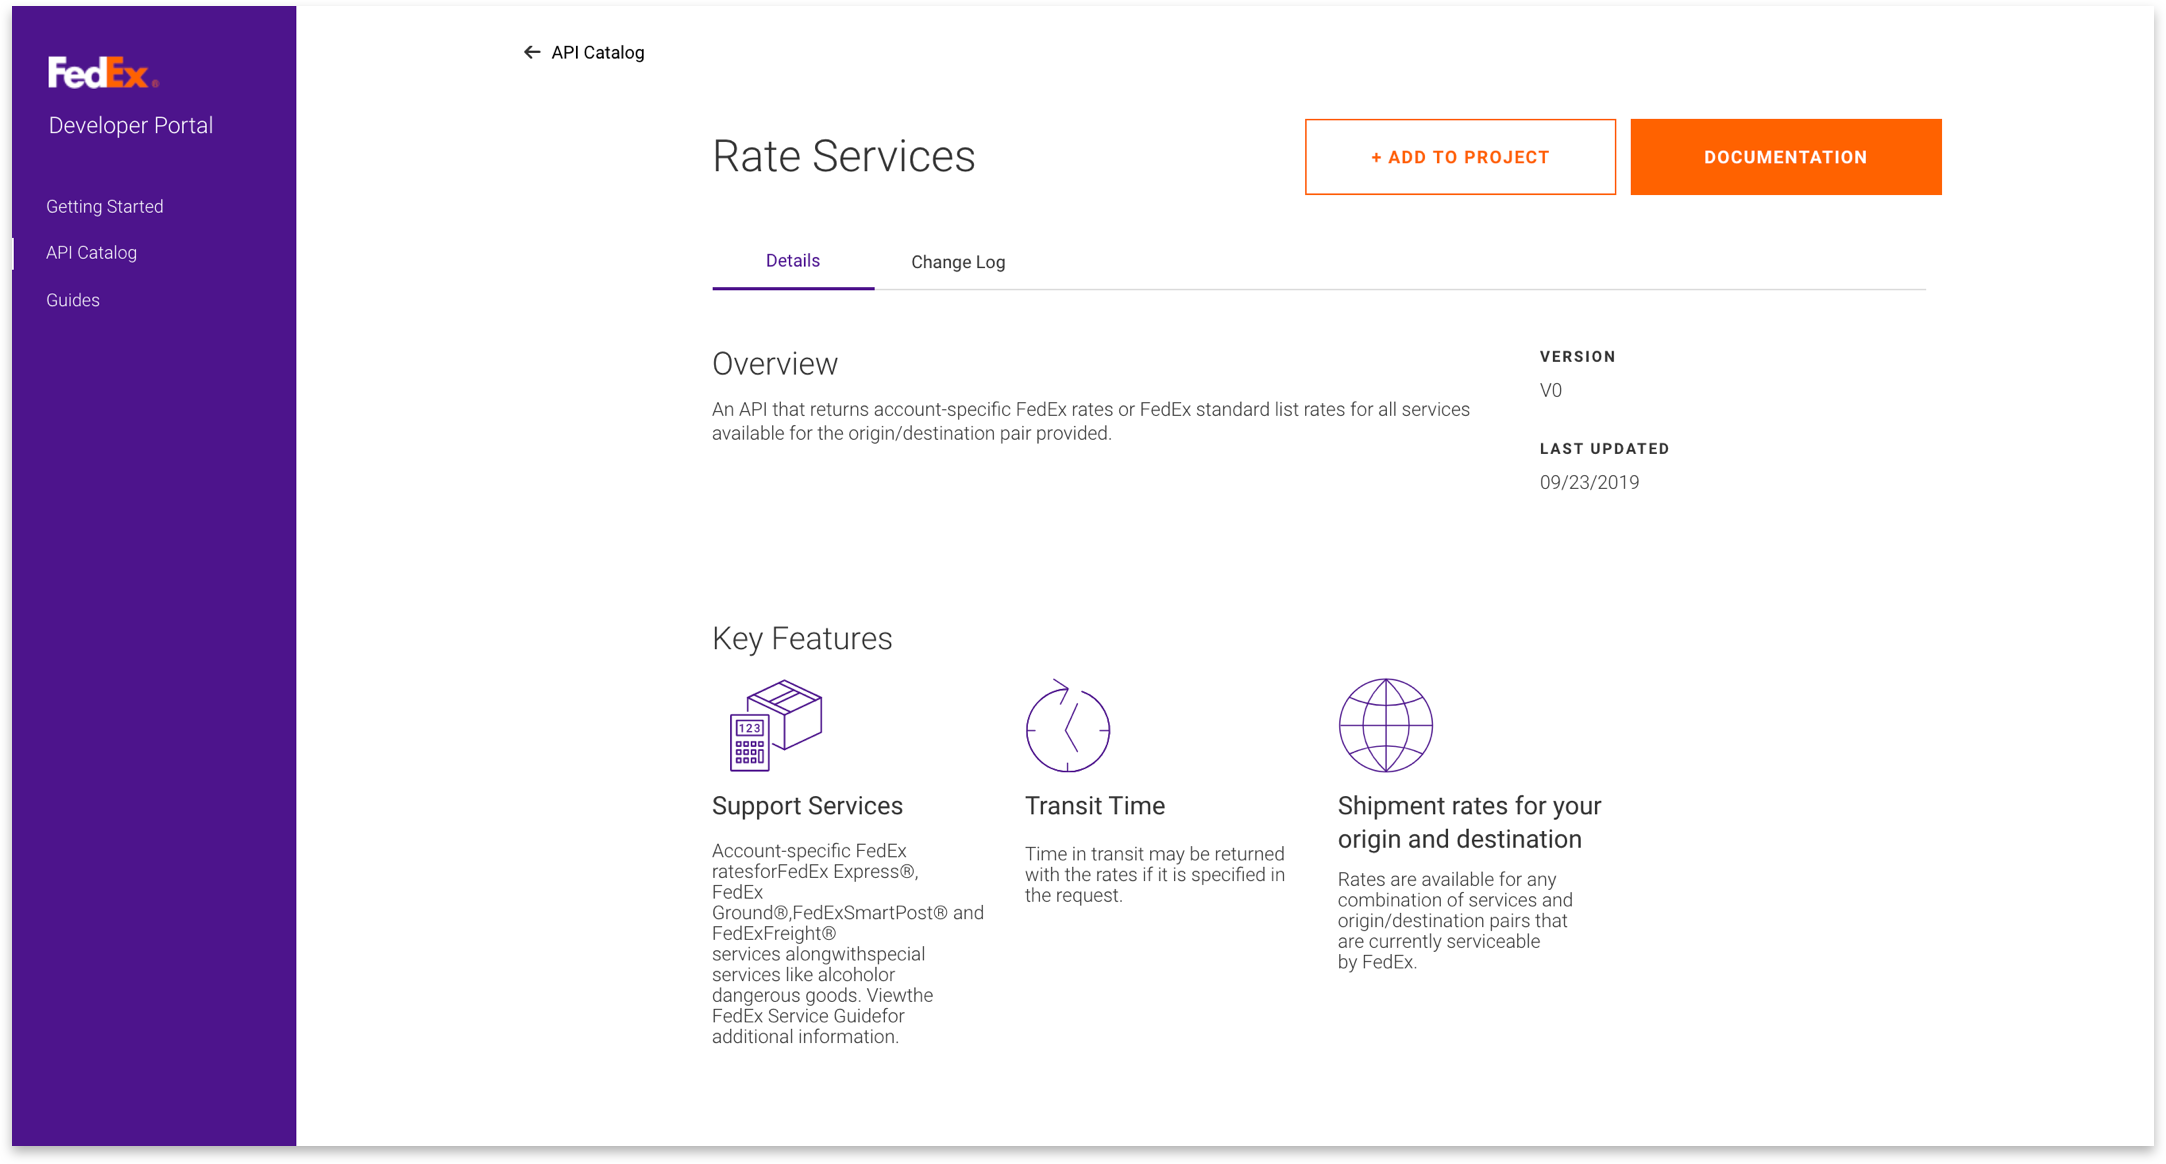
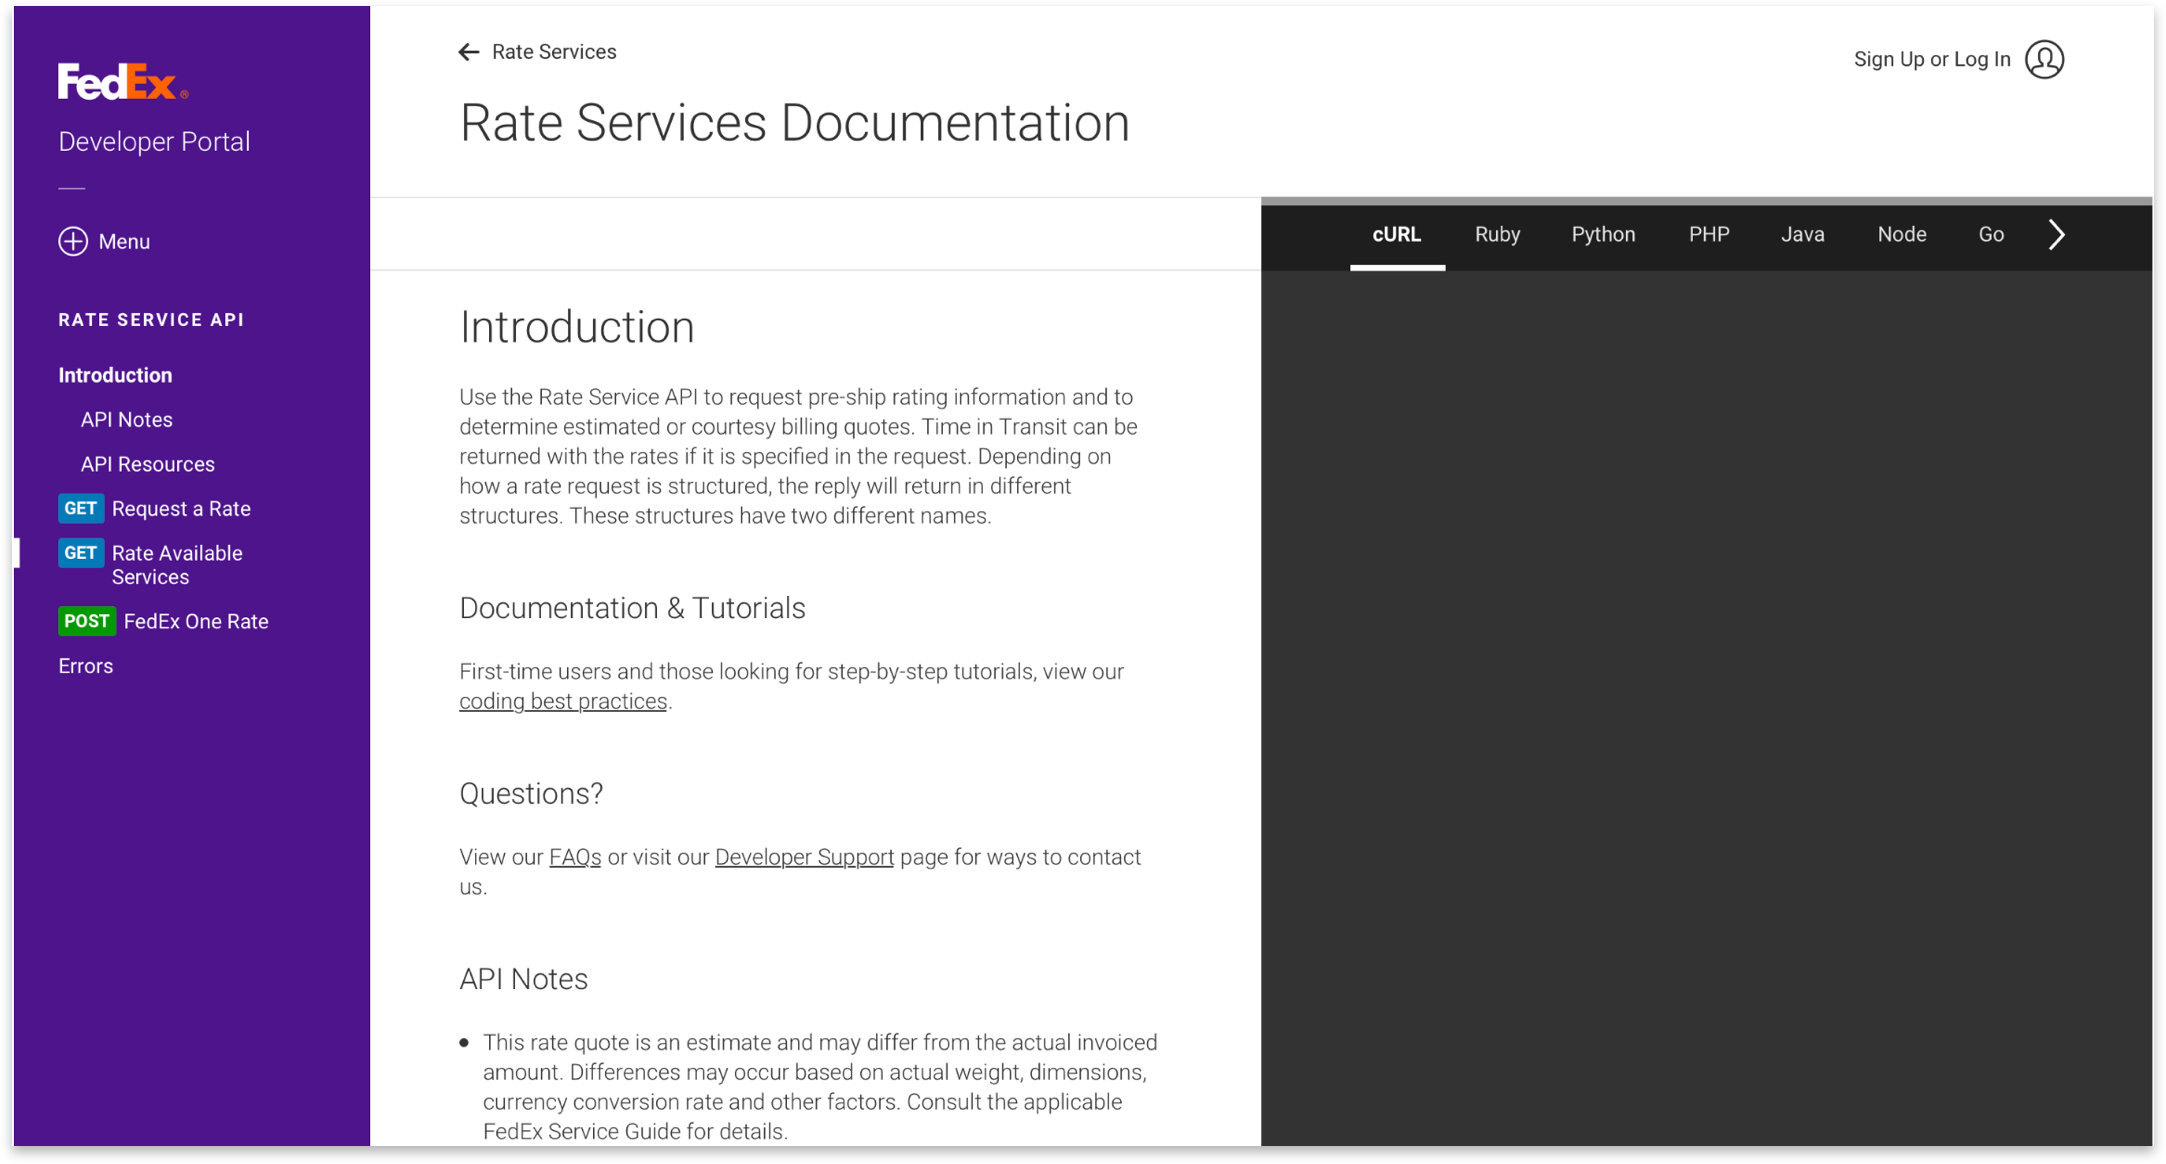
- View the API’s docs to learn more about request and response elements, examples in your programming language of choice, error codes and more.
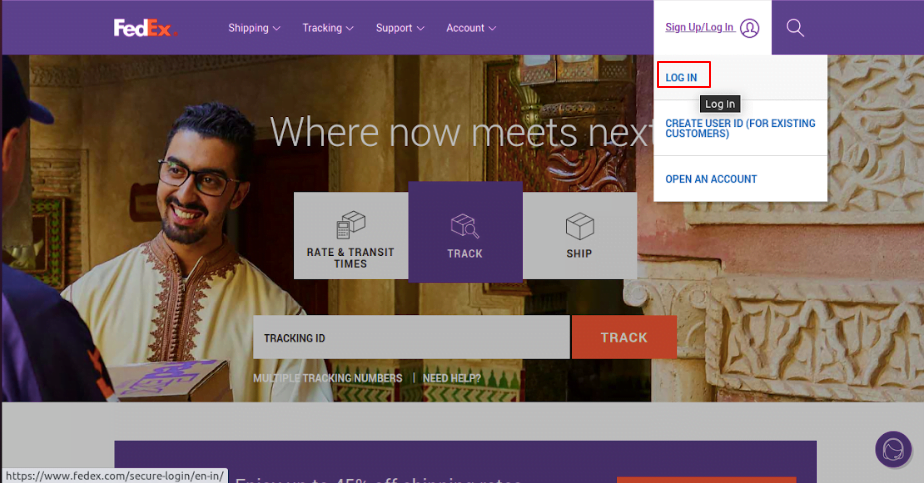
3] Sign up or log in to begin integrating with FedEx APIs.
- Log in with your fedex.com user ID and password to begin integrating with FedEx APIs.
- If you do not have a user ID yet, please sign up for free.
4 ] Create or join an organization.
Either create an organization if one does not yet exist for your company or join your company’s existing organization. You can have many users associated with your organization, but you cannot have many organizations associated with one user ID.
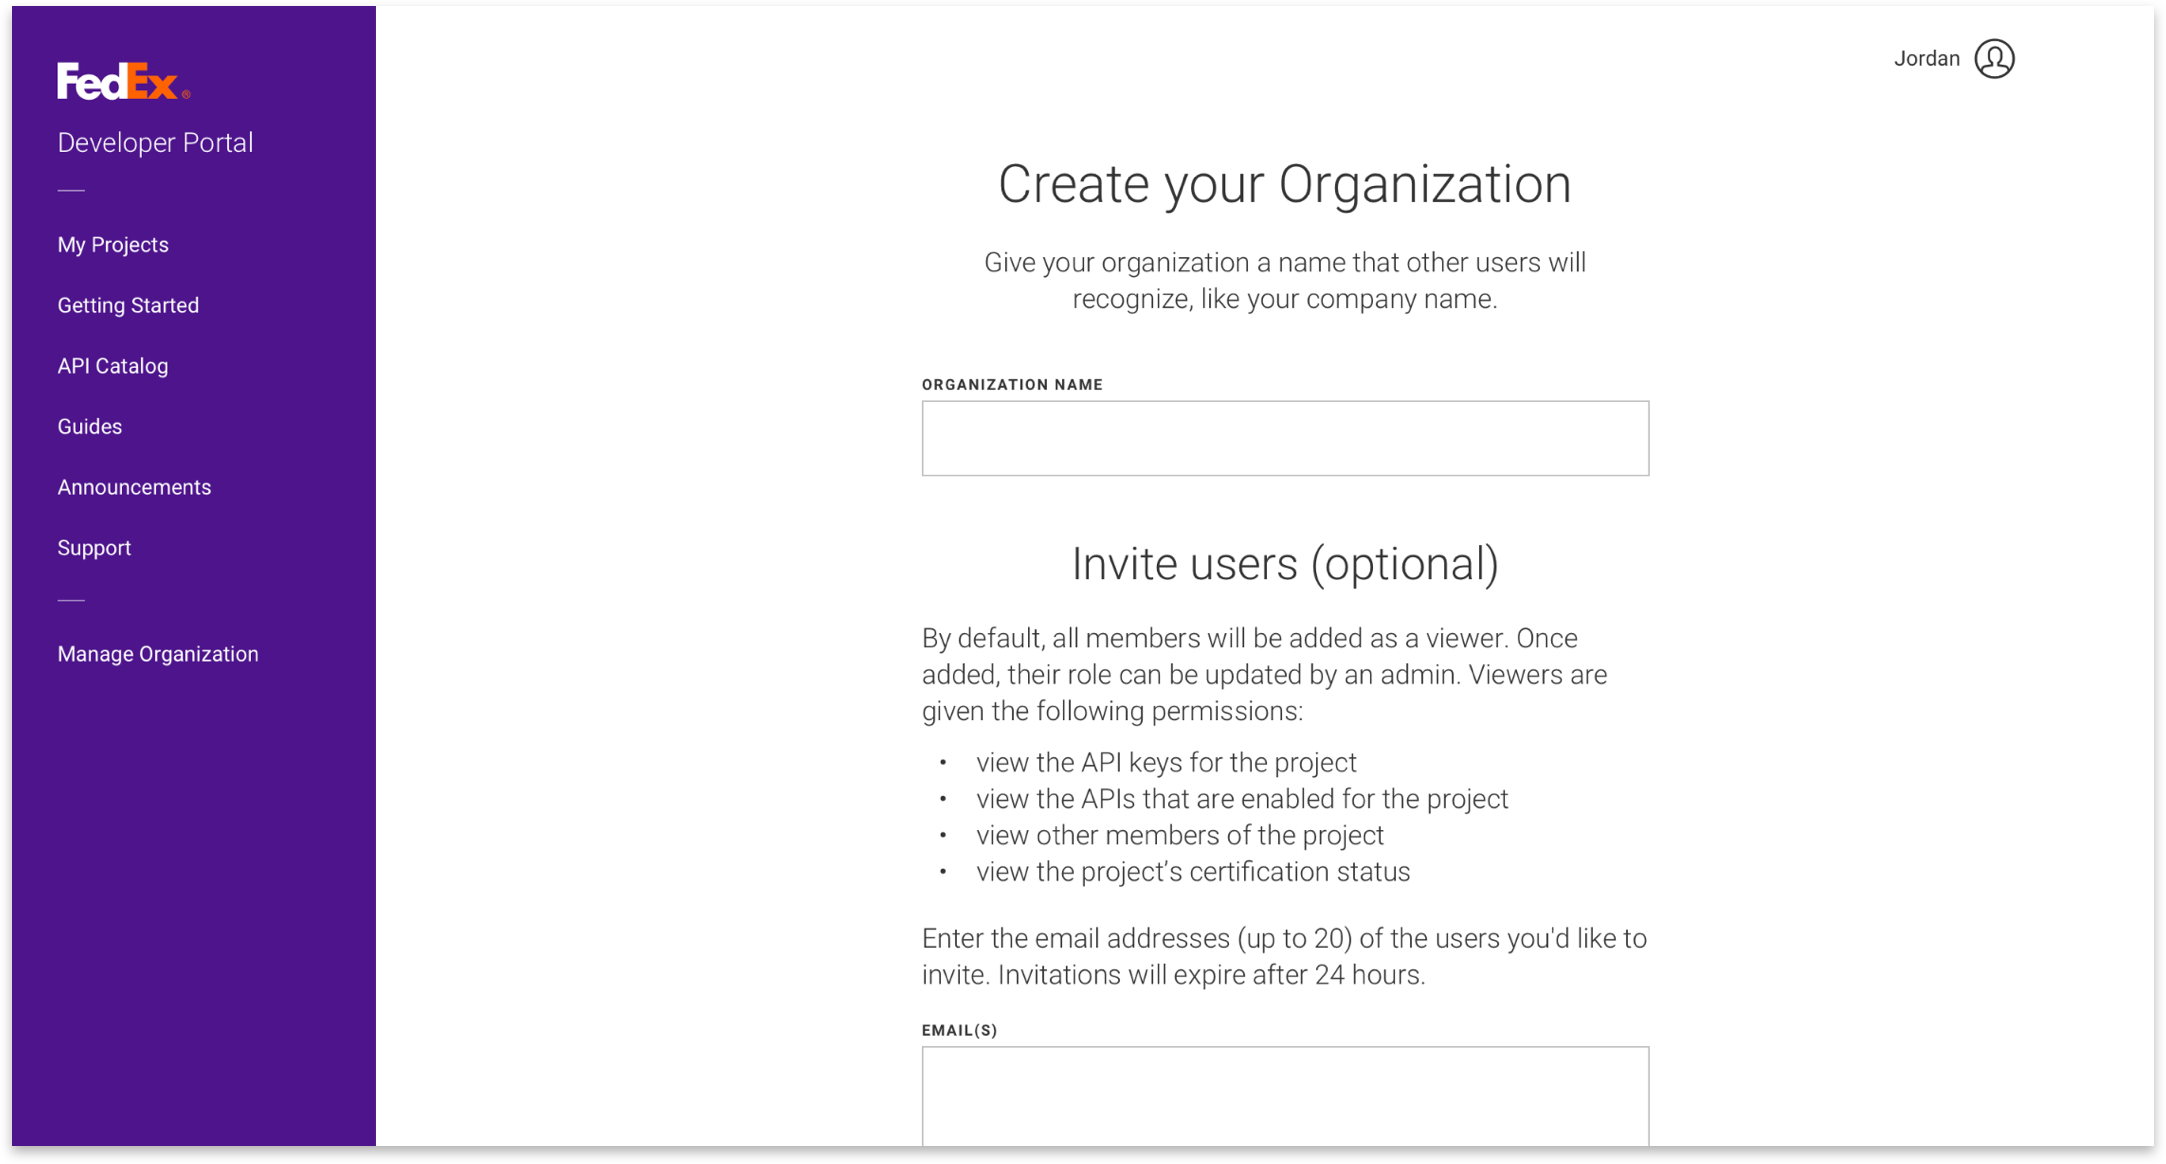
If you create your organization, you will automatically be listed as the Admin of that organization. An Admin can invite users to join their organization, assign them to roles and projects and manage shipping accounts. To learn more about which roles are best for whom, view our Organization Administration Guidelines. To create your own organization, click on My Projects and then click the “Create Organization” button. This button will only display if you have not associated your user ID with an existing organization yet. From there, you can start to create an organization by completing the following (those that are marked with an * are optional):
- Enter an organization name.
- Enter email addresses of any team members you would like to invite. They will automatically be added as a Viewer, associated with no projects.*
You can also join your company’s organization by completing the following:
- If your company already has an organization created, ask the Admin of the organization to invite you to join. You will have 24 hours to accept their invite, but if you miss this window of time, you can ask them to resend it.
- To accept the invite, you will need to either log in with your existing user ID and password or create a new one if your existing user ID is already associated to an organization.
5 ] Add a shipping account.
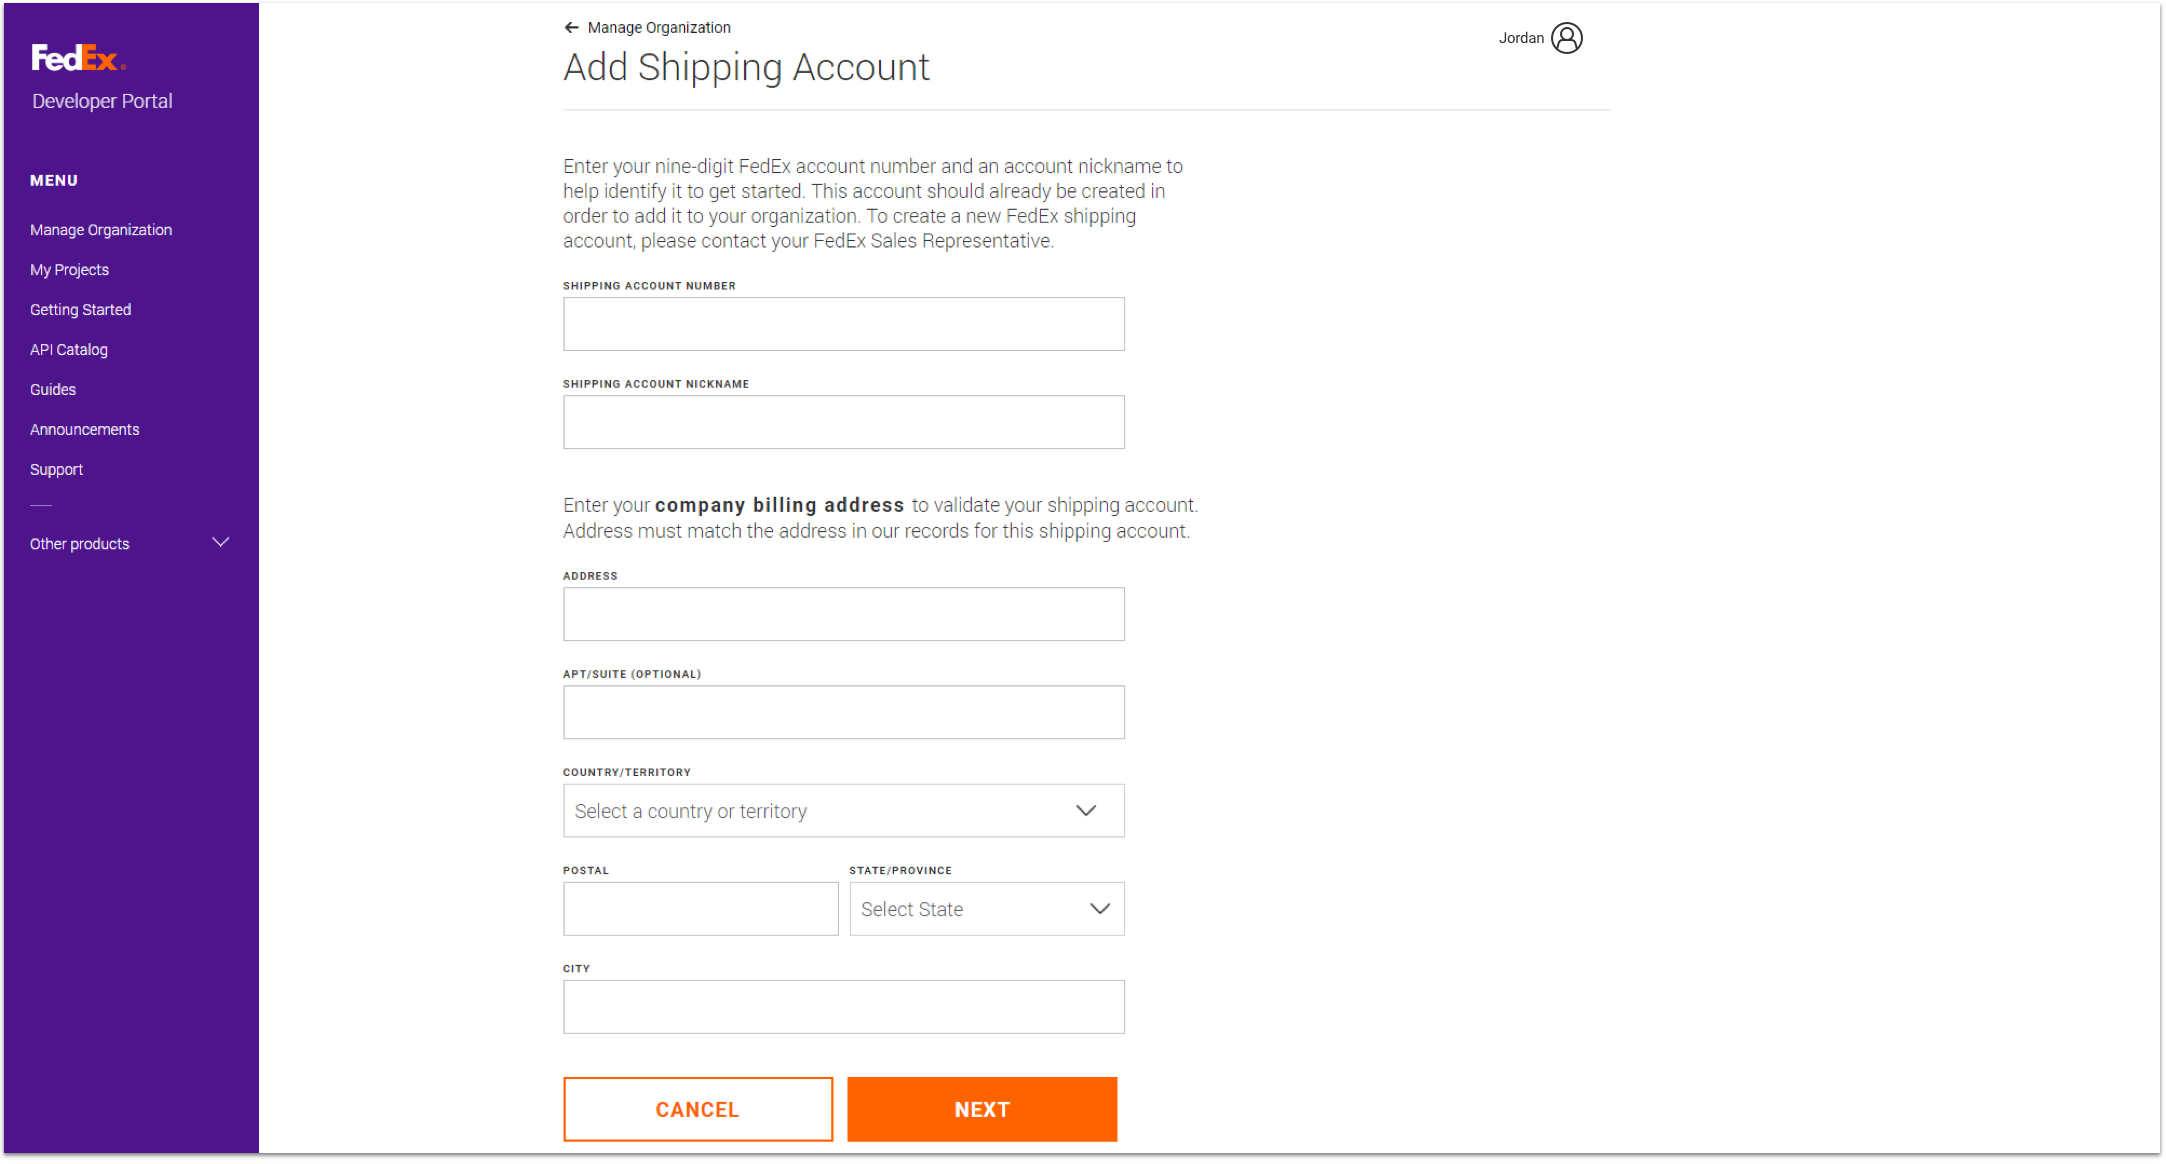
An admin can add as many shipping accounts as needed under the organization. To begin, click the “Add Account” button from the Shipping Accounts tab of the Manage Organization page. From there, you can add an existing shipping account to your organization by completing the following steps:
- Complete account information
- Enter your account number, any account nickname and billing address associated with the account. This will be validated to be sure it matches the account details in order to prevent fraudulent activities.
- To view shipping accounts associated with your user ID, go to the Ship Admin page. To create new shipping accounts, please contact your FedEx Sales Representative.

6 ] Add users to your organization to begin collaborating with your teammates.
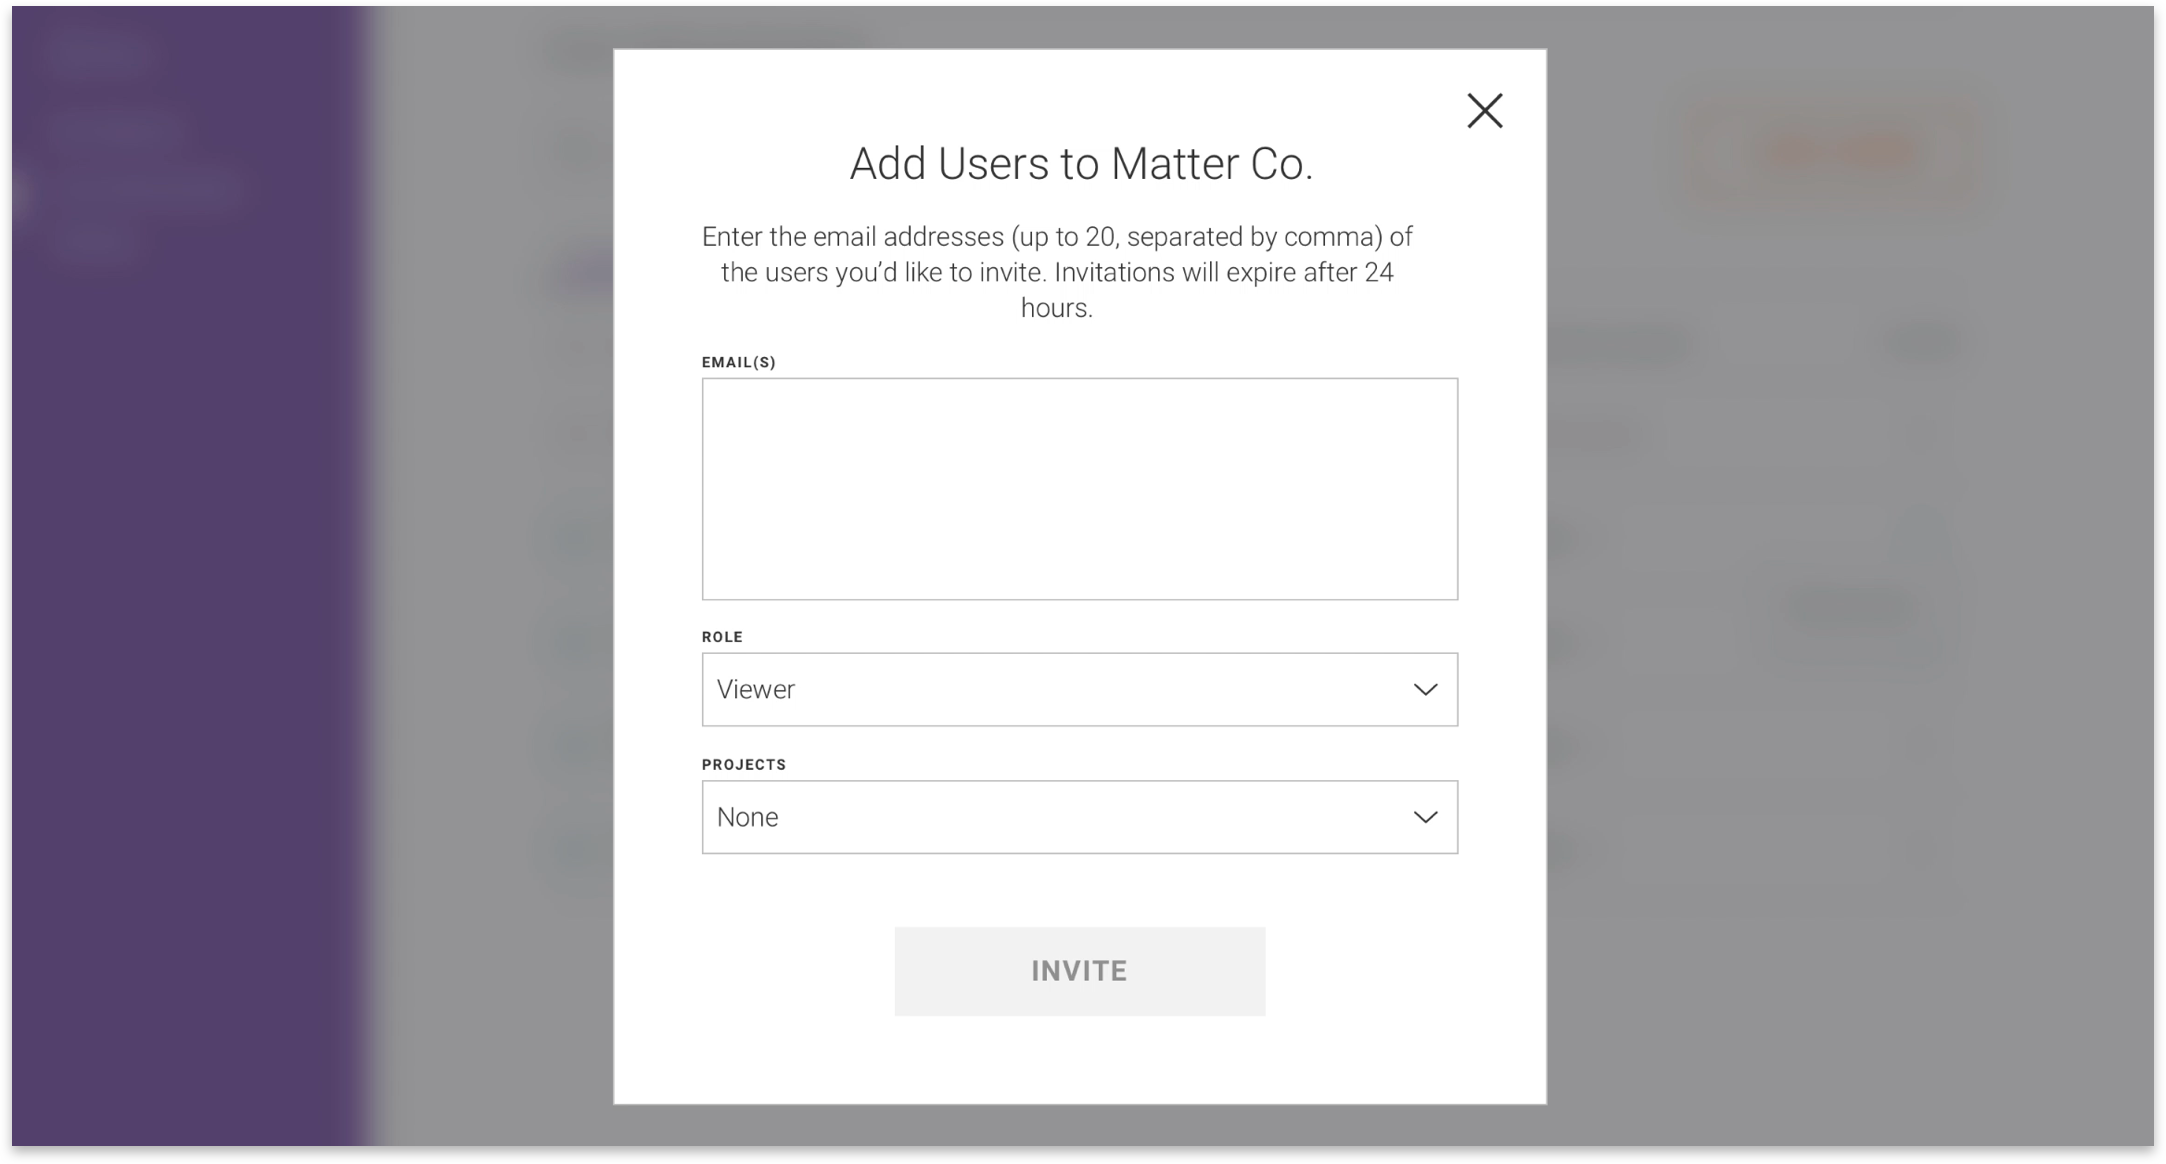
An Admin can invite users to their organization and assign them to roles and projects. To begin, click the “Add Users” button from the Users tab of the Manage Organization page. From there, you can add users by completing the following steps (those that are marked with an * are optional):
- Enter the email addresses of the user(s) needing to join your organization. Enter multiple email addresses by hitting a space, comma, semicolon or enter key on your keyboard.
- Choose a role if default option of Viewer doesn’t match the users’ needs.*
- Choose a project associated with your organization to assign users to. If you haven’t created one yet, that’s covered in the next step.*
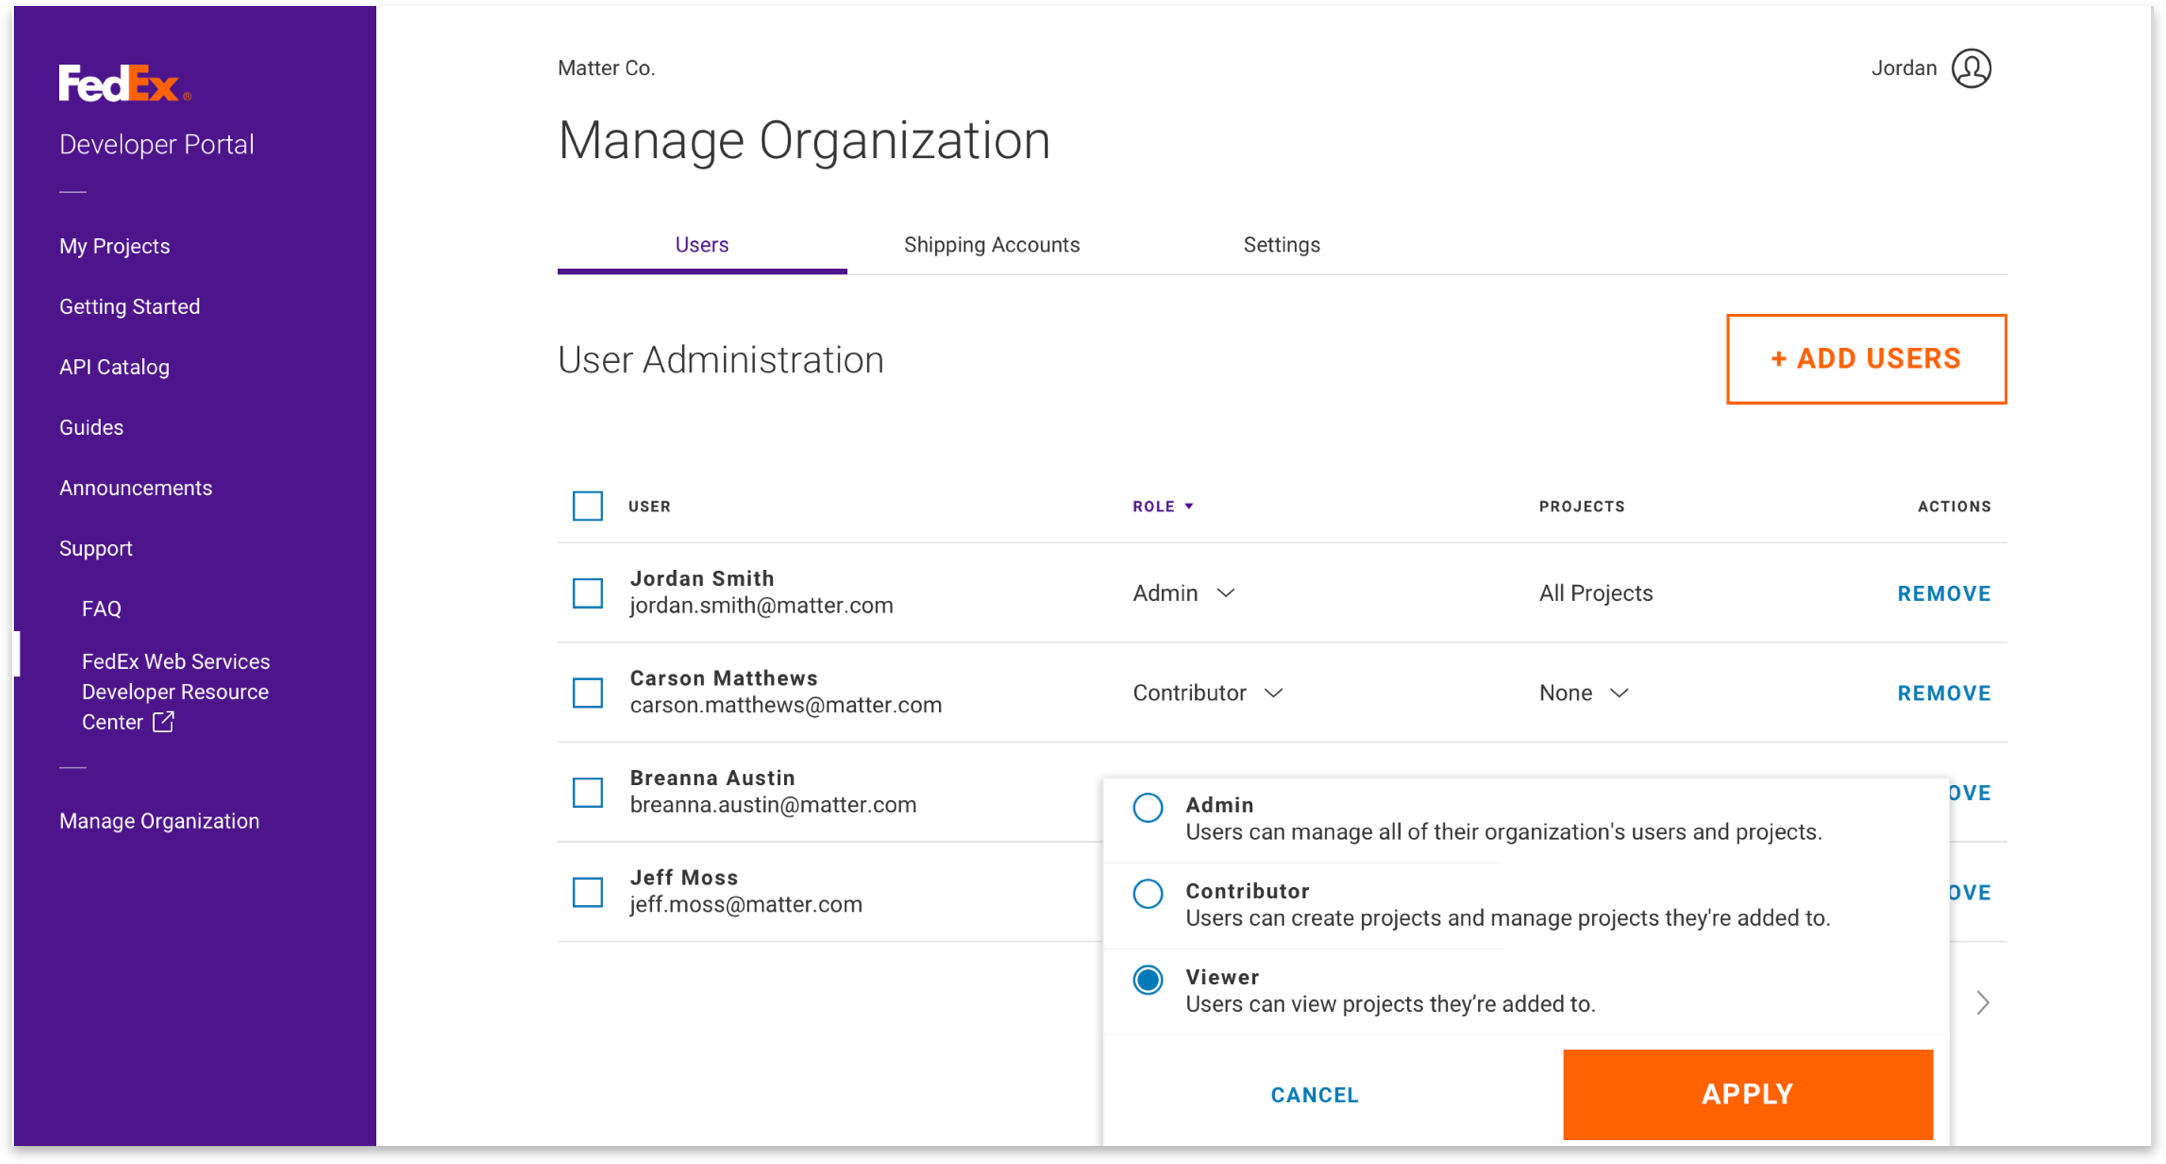
An Admin will always have access to all projects, but a Contributor or Viewer must be assigned to a project, unless the Contributor created the project. Whether a user has accepted the invite yet or not, you can quickly update their projects or roles straight from the Users tab on the Organization Administration screen. All you have to do is click on the caret beside the role or project and a dropdown will appear with options to choose from. Make your choice and select the “Apply” button to save your selection.
7 ] Create a project to get credentials.
- Set Up Project 1. Give your project an identifiable name that’s unique to your organization.
2. Begin by selecting at least one API to add to your project. You can always add or remove APIs later.

- Accept Terms
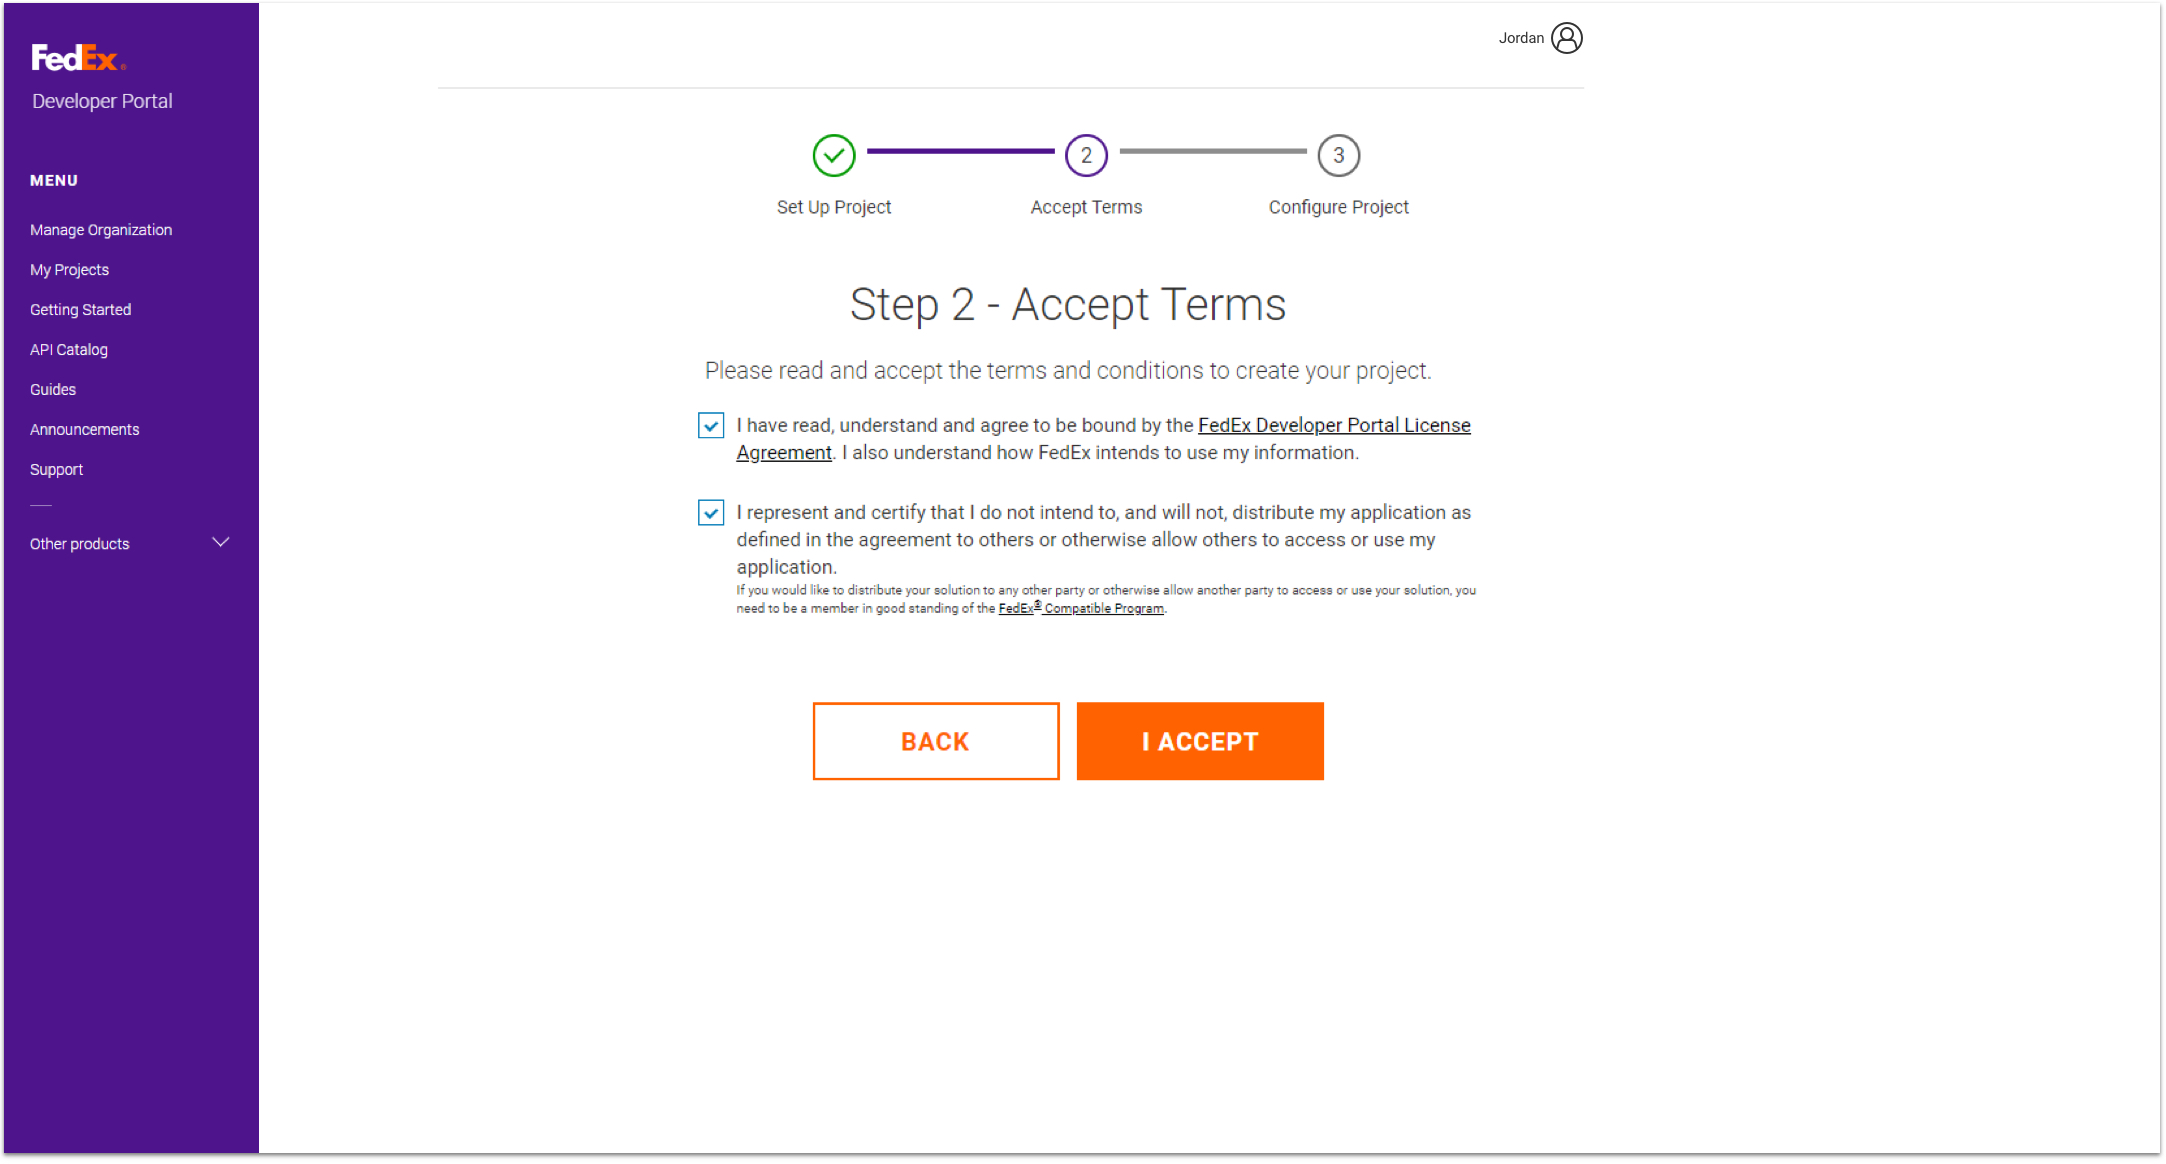
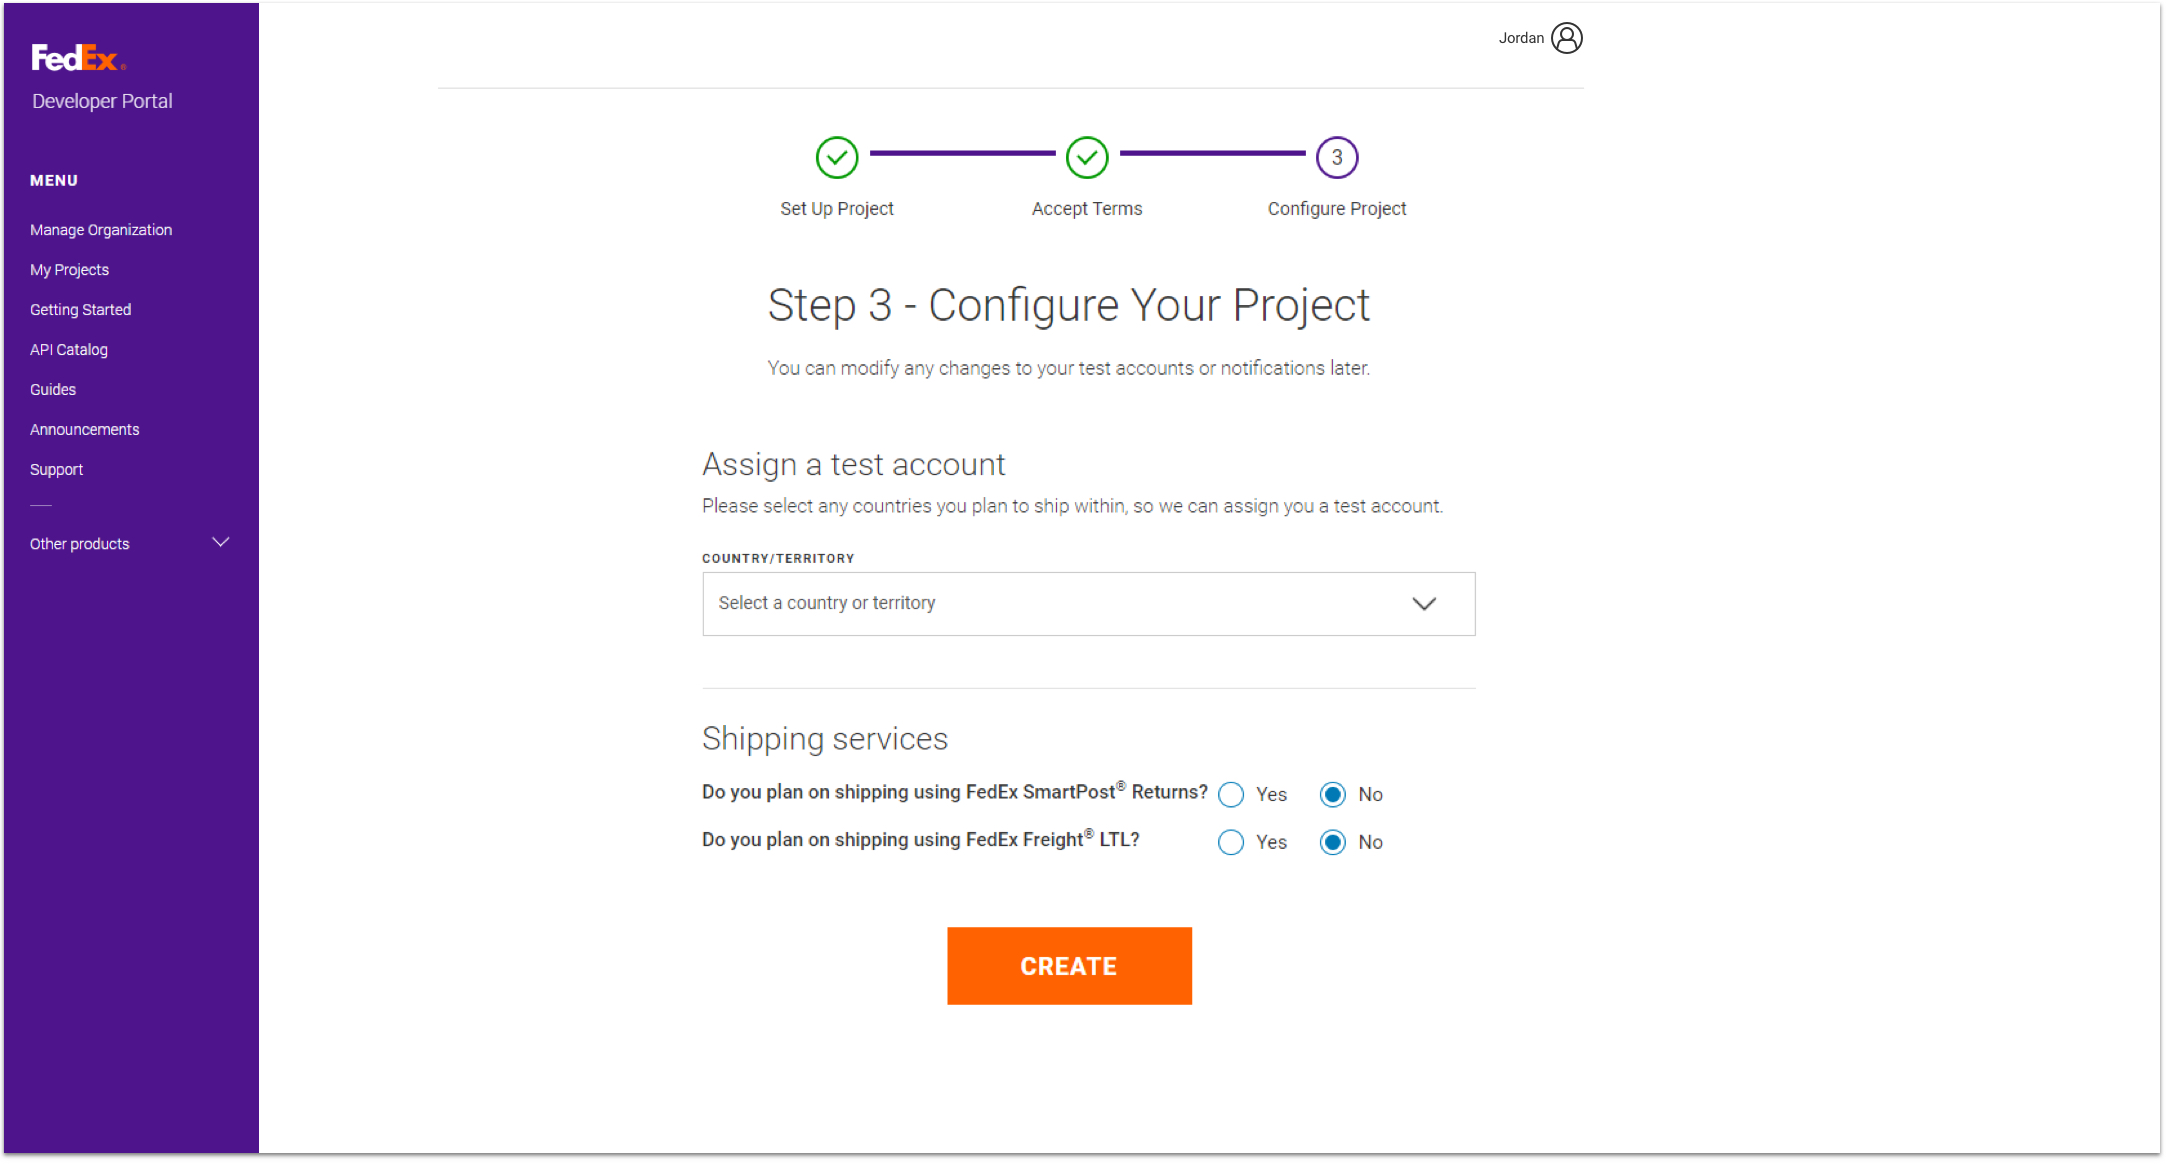
- Configure your project
- Select any countries you plan to ship within, so that we can assign you a test shipping account. To test shipping packages domestically within a European country, you must have a separate test account for each country. You can always add/remove countries at a later time.
- If you plan to use FedEx Ground® Economy Returns or FedEx Freight® LTL, select Yes.
- Once you click the “Create” button, you will see a confirmation screen. Within your new project, you can now view your test credentials.
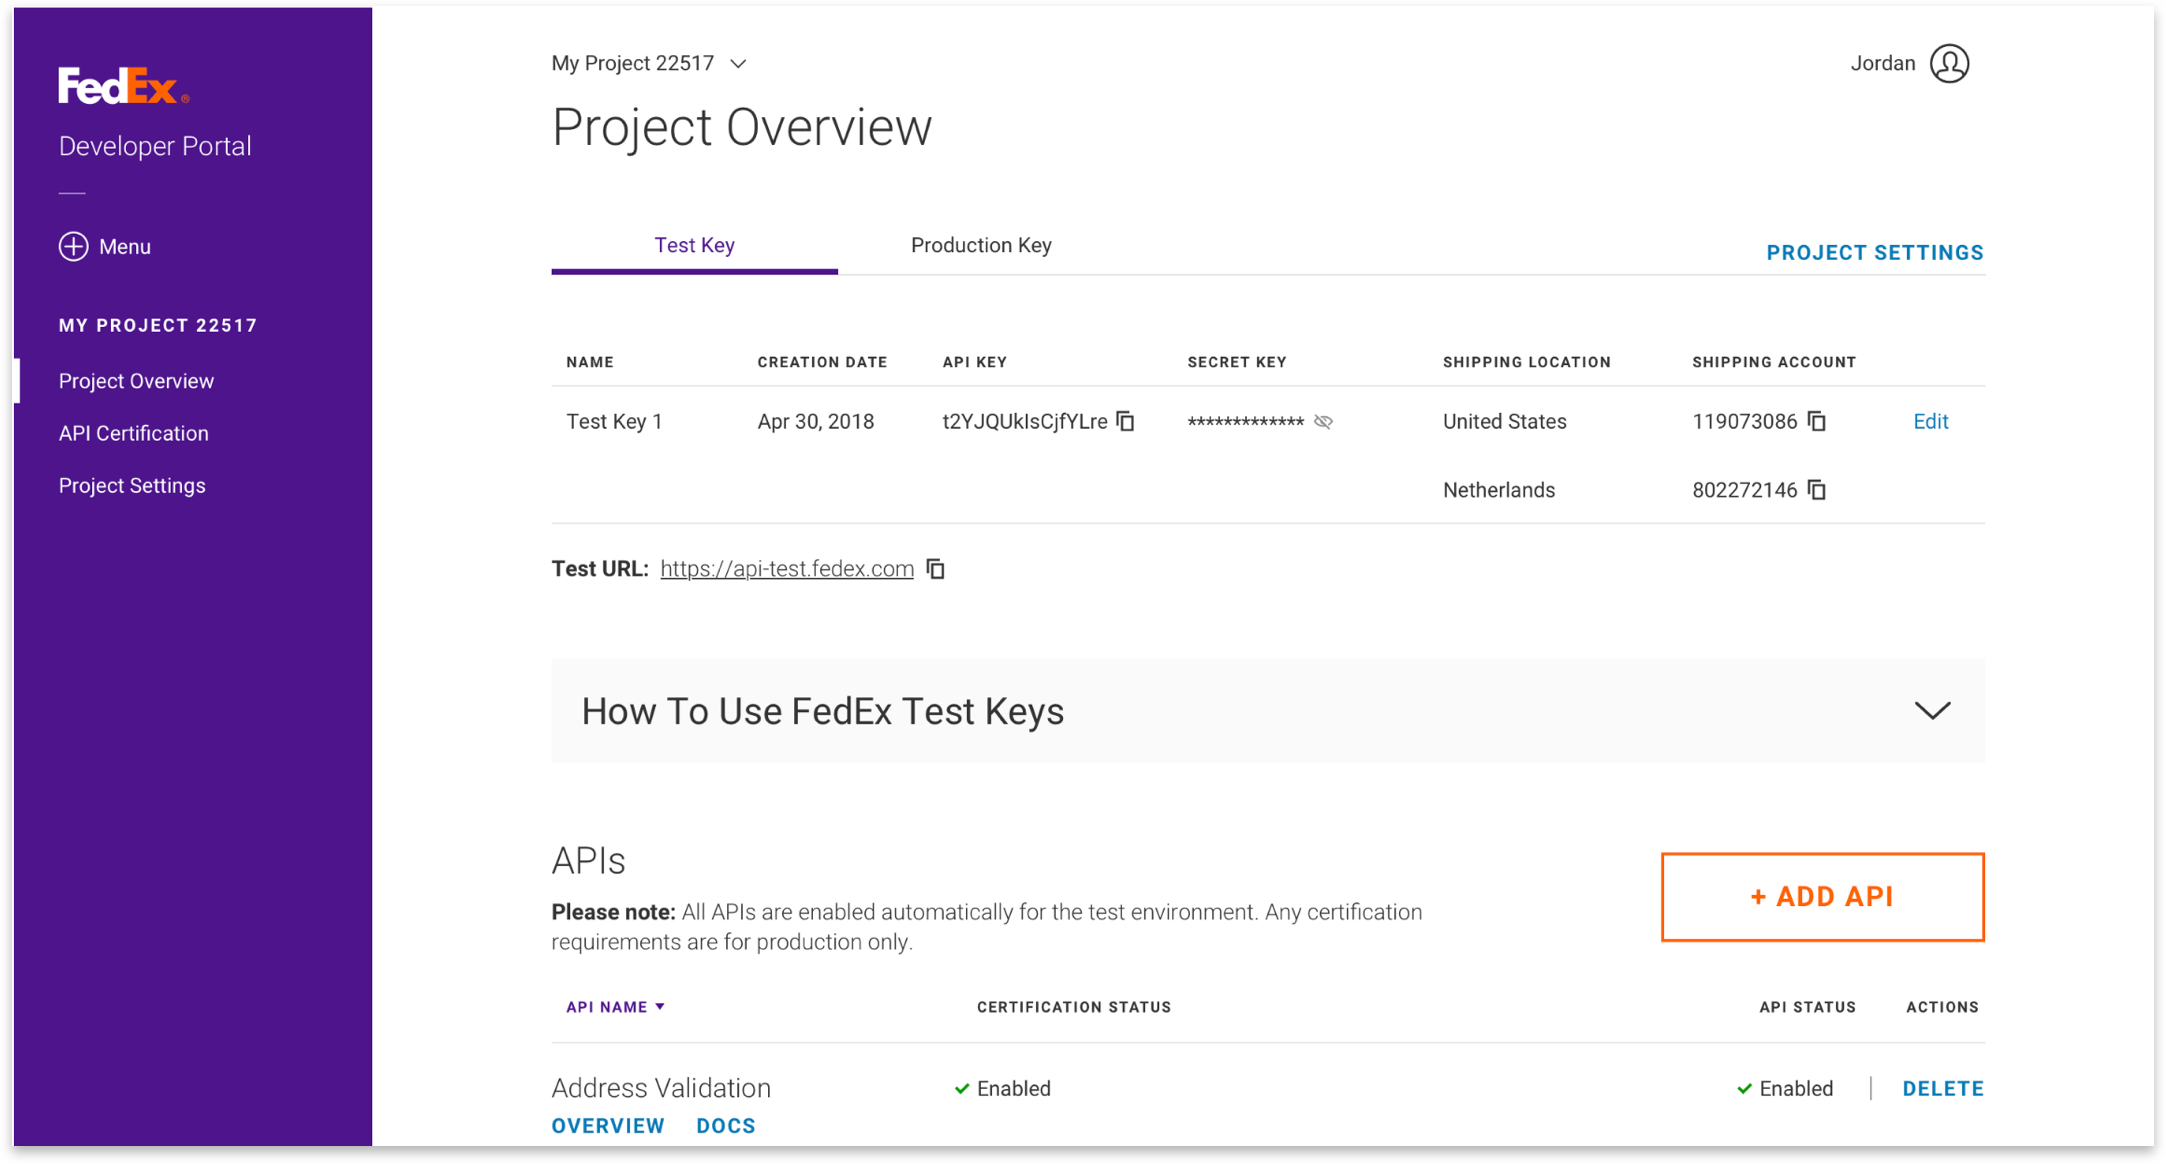
8 ] Integrate APIs into your application and test your implementation.
- Retrieve test credentials (API Key, Secret Key and shipping account(s)) from the Test Key tab of the Project Overview page.
- Request an OAuth access token that must be used with each API transaction. The session for the token is valid only for an hour, so you will need to programmatically code your application to refresh the token before the session expires. Refer to the API Authorization docs for more details.
- Select docs for the APIs on your Test Keys page and read the business context to best understand how to use the selected API. Review example requests for the endpoint that match your desired integration.
- Implement your calls to these endpoints as described in the example requests, configuring them to use your test credentials.
- Verify that the received API call responses are matching those shown in the documentation.
- Completely test your implementation within the FedEx test environment using test credentials and the FedEx test URIs.
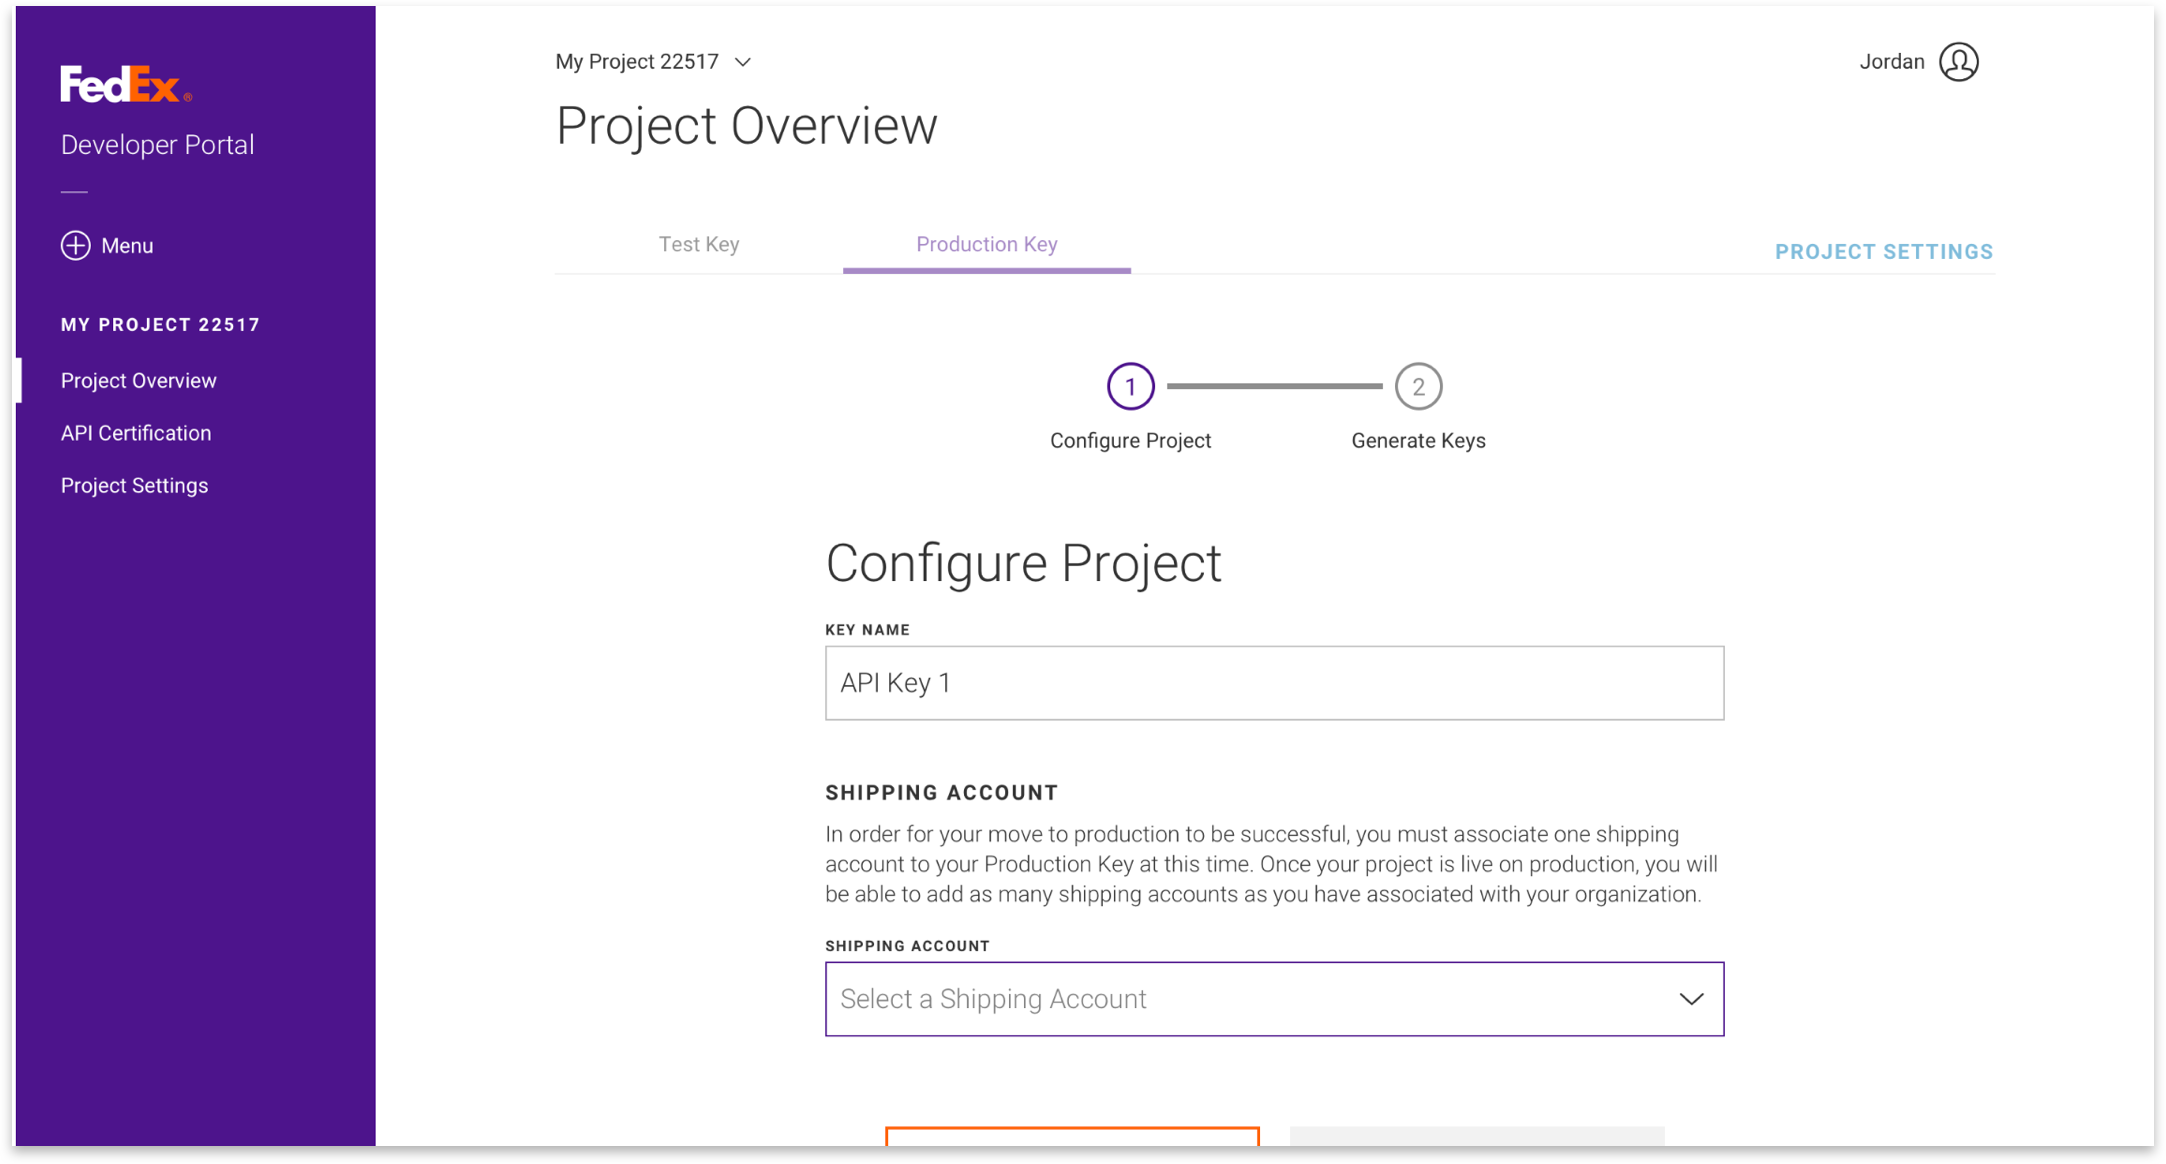
9] Move your project to production.
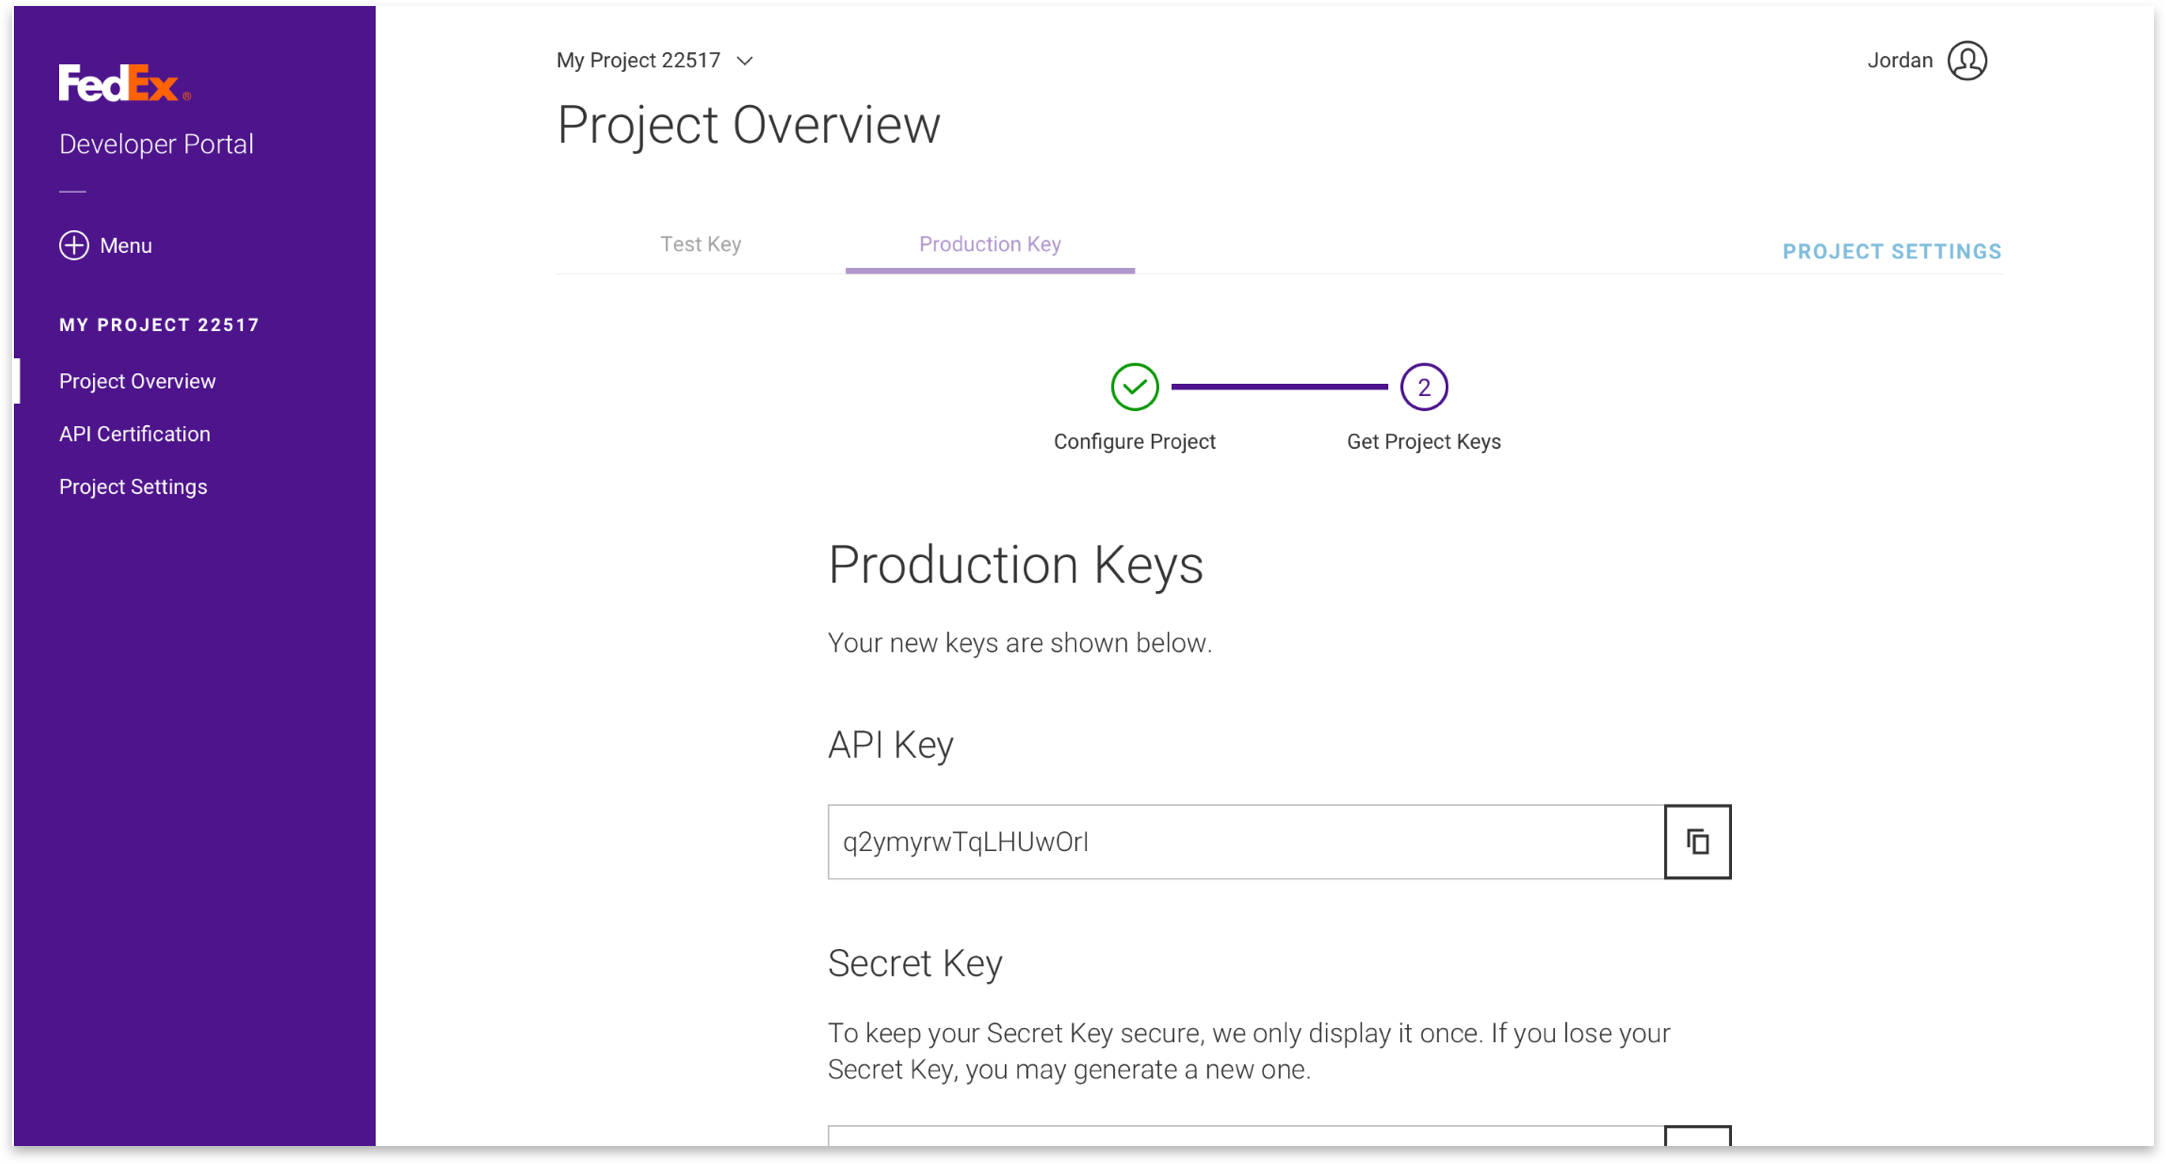
On the Project Overview page, click the Production Key tab. From there, you can start to move your project to production by completing the following steps (those that are marked with an * are optional):
- Configure Project.
- Rename your Production API Key.*
- One shipping account is required to be added at this time, but you can add more after your project has successfully been moved to production. If you have no shipping accounts associated with your organization or if the EULA has not been signed for shipping accounts that are added to your organization, they will not appear in the dropdown.
- Get Project Keys.
- Next, your production API Key and production Secret Key will be displayed. Make sure to copy them to a secure place.
- To keep your production Secret Key secure, we only display it once. If you lose it, you may generate a new one.
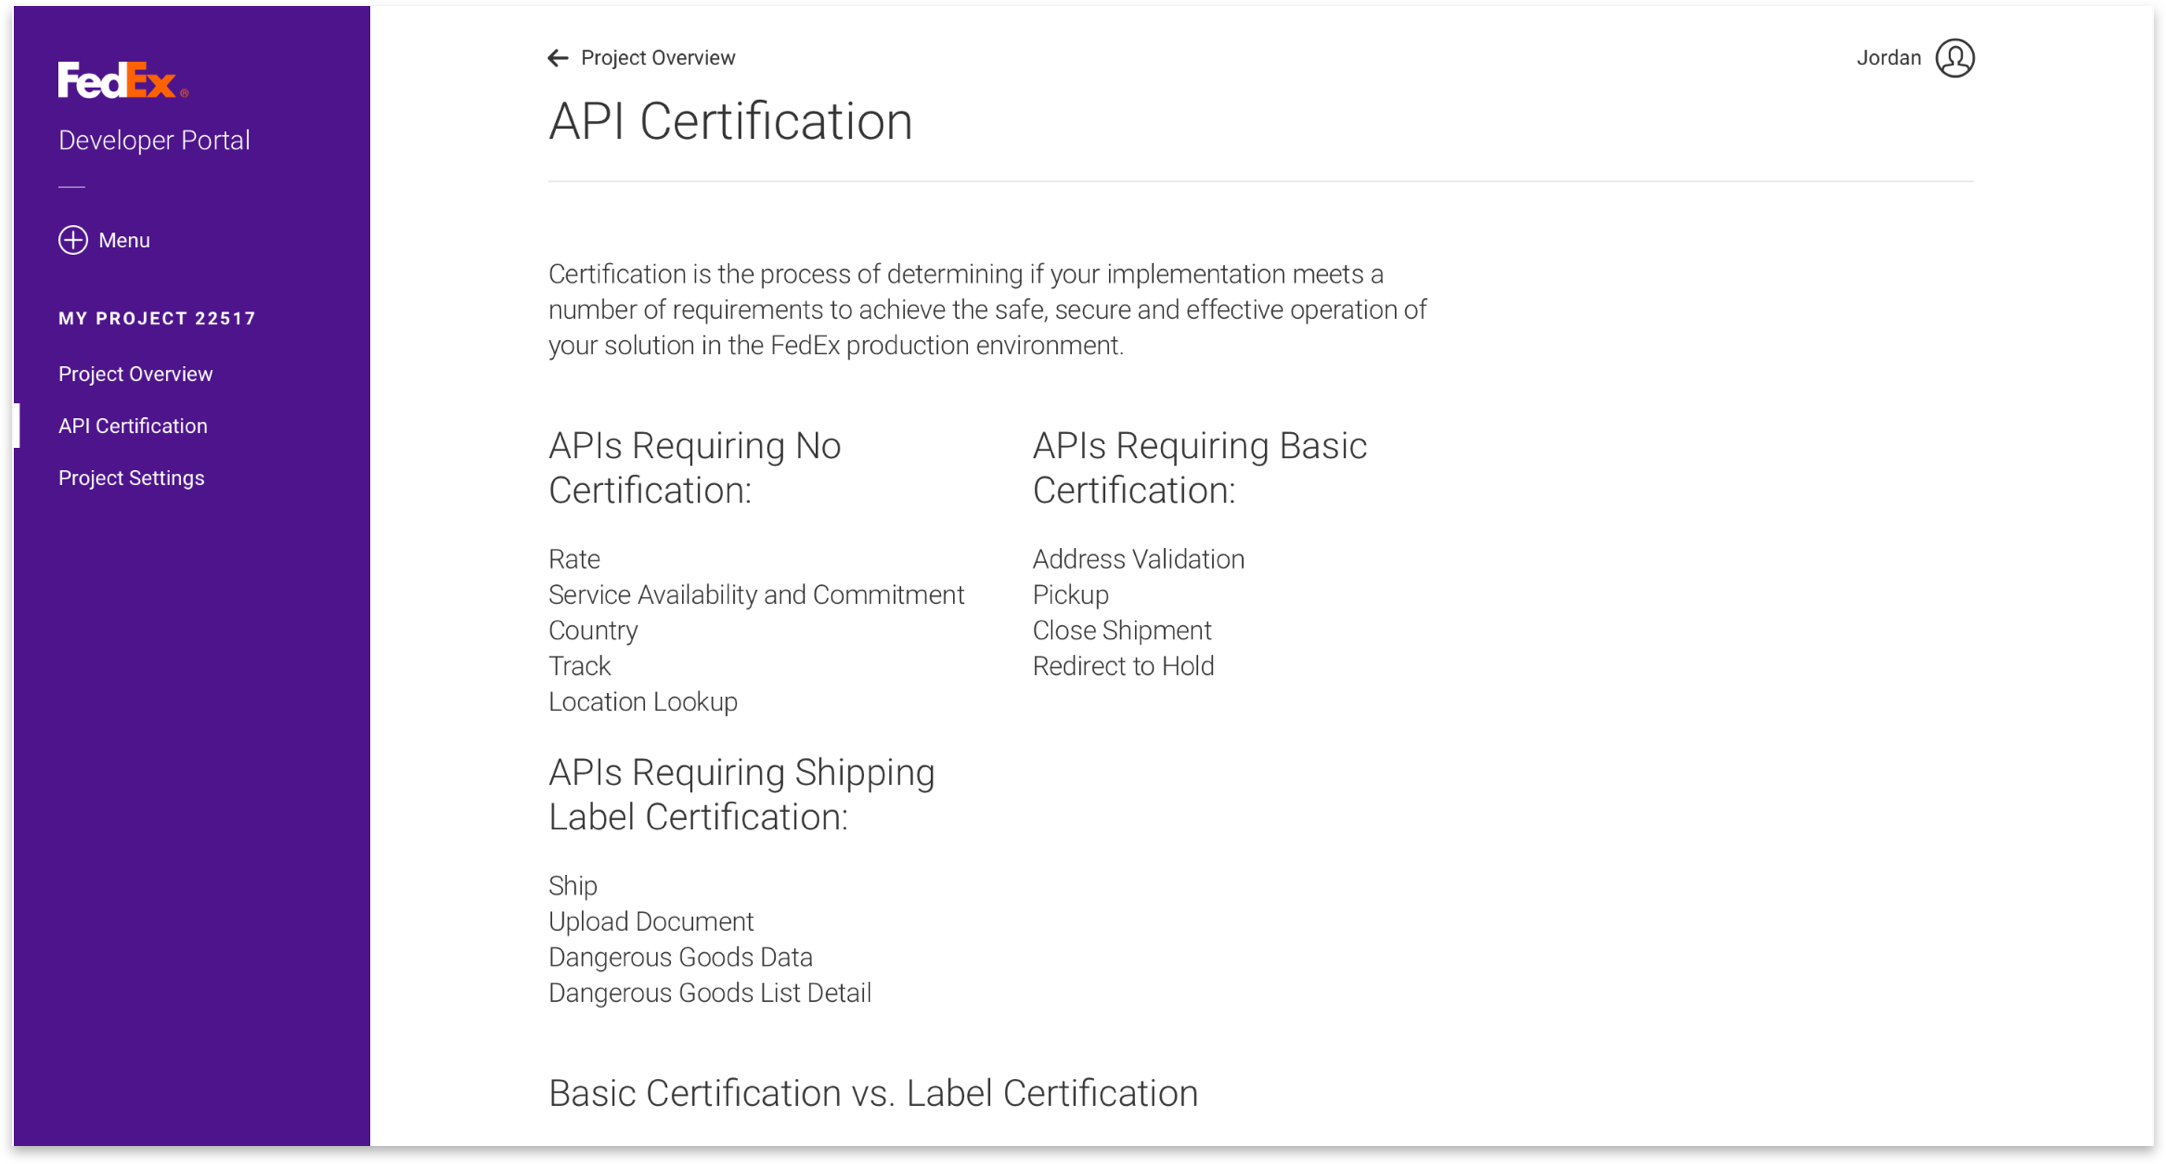
10 ] Complete your integration.
Some APIs require either basic or shipping label certification for use in our production environment. Complete the certification process for any APIs in your project with this requirement.
- After all APIs have been certified and enabled, update your API requests by replacing the test URIs, keys and shipping accounts with the production URIs, keys and shipping accounts
- Retest your implementation in the production environment using sample data.
- Enjoy the benefits of your new integration!
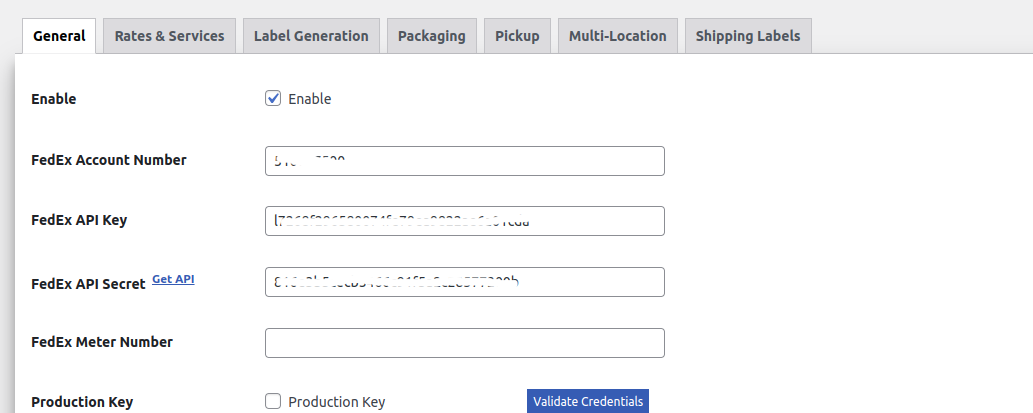
11 ] To save your FedEx Web Services credentials in WooCommerce Shipping Pro for FedEx, Go to Woocommerce>Settings>Shipping>FedEx > General Enter your credentials in your respective fields.
Then click on “Validate Credentials” after that hit the “Save” button.