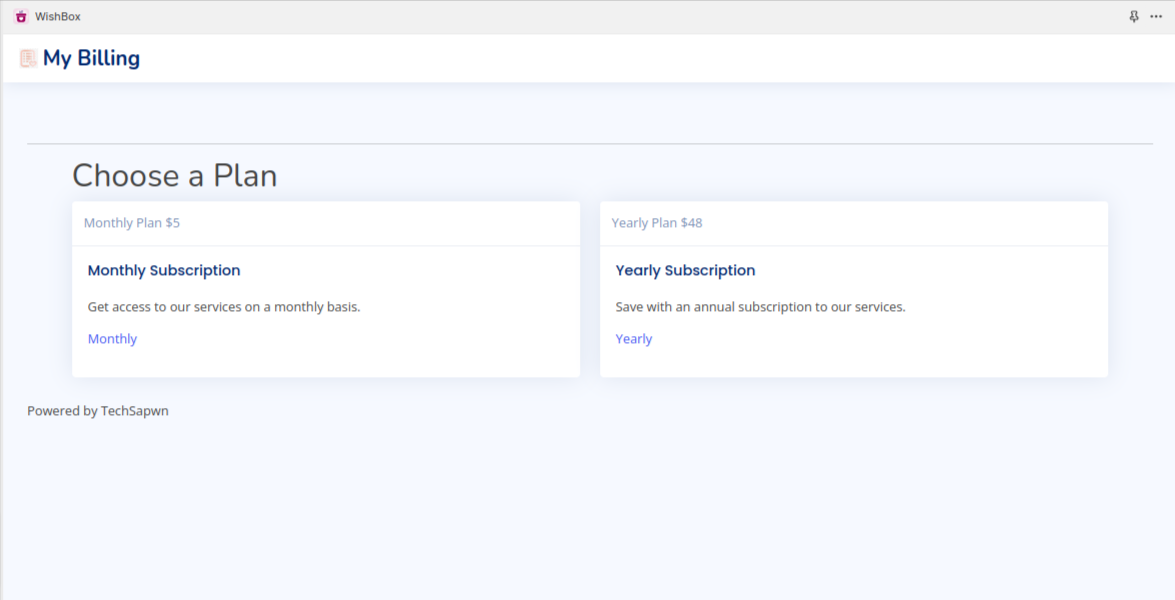
- Choose a plan: Your initial step is to select the plan that best suits your needs—either the monthly plan or the yearly plan.
2.
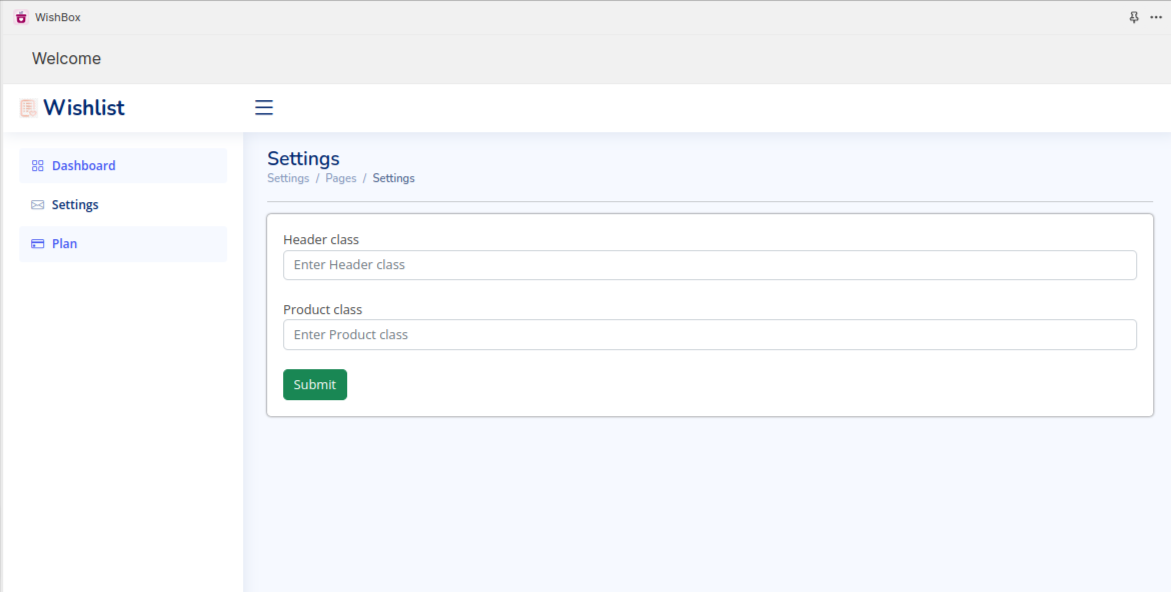
2.1 Header icon class for wishlist: “Kindly provide the class name associated with the wishlist icon in the header.”
- Steps to find Header Class Name –
a. Log in to your Shopify Admin:
Open your web browser, go to your Shopify store’s URL (e.g., yourstorename.myshopify.com/admin), and log in to your Shopify admin panel.
b.Open the Header Section:
In the Theme Editor, you should see a live preview of your store on the right side. On the left side, you’ll find a list of sections and settings. Look for the section labeled “Header” or “Header and Navigation.” Click on it to expand its settings.
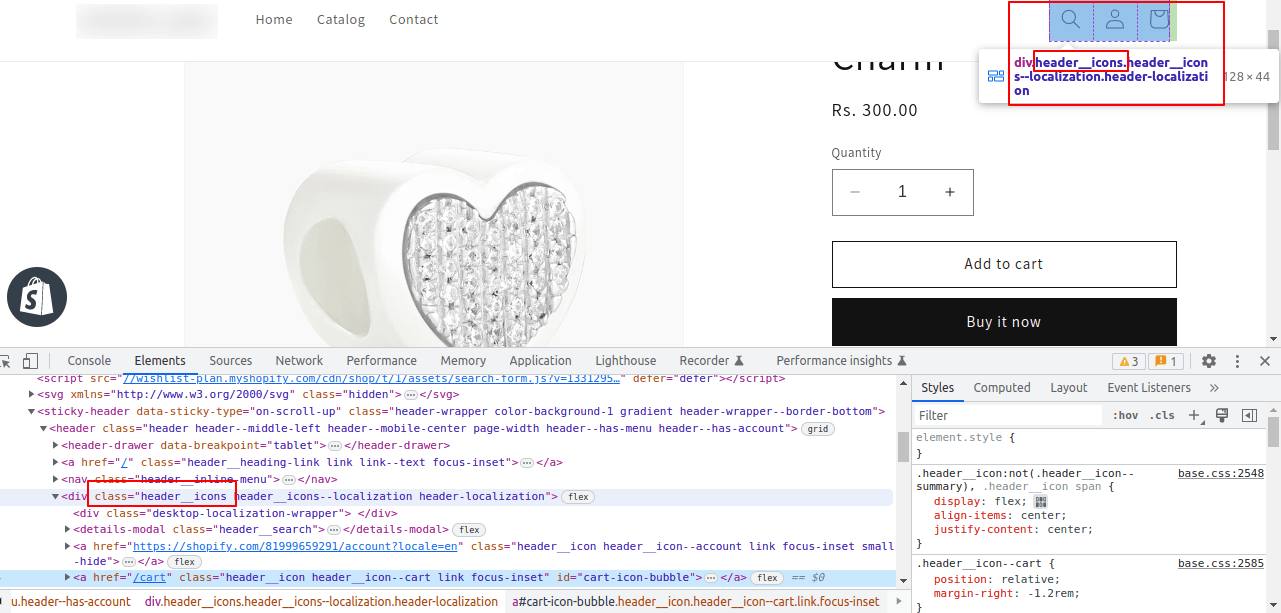
c.Inspect the Header Elements:
Now, you’ll need to inspect the header elements to find the class you’re looking for. Right-click on the header area within the live preview (usually at the top of the page), and select “Inspect” or “Inspect Element” from the context menu. This will open your browser’s developer tools.
d.Locate the Header Class:
In the developer tools, your header elements should be highlighted in the HTML/CSS code. Look for the specific header element you want to modify, such as the logo, navigation menu, or any other part of the header. You can usually find the class names associated with these elements by hovering over the HTML code or clicking on the relevant elements in the preview.
e.Note the Class Name:
Once you’ve located the header element you want to target, note down the class name. It will typically be listed in the “class” attribute of the HTML element. For example, it might look like class=”header-icon” or something similar.
It’s been highlighted in the screenshot below.
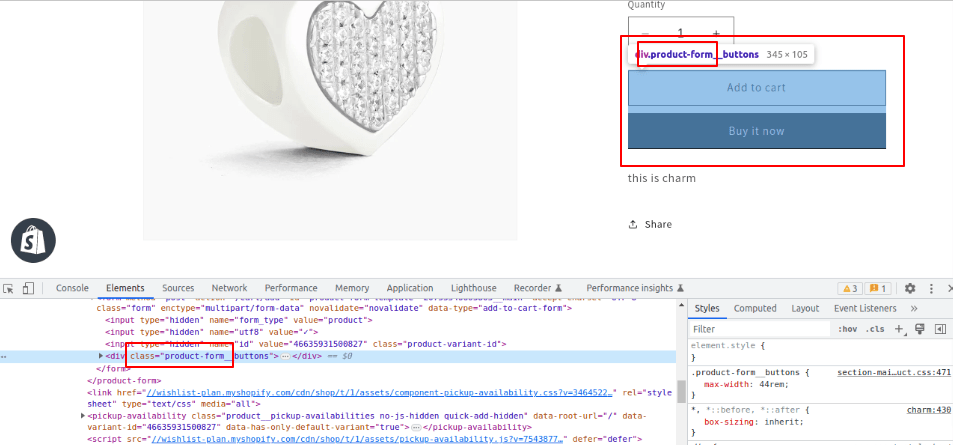
2.2 Product page button class for adding to wishlist: “Please indicate the class name pertaining to the ‘Add to Wishlist’ button on the product page.”
- Steps to find Product page button class Class Name –
a.
Log into your Shopify Admin:
Open your web browser, go to your Shopify store’s URL (e.g., yourstorename.myshopify.com/admin), and log in to your Shopify admin panel.
b. Open a Product Page:
To inspect the product class, you’ll need to navigate to a product page. You can do this by going to your online store and clicking on a product. This will open a product page in the preview window of the Theme Editor.
c.Inspect the Product Elements:
Right-click on any element within the product page (e.g., the product title, image, price, or description), and select “Inspect” or “Inspect Element” from the context menu. This will open your browser’s developer tools.
d.Locate the Product Class:
In the developer tools, the product elements should be highlighted in the HTML/CSS code. Look for the specific product element you want to target, such as the product title or image. You can usually find the class names associated with these elements by hovering over the HTML code or clicking on the relevant elements in the preview.
e.Note the Class Name:
Once you’ve located the product element you want to target, note down the class name. It will typically be listed in the “class” attribute of the HTML element. For example, it might look like class=”product-title” or something similar.
It’s been highlighted in the screenshot below.
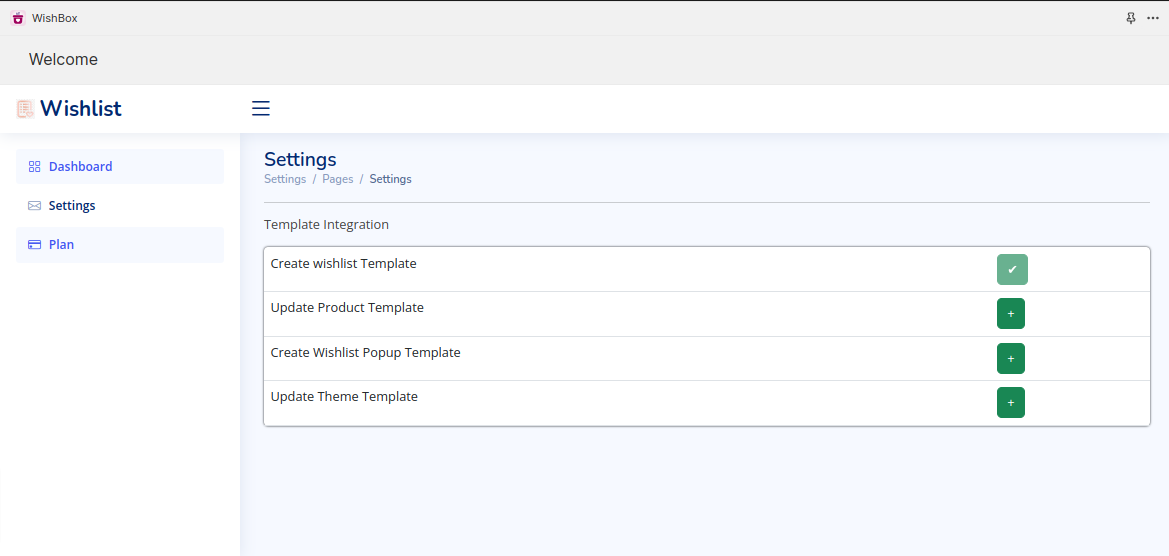
3. Template Integration – To activate the wishlist popup and its functionality within your store, please follow these instructions:
- Access your store’s admin dashboard.
- Navigate to the settings or preferences section.
- Locate the Template Integration option.
- Enable the wishlist popup and functionality from the available choices.Note: Ensure that you enable all of these templates.