Once the BookUpp – WordPress Booking System plugin has been successfully installed and activated. As seen in the following image, it will appear on the left pane of the WordPress backend.
Go to Booking Management > Click on “Add New” > You can create here a Bookable product /service.
Just give the Title to your Booking service as per need and scroll down you can see the “General” and “Configure” tab
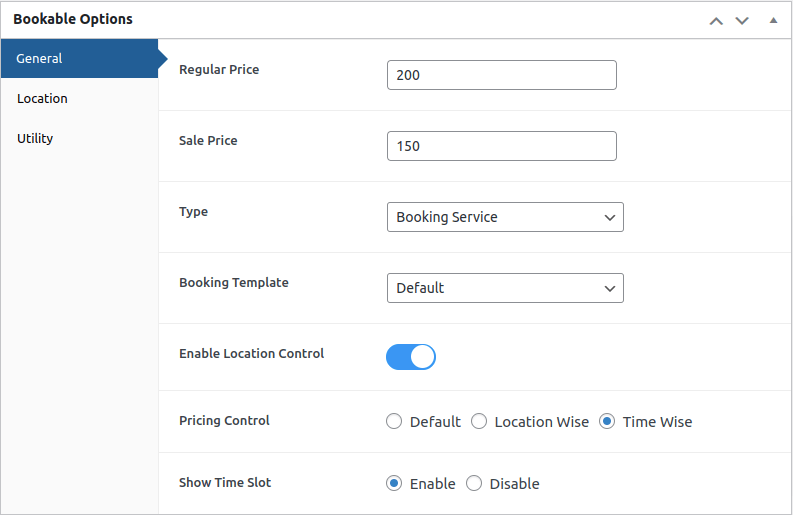
In General Tab, You have to fill up the basic details like Regular price and Sale price
Type: you can choose the booking type from the dropdown like Booking service and Rental service. Currently, it set up a booking service. When the booking service is selected your booking goes to Appointment and if the rental service is selected then your booking goes to Rental.
Booking template – You can choose the booking template from the dropdown. Currently, it is set to the default template.
Enable Location control – You can manage the booking service by Location /Store wise if you enable the setting. Following its activation, the “Location” section appears just below the general tab, as illustrated in the figure below. It will display every location you’ve created using the Manage location option.
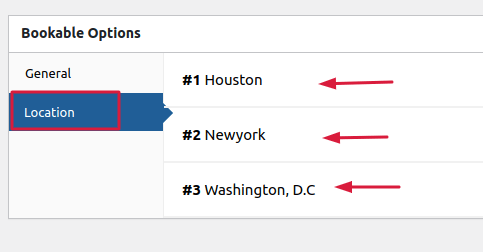
To fill out further booking information like time, date, and more, click on the name of your preferred location or shop.
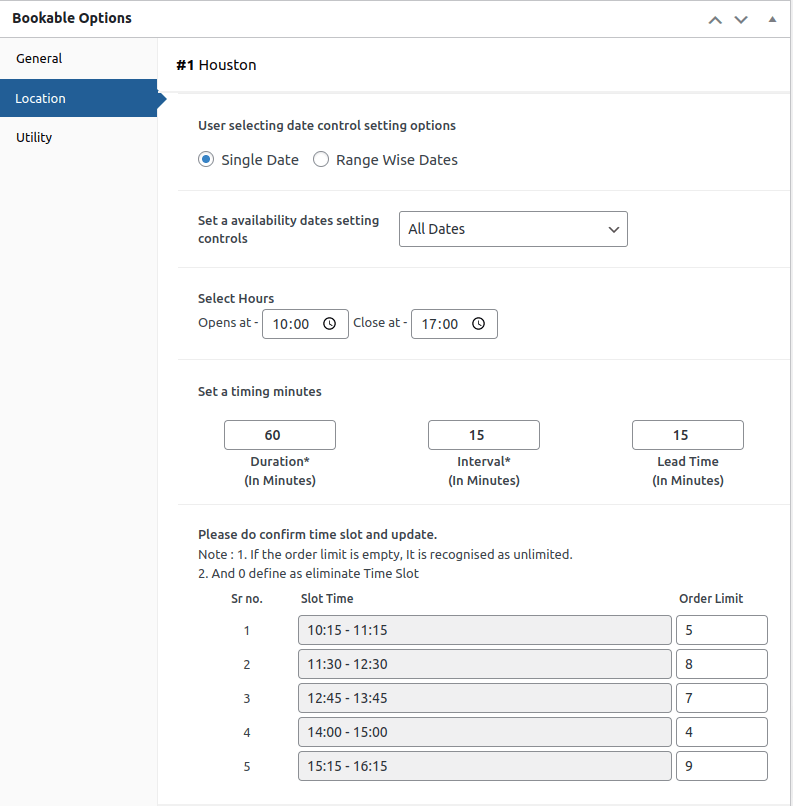
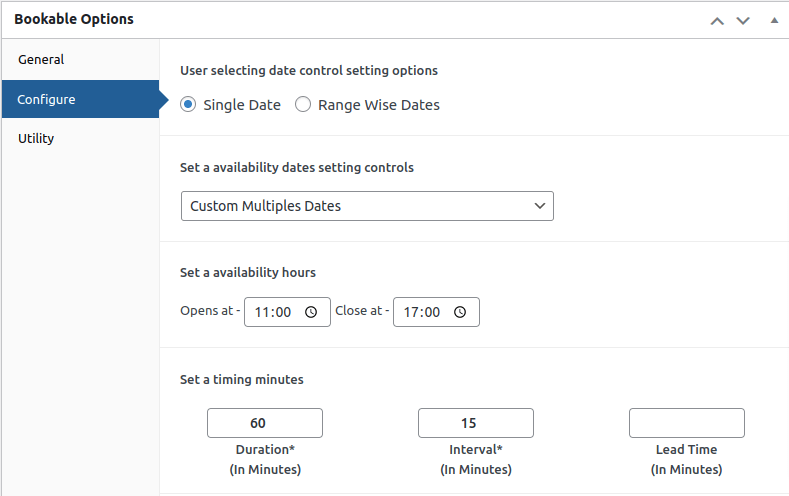
User selecting date control setting options: For an appointment. you can select a Single date or Range wise dates format.
In single date format, you can choose All Dates, Single date, Custome Range date, and Custom Multiple dates.
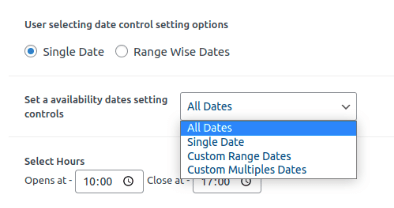
Set availability dates setting controls: For an appointment, you can choose from a variety of date formats here. comparable to All dates, single dates, custom range dates, and multiple dates,
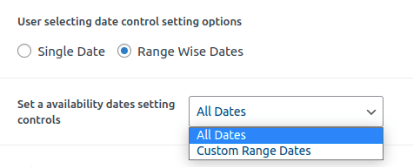
In Range Wise Dates Format, you can choose All Dates, or Custom Range Dates.
Select Hours: Mention the opening and closing time of your shop here
Duration: Fixed duration for the appointment. Admin has to enter time in minutes. For example, for a one-hour appointment, the admin should enter 60 minutes.
Interval: Interval time is a time between two slots.
Lead time: Enter the lead time in minutes here. The amount of time required to get ready for your booking service is referred to as the lead time.
For eg If the lead time is 30 minutes, then 30 minutes will elapse after each fixed duration of the appointment time.
Select Appointment Date: Choose the appointment date based on the date format you’ve chosen. This will be shown on the frontend
Slot Time /Order limit: Add a time slot for your Bookable product. These time slots will be displayed on the front end, and users can choose any of them based on their needs. You can set the order limit for the specific time slot as well.
Pricing Control: For pricing, you can choose Default, Location Wise, and Time Wise. If you select the default then on the front end you will see the default price in general.
If you choose Location Wise pricing then you can give the price for each location.
If choose Time Wise then you can give the price for each time slot.
Configure: If you don’t want to add the booking details location /store name wise then that’s perfectly fine. In such case, you just have to fill up the same information as above in Configure section. When “Enable Location control” is disabled, the Configure section appears.