Step 1. Enable “Set Users as Location Shop Manager” settings
- Go to the Multilocation inventory plugin →Settings → General setting →
- Enable “Set Users as Location Shop Manager” settings and click on “Save Changes”.
Step 2. : –
- Go to User > CLick on Add user > Fill out all the details > Assign User Role as > Location Shop Manager or Location Regional Manager as per your requirement.
- You will get a username and password here that will be used to log in as a User manager.
Step 3:-
- Go to Manage location where you have created locations.
- Then select one of the locations where you want to set shop manager. Edit the location in that you will get an option as ” Location shop manager” .
- Select the desired location shop manager name from the dropdown and click on “Save Changes”.
Login to the Location Shop manager or Location Regional Manager.
Once you logged in you can see the user manager’s name in the upper left corner.
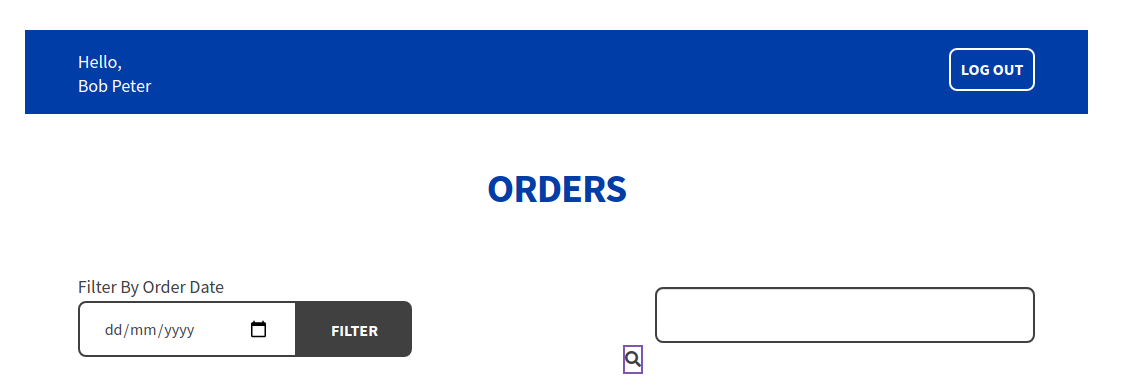
- Filter By Order Date: You can filter orders by date and the result will be displayed on the below screen. It filters out as per order status.
- Search: Through the search box you can search the specific order by Order Id .
- Users can able to see the order counts as shown in the below image. It displays ALL order counts.
It displays the following values: all order values, processing order values, and completed order values.
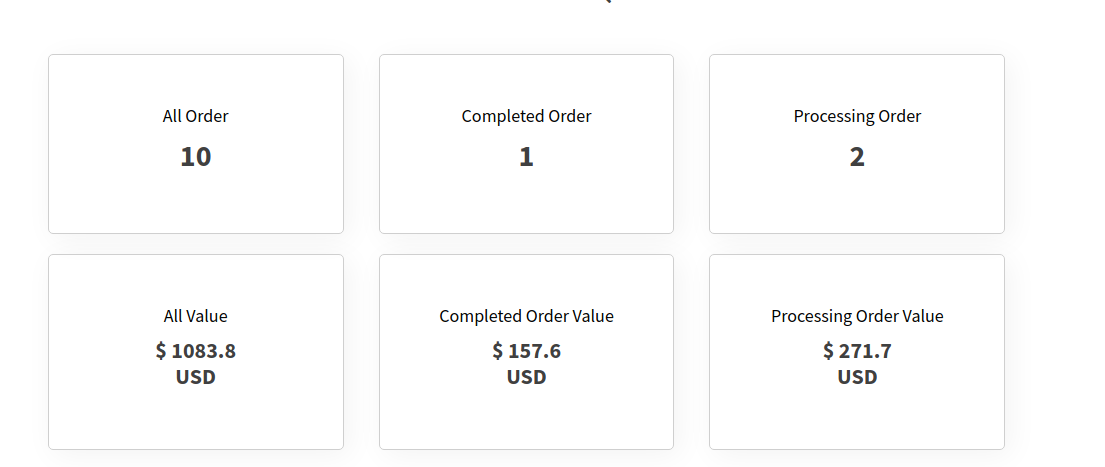
- All the Woocommerce order statuses are displayed here with respective counts.
You can see all the orders by clicking on the “View Orders” button.
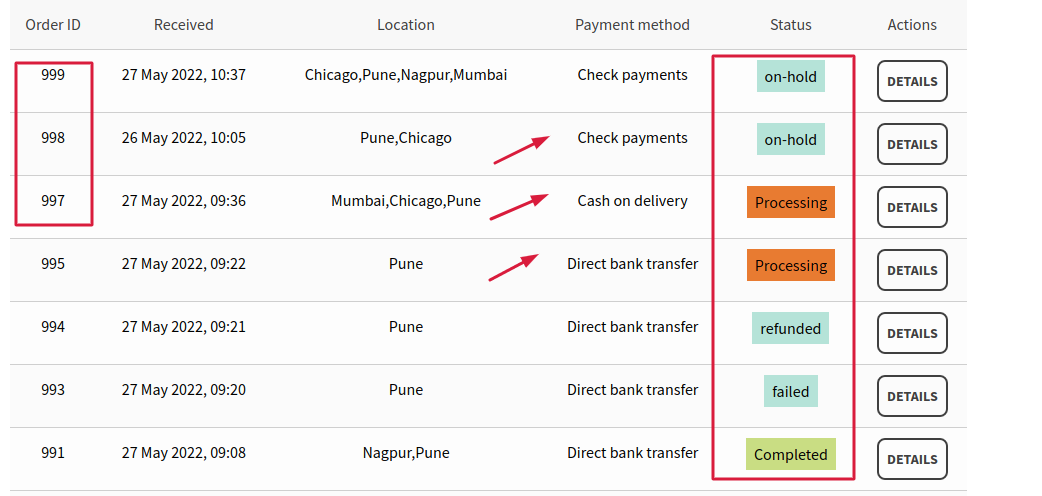
- All orders are listed here in table format having, Received date, Location,
Order Id: Uniques order id for each order.
Received date: Received date for that order
Payment status -Display the payment method of the particular order
Location: Locations of products in that order.
Staus: Wc order status is displayed here.
Actions: By clicking on “Details” you can see the more information about that order
- Detail button: After clicking on the “Details” button.
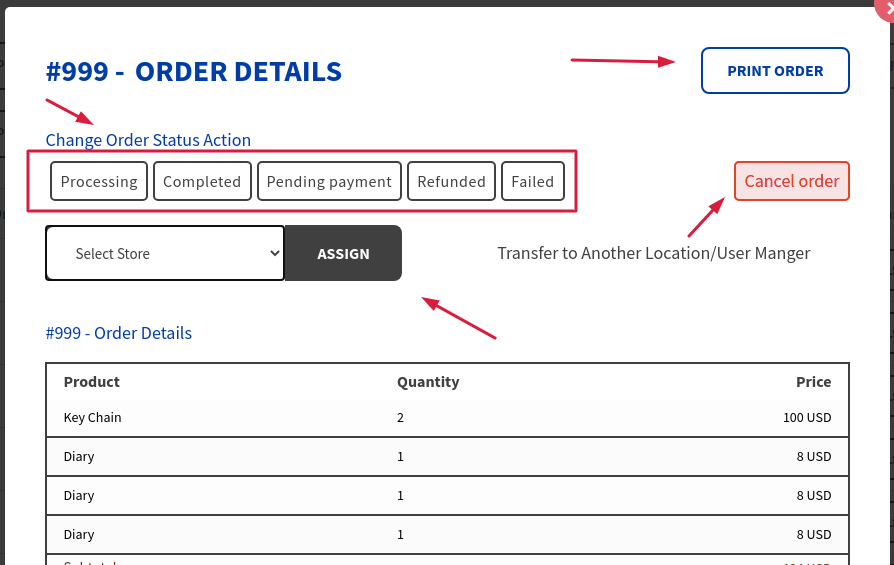
Change the order status with one click. Just click on the WC order status and it changes the status instantly.
- Assing: You can assign specific order to Another location. Just select the desired location through the dropdown and click on “Assign”. The order will be transferred to that location shop manager and the order is removed from the current location shop manager.
- Cancel Order: – By clicking on the cancel button simple user can cancel a specific order.
- Print Order button: Click on the “Print Order” button in order the print the order directly.